
>>

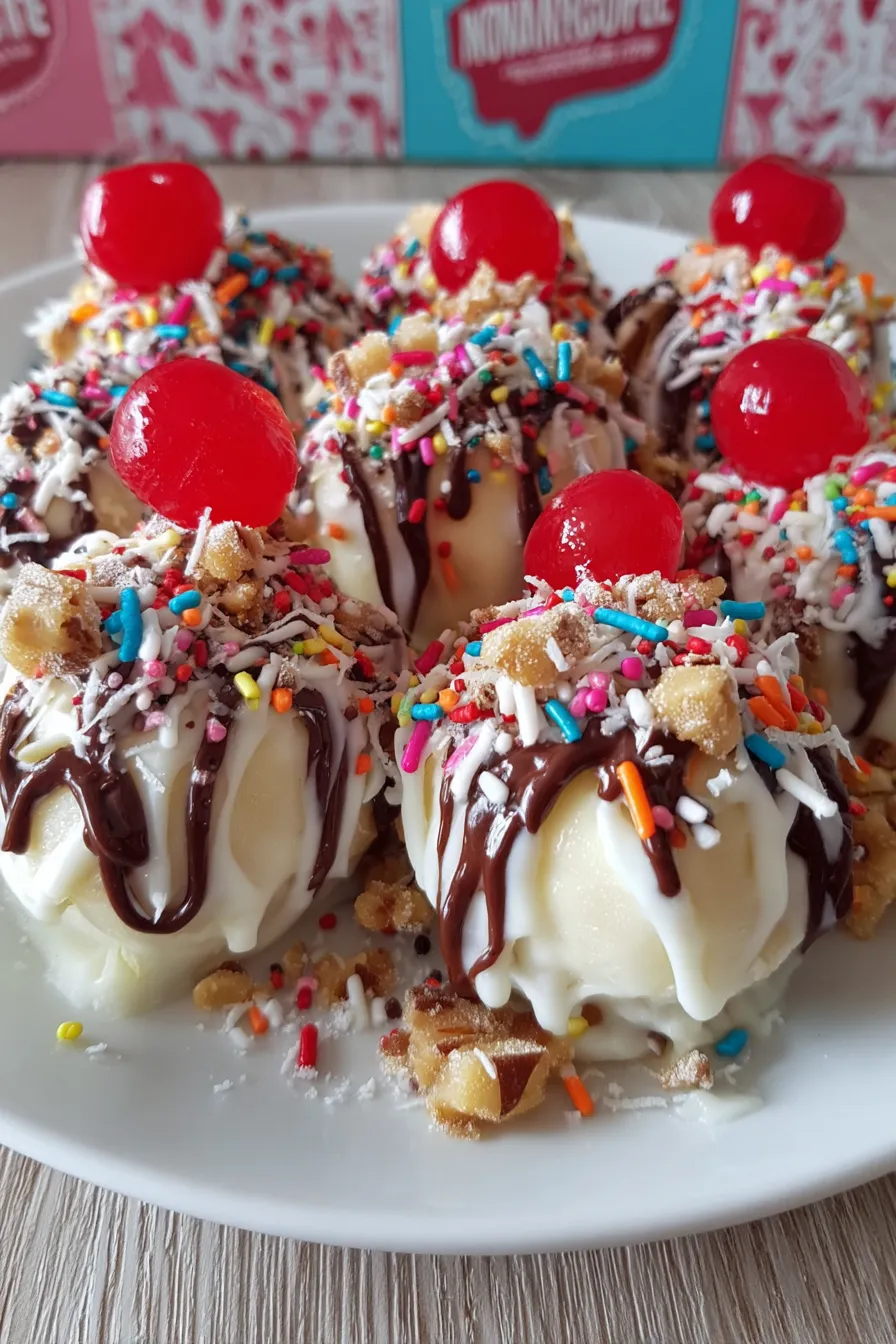
Creamy, fruity truffles made with white cake mix, cream cheese, crushed pineapple, banana and coated in white candy with a chocolate drizzle and cherry on top.

This Banana Truffles recipe is one of those little kitchen miracles that began as a curious attempt to use pantry staples and turned into a party favorite. I first made these on a humid summer afternoon when ripe bananas on the counter and a forgotten box of white cake mix met an open block of cream cheese. The first bite combined bright banana and pineapple notes with the rich creaminess of the filling and the crisp snap of white candy coating. It was an instant hit — nostalgic, like a bite of banana cream pie turned into a perfectly sized candy.
What I love most about these truffles is how approachable they are. They require no oven, only a few tools, and most of the components are shelf-stable. The texture is what makes them special: a soft, almost cheesecake-like center flecked with crunchy walnuts, a subtle fruitiness from very well-drained crushed pineapple, and the banana that ties it all together. The white candy coating gives a festive look while the chocolate drizzle and stemmed cherry add a classic bakery finish. Over the years I have served these at summer potlucks, holiday cookie exchanges, and quiet Sunday afternoon tea — they always disappear quickly.
I still remember the first time I brought a batch to a family reunion; my aunt called them tiny banana pies and asked for the recipe twice. They’re forgiving, forgiving to substitute, and always feel a little festive when you add the cherry on top.
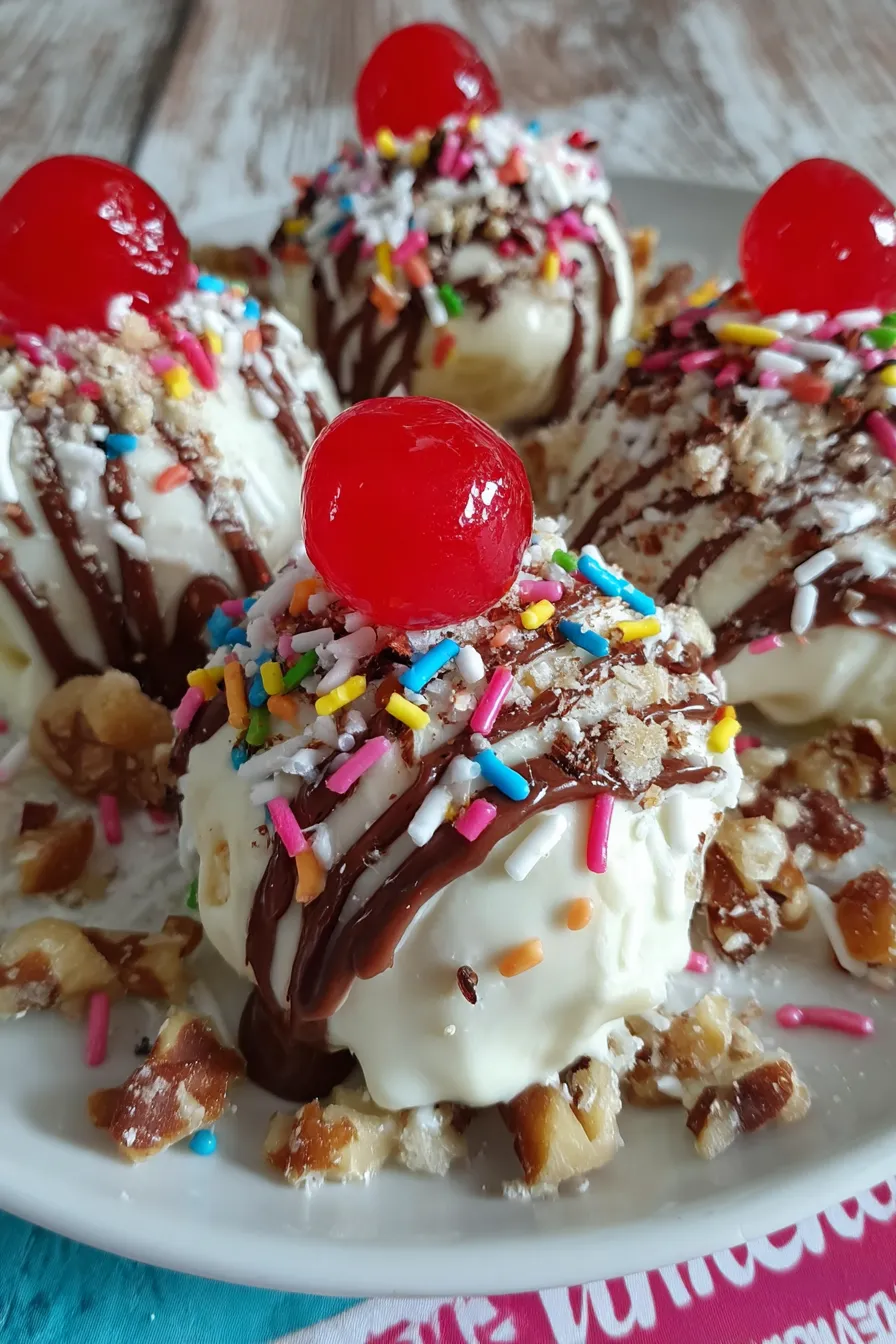
My favorite part is the little surprise of pineapple in the center; it brightens each bite and stops the treat from feeling too cloying. At a church bake sale these were the first to go — one neighbor asked if I had used fresh pineapple because the flavor was so vibrant. The chilling and coating steps are where the magic happens: take your time and the finish will be glossy and professional.
Store the truffles in an airtight container in the refrigerator for up to 5 days. Layer parchment between rows to prevent sticking; keep the container in the coolest part of the fridge, not the door. For longer storage, freeze the coated truffles in a single layer on a tray until solid, then transfer to a freezer-safe container for up to 3 months. Thaw in the refrigerator for several hours before serving to avoid condensation blurring the coating. If sprinkles absorb moisture, add fresh sprinkles right before serving.
If you have allergies or preferences, you can swap the walnuts for chopped pecans or sunflower seeds for a nut-free option. Use dairy-free cream cheese and dairy-free white coating to make them lactose-free, but expect a slightly different mouthfeel. Replace white candy coating with melted milk or dark chocolate for a richer shell; if you choose darker chocolate, balance the sweetness by reducing any additional sweet garnish. Canned crushed pineapple can be low-sugar or in natural juice — always drain thoroughly to maintain proper texture.
Serve these as part of a dessert platter with coffee, tea, or a bright citrus punch. For a retro-themed party present them on doilies with a bowl of extra cherries. They pair exceptionally well with fresh berries or a light whipped cream on the side. For holiday presentations, use red and green sprinkles and replace cherries with candied cranberries for a seasonal touch. Small paper baking cups make them easy to pick up and look polished.
These truffles are a modern American creation that borrows from vintage no-bake dessert traditions where boxed cake mix and cream cheese are combined to create easy confections. The practice of using boxed mixes as base ingredients became popular in mid-20th century baking, prized for convenience. Adding tropical elements like banana and pineapple nods to classic banana cream and pineapple desserts that have long been staples in American home baking, especially in regions where canned fruit became common during the post-war era.
In summer, use very ripe bananas and fresh cherries for a bright, seasonal version. For winter holidays, stir in a pinch of ground cinnamon or nutmeg and swap rainbow sprinkles for festive colors. In spring, substitute chopped macadamia nuts and add a splash of coconut extract for a tropical twist. You can also fold in freeze-dried banana powder for more concentrated banana flavor without extra moisture.
Make the centers a day ahead and keep them chilled on a tray so they are easy to dip the next day — this reduces active time the day of serving. If planning for an event, dip truffles and store in layers with parchment; finish with sprinkles and cherries just before serving to maintain a fresh appearance. Use a cookie scoop to keep sizing consistent, which helps with chilling time and presentation.
These little confections are joyful to make and even more joyful to share — they carry a comforting, familiar sweetness with a playful finish. Make them your own, and don't forget to save one for a late-night refrigerator raid.
Very well drain the crushed pineapple to prevent soggy centers; use a fine mesh strainer and press gently.
Soften cream cheese to room temperature for smooth mixing; avoid overheating coatings when melting to prevent graininess.
Use a 1 to 2 inch cookie scoop for consistent sizing and even chilling before dipping.
Chill the centers fully to ensure the coating sets smoothly and does not crack.
This nourishing banana truffles recipe is sure to be a staple in your kitchen. Enjoy every moist, high protein slice — it is perfect for breakfast or as a wholesome snack any time.
Yes. After coating and chilling, freeze in a single layer until solid then transfer to an airtight container. Thaw in the refrigerator before serving.
Drain the crushed pineapple thoroughly and make sure the cream cheese is at room temperature for smooth mixing. Chill fully before dipping.
This Banana Truffles recipe makes perfectly juicy, tender, and flavorful steak every time! Serve with potatoes and a side salad for an unforgettable dinner in under 30 minutes.
Line a large cookie sheet with parchment paper and gather your scoop, bowls, and melting equipment. Ensure the tray fits in your refrigerator for chilling.
In a medium bowl, beat the white cake mix, softened cream cheese, and vanilla until combined and dough-like, scraping the bowl to incorporate all dry mix.
Drain crushed pineapple thoroughly, then fold it into the base along with chopped walnuts and banana. Mix gently to distribute evenly without overworking.
Scoop the mixture with a 1 to 2 inch cookie scoop and roll into smooth balls about 1 to 1.5 inches across. Place on parchment and refrigerate 1 hour.
Melt the white candy coating in a microwave-safe bowl at 50 percent power in 1 minute, then 30 second bursts until smooth. Melt chocolate wafers similarly when ready.
Dip each chilled truffle into the white coating, place back on parchment, and chill 30 minutes. Drizzle with melted chocolate, top with a cherry and sprinkles, then chill another 30 minutes.
Last Step: Please leave a rating and comment letting us know how you liked this recipe! This helps our business to thrive and continue providing free, high-quality recipes for you.
Leave a comment & rating below or tag
@culinya on social media!

Ultra-fudgy brownies crowned with gooey mini marshmallows and a quick-set chocolate icing. Crowd-pleasing, nostalgic, and irresistibly rich in every bite.

Buttery shortbread crust meets a silky brown sugar pecan topping in these easy pecan pie bars. Just 10 minutes of prep for bakery-level bliss.

A flawlessly smooth pumpkin cheesecake with warm spice, buttery graham crust, and no cracks. Finish with caramel and rum-kissed whipped cream.
Leave a comment & rating below or tag @culinya on social media!
Enjoyed this recipe? Share it with friends and family, and don't forget to leave a review!
This recipe looks amazing! Can't wait to try it.
Comments are stored locally in your browser. Server comments are displayed alongside your local comments.

Join to receive our email series which contains a round-up of some of our quick and easy family favorite recipes.
