
>>

Buttery oat bars layered with milk chocolate and soft caramel—an irresistibly chewy-sweet treat perfect for holidays and everyday indulgence.
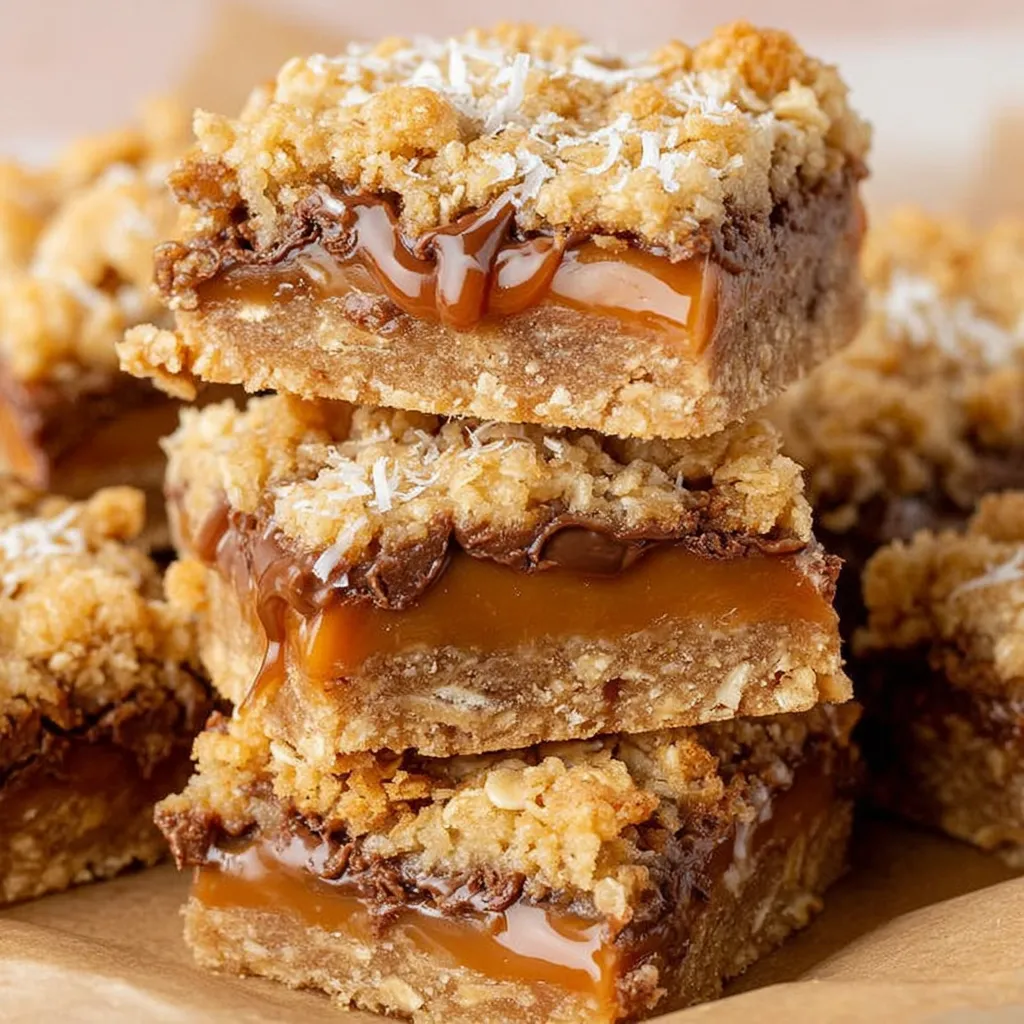
This Carmelitas recipe has been a kitchen staple since I first made it for a holiday cookie swap and discovered how quickly a tray disappears at family gatherings. I stumbled on this combination when I wanted something simpler than candy but richer than a cookie: a crisp oat base, a melty chocolate middle, and a creamy caramel ribbon on top. The result is a bar that balances textures—crunch from the oats, tender chewiness from the caramel, and a soft chocolate buffer in between—so every bite feels like a little celebration.
I remember unwrapping the individually wrapped caramels at midnight while the first half of the base baked, the house filled with a buttery, toasty aroma. My partner declared them addictive, and my neighbor asked for the recipe on the spot. What makes these bars special is that they borrow pantry staples—old fashioned oats and brown sugar—but present them in layers that look and taste luxurious. They’re forgiving, travel well, and make an excellent gift when cut into neat squares and tied with twine.
Every time I bring these to potlucks, people ask if I made them from scratch, and when I say yes they’re always surprised at how simple the ingredients are. They’re consistently the first thing to be finished on any dessert tray, and they travel well, which makes them my go-to when I volunteer to bring treats for school events.
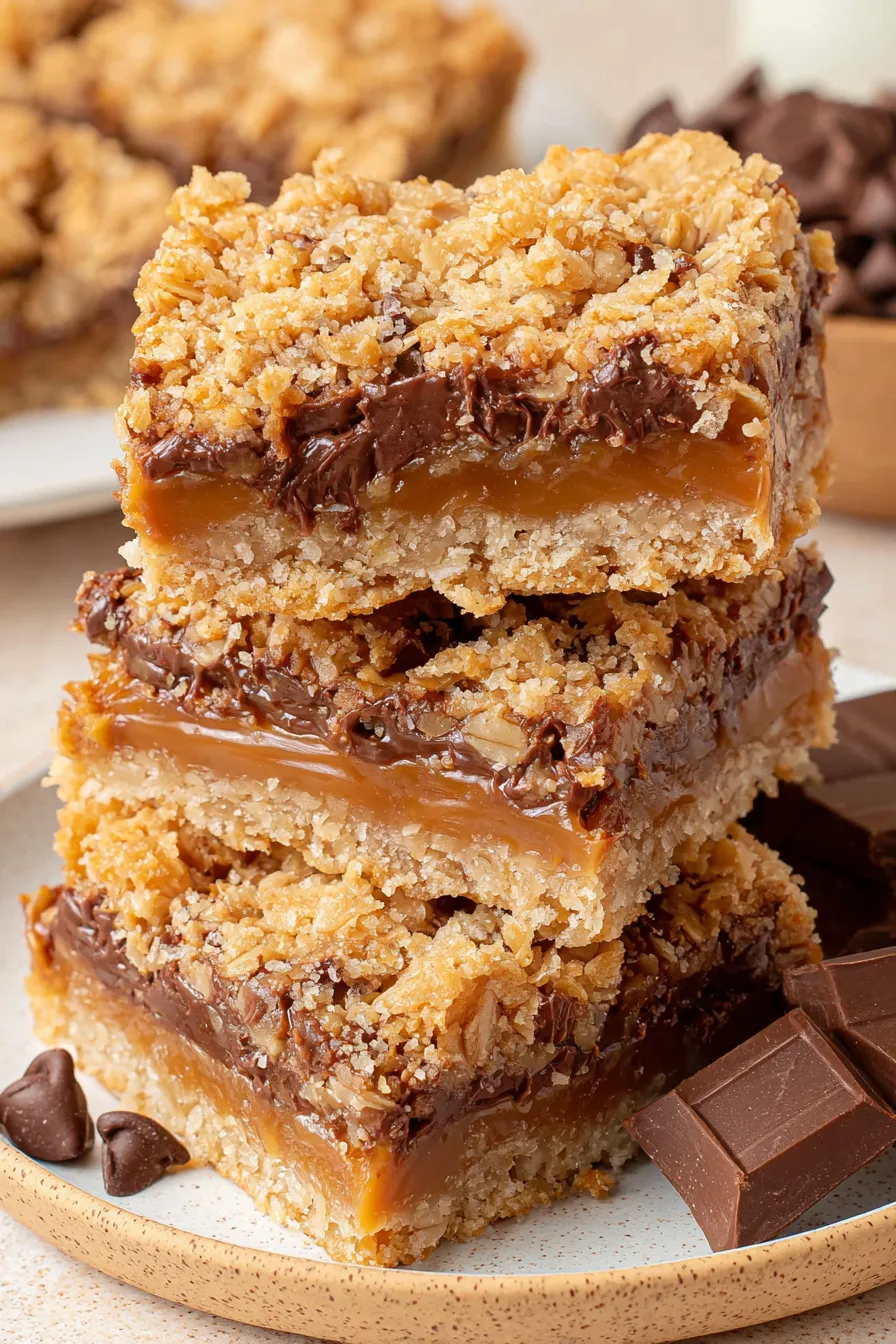
My favorite part is watching the caramel drizzle meld with chocolate—there’s a satisfying moment when the layers settle and the slab feels just firm enough to cut. At family picnics, people often grab one while still warm; they’re delicious both chilled and a little warmed for 10 seconds in the microwave.
To keep the bars at peak quality, cool them completely before covering. For short term, place in a single layer in an airtight container lined with parchment and store in the refrigerator for up to seven days. For longer storage, flash freeze on a tray for an hour, then wrap tightly in plastic wrap and store in a freezer-safe bag for up to three months. When reheating, microwave a single bar for 8 to 12 seconds to soften the caramel, or place frozen bars in the refrigerator overnight to thaw slowly and preserve texture.
If you need gluten-free options, swap the all-purpose flour for a 1-to-1 gluten-free flour blend and use certified gluten-free oats; results are slightly crumblier but still delicious. For a dairy-free version, use dairy-free butter and coconut cream in place of heavy cream, and choose dairy-free chocolate chips—note the flavor shifts with coconut notes. To intensify flavor, replace half the milk chocolate chips with dark 60 percent chocolate or add 1/2 cup toasted chopped pecans into the oat mixture for crunch.

Serve the squares slightly chilled for neat bites or warm for melty caramel appeal. Pair with a robust coffee or a glass of cold milk. For a festive presentation, dust with a light sprinkle of flaky sea salt or drizzle with melted dark chocolate. These also make a lovely addition to dessert boards alongside shortbread and fruit, and are easy to portion for party guests—stack them in a festive box with parchment for homemade gifts.
The layered oat bar family traces back to simple European and American baking traditions where oats and butter form the basis for hearty biscuits and bars. Carmelitas are an American adaptation that highlights the mid-20th century popularity of individually wrapped caramels and convenience ingredients. They combine the rustic textures of oat cookies with confection-style caramel and chocolate layers to create a hybrid that’s both nostalgic and contemporary.
Adapt these bars to the season by swapping the chocolate: use white chocolate and crushed peppermint in winter, or add dried cherries and orange zest in winter for brightness. In autumn, stir in 1 teaspoon ground cinnamon and 1/4 teaspoon nutmeg to the oat base and top with toasted walnuts. For summer gatherings, serve chilled with a scoop of vanilla ice cream so each bar becomes a mini sundae.
For efficient meal prep, double the recipe and bake in a quarter sheet pan, extending bake time by a few minutes and checking for firm edges. Cut into portions and freeze individually wrapped for grab-and-go treats. Label containers with date and flavor variations. Keep a small jar of caramel sauce in the fridge for up to two weeks to refresh slightly dried bars by brushing a thin layer over the surface and chilling briefly before serving.
These Carmelitas are proof that simple pantry staples can produce something decadent and memorable. Whether you’re packing them for a picnic, gifting them during the holidays, or keeping a tin in the fridge for yourself, they hold a special place on my baking list for reliably impressive results.
Par-bake the base for 10 minutes to prevent a soggy crust under the caramel layer.
Warm your knife under hot water and dry it between cuts for clean edges.
If caramel thickens too much, stir in a tablespoon of warm cream to loosen it.
Press the base firmly with the bottom of a measuring cup to create an even crust.
Chill thoroughly before slicing to keep the layers distinct.
This nourishing carmelitas recipe is sure to be a staple in your kitchen. Enjoy every moist, high protein slice — it is perfect for breakfast or as a wholesome snack any time.
Yes. Store in an airtight container in the refrigerator for up to 7 days, or freeze for up to 3 months.
Use 1-to-1 gluten-free flour and certified gluten-free oats, and swap dairy ingredients for dairy-free alternatives.
This Carmelitas recipe makes perfectly juicy, tender, and flavorful steak every time! Serve with potatoes and a side salad for an unforgettable dinner in under 30 minutes.
Preheat oven to 350 degrees Fahrenheit. Line a 9x9 inch baking dish with parchment paper leaving an overhang and lightly grease with nonstick spray.
Combine flour, oats, melted butter, brown sugar, vanilla, baking soda, and salt until just combined into a crumbly but pressable mixture.
Press half of the oat mixture firmly into the prepared pan and bake for 10 minutes until edges are lightly golden.
Unwrap caramels and melt with heavy cream in a small saucepan over medium-low heat until smooth, or microwave in 30 second bursts until combined.
Sprinkle chocolate chips over the par-baked base, then pour the warm caramel evenly over the chips so they soften and meld together.
Scatter remaining oat mixture over the caramel, bake at 350 degrees Fahrenheit for 18 to 22 minutes until the top is golden and firm.
Cool 10 minutes, then refrigerate for 1 1/2 to 2 hours. Lift from pan using parchment overhang and slice into 16 squares with a warm knife.
Last Step: Please leave a rating and comment letting us know how you liked this recipe! This helps our business to thrive and continue providing free, high-quality recipes for you.
Leave a comment & rating below or tag
@culinya on social media!

Ultra-fudgy brownies crowned with gooey mini marshmallows and a quick-set chocolate icing. Crowd-pleasing, nostalgic, and irresistibly rich in every bite.

Buttery shortbread crust meets a silky brown sugar pecan topping in these easy pecan pie bars. Just 10 minutes of prep for bakery-level bliss.

A flawlessly smooth pumpkin cheesecake with warm spice, buttery graham crust, and no cracks. Finish with caramel and rum-kissed whipped cream.
Leave a comment & rating below or tag @culinya on social media!
Enjoyed this recipe? Share it with friends and family, and don't forget to leave a review!
This recipe looks amazing! Can't wait to try it.
Comments are stored locally in your browser. Server comments are displayed alongside your local comments.

Join to receive our email series which contains a round-up of some of our quick and easy family favorite recipes.
