
>>

A comforting, crowd-pleasing layered bake: creamy salsa-spiked chicken, seasoned beans, crunchy tortilla chips and a gooey cheese blanket—perfect for weeknights or potlucks.

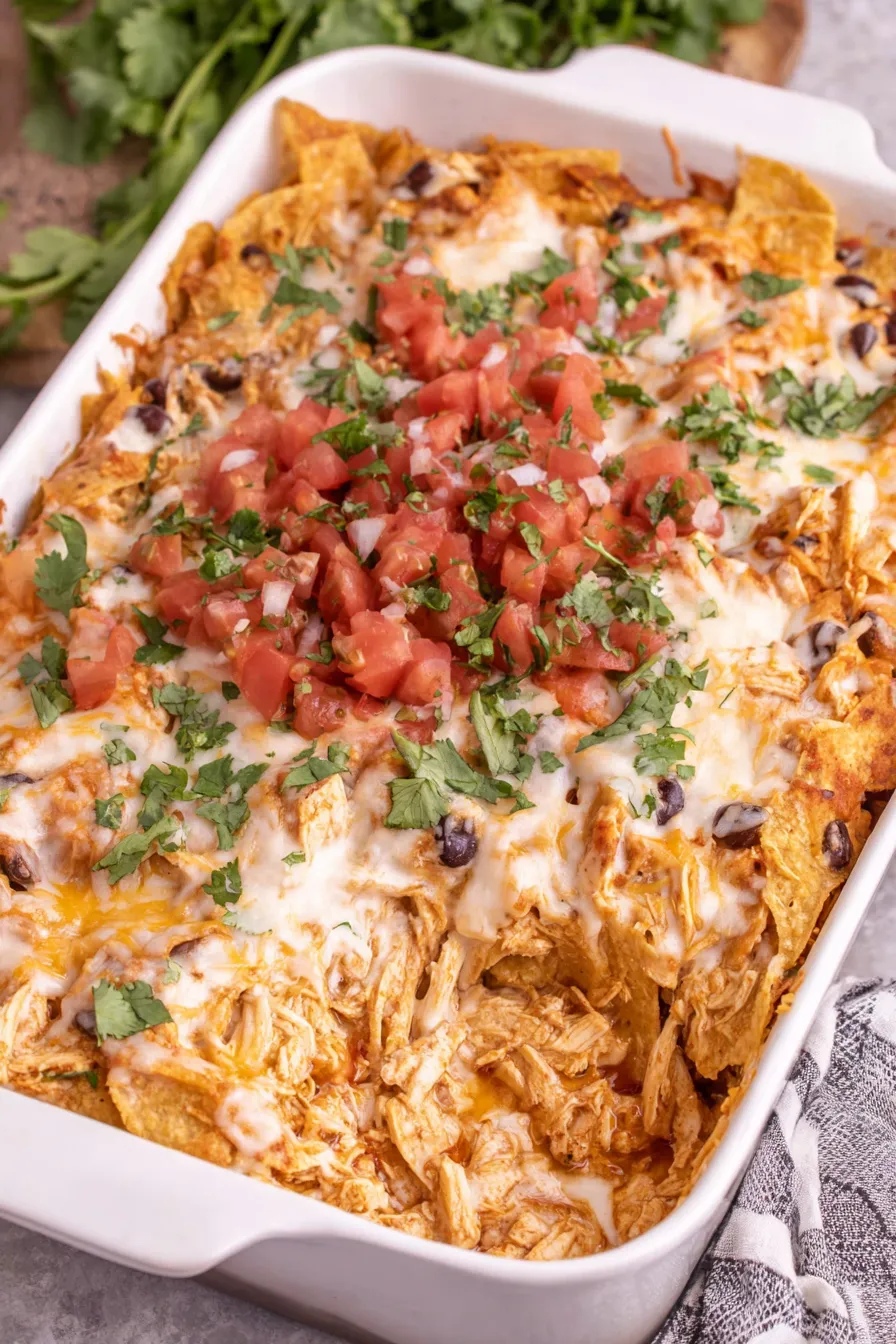
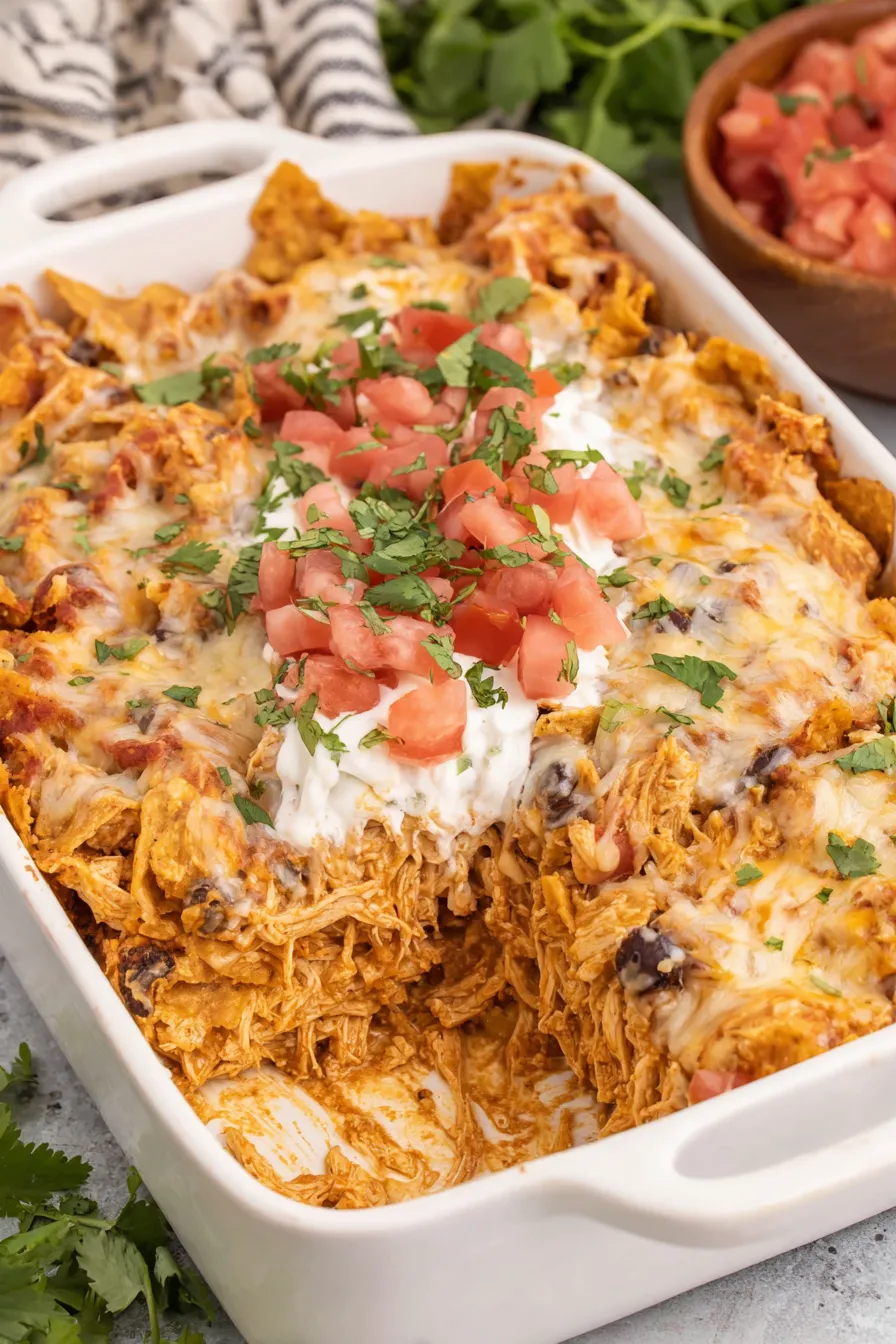
This Chicken Taco Casserole became one of my fastest weeknight go-tos the first time I made it for an impromptu family dinner. I discovered this particular combination on a rainy evening when I only had pantry odds and ends: a couple of cans, a bag of chips, some leftover cooked chicken, and a block of cheese. The simplicity felt like magic. The finished casserole is creamy and tangy from the salsa and cream-of-chicken base, with a pleasant, smoky bite from the green chilies and taco seasoning. Texture is everything here—soft shredded chicken and beans framed by crunchy tortilla chips and finished with a molten, slightly browned cheese crust.
What makes this dish special is how forgiving it is. The flavors are familiar—Tex-Mex comfort without fuss—but the layered format keeps every bite exciting: creamy, crunchy, salty, and fresh when you add cilantro at the end. It’s a dish that travels well to potlucks, feeds a crowd, and warms up beautifully for leftovers. I usually double it when guests are coming because it disappears fast, and I love that you can swap proteins and spice levels depending on who’s eating. This casserole has become a staple at our casual gatherings and late-week dinners alike.
My family’s reactions the first time I made this were priceless—half the table went back for seconds before I even sat down. I discovered small technique tricks along the way, like crushing the chips by hand for a mix of chip sizes so you get pockets of crunch and a nearly crumb-like bed that absorbs the filling perfectly.
My favorite aspect is how adaptable this dish is—I've swapped in shredded pork, used smoked chicken for depth, and turned it into a vegetarian version with extra beans and roasted vegetables. Each variation brings a new character while keeping that comforting, crowd-pleasing core.
Cool the casserole to room temperature for no more than two hours before refrigerating. Store in an airtight container or cover the baking dish tightly with foil or plastic wrap. Refrigerated portions will remain good for 3–4 days. For longer storage, freeze individual slices wrapped tightly in plastic and then foil—freeze up to 3 months. Reheat slices in a 350°F oven for 15–20 minutes from thawed, or microwave single portions for 2–3 minutes, stirring halfway.
Want to change the profile? Use Greek yogurt instead of sour cream for tang and protein (use equal amounts). Swap rotisserie chicken for shredded pork or leftover turkey for a different flavor. Replace the cream of chicken soup with a condensed cream of mushroom or cream of celery if you prefer milder notes. Use gluten-free tortilla chips to make the dish gluten-free and dairy-free cheese alternatives if you need a dairy-free version—expect a slightly different melt and texture.
Serve straight from the dish with bowls of extras: lime wedges, chopped tomatoes, sliced jalapeños, guacamole, and extra salsa. A simple side salad with crunchy greens balances the richness. For a party, pair with Spanish rice or a corn and black bean salad. Garnish with cilantro, thinly sliced green onions, and a drizzle of crema or sour cream for a bright finish.
This layered bake sits comfortably in Tex-Mex tradition: familiar taco flavors adapted into an American-style casserole. The combination of canned soups and chip-topped bakes became popular in mid-20th-century home cooking for convenience. Today it’s cherished for bringing those nostalgic flavors into a modern, shareable format that nods to Mexican spices while embracing pantry simplicity.
Summer: add fresh grilled corn and swap canned salsa for fresh pico de gallo. Fall/Winter: use smoked chicken and add a spoonful of chipotle in adobo for smoky warmth. For Cinco de Mayo or large gatherings, double the recipe and offer a toppings bar so guests can customize each portion.
Assemble up to 24 hours ahead and refrigerate; bake when ready. For make-ahead freezing, assemble in a foil tray, freeze solid, then cover and bake from frozen—add an extra 15–20 minutes to baking time and tent with foil halfway through to avoid over-browning. Portion into shallow containers for grab-and-go lunches; include a small container of fresh cilantro to add after reheating.
There’s something deeply satisfying about pulling this bubbly, fragrant bake from the oven and seeing people dig in. It’s reliable, adaptable, and always a comfort—try making it your own with one of the variations below and let it become a new favorite at your table.
Crumble tortilla chips by hand to get a mix of fine crumbs and larger pieces for varied texture.
Let the casserole rest 5–10 minutes after baking so the filling sets and slices hold together cleanly.
Use rotisserie chicken to save time and add flavor; if starting from raw, poach breasts in seasoned water until 165°F then shred.
If the top browns too quickly, loosely tent with foil for the remaining bake time.
This nourishing chicken taco casserole recipe is sure to be a staple in your kitchen. Enjoy every moist, high protein slice — it is perfect for breakfast or as a wholesome snack any time.
Yes—assemble and cover the dish, then refrigerate for up to 24 hours before baking. Add 5–10 minutes to baking time if chilled.
Use gluten-free tortilla chips and verify canned goods are gluten-free. Also substitute dairy-free cheese and sour cream to make it dairy-free.
This Chicken Taco Casserole recipe makes perfectly juicy, tender, and flavorful steak every time! Serve with potatoes and a side salad for an unforgettable dinner in under 30 minutes.
Preheat oven to 375°F and spray a 9x13-inch baking dish with nonstick spray. Position rack in the center of the oven for even browning.
In a large bowl, combine cream of chicken soup, chunky salsa, diced green chilies, sour cream, and taco seasoning. Whisk until smooth and well combined.
Fold shredded chicken and drained seasoned black beans into the creamy base until everything is evenly coated. Ensure the mixture is homogeneous so the chips will absorb flavors uniformly.
Spread half the mixture into the prepared dish, then sprinkle 2 1/2 cups crushed tortilla chips evenly over the layer and press lightly so they nestle in.
Spread the remaining filling over the chips, top with all shredded cheeses, and scatter the remaining 1/2 cup crushed chips across the top.
Bake at 375°F for 30 minutes, or until cheese is melted and bubbly and the top is lightly golden. Tent with foil if the top browns too quickly.
Let rest for 5–10 minutes after baking to set. Garnish with chopped cilantro and serve with extra salsa or sour cream if desired.
Last Step: Please leave a rating and comment letting us know how you liked this recipe! This helps our business to thrive and continue providing free, high-quality recipes for you.
Leave a comment & rating below or tag
@culinya on social media!

Ultra-fudgy brownies crowned with gooey mini marshmallows and a quick-set chocolate icing. Crowd-pleasing, nostalgic, and irresistibly rich in every bite.

Buttery shortbread crust meets a silky brown sugar pecan topping in these easy pecan pie bars. Just 10 minutes of prep for bakery-level bliss.

A flawlessly smooth pumpkin cheesecake with warm spice, buttery graham crust, and no cracks. Finish with caramel and rum-kissed whipped cream.
Leave a comment & rating below or tag @culinya on social media!
Enjoyed this recipe? Share it with friends and family, and don't forget to leave a review!
This recipe looks amazing! Can't wait to try it.
Comments are stored locally in your browser. Server comments are displayed alongside your local comments.

Join to receive our email series which contains a round-up of some of our quick and easy family favorite recipes.
