
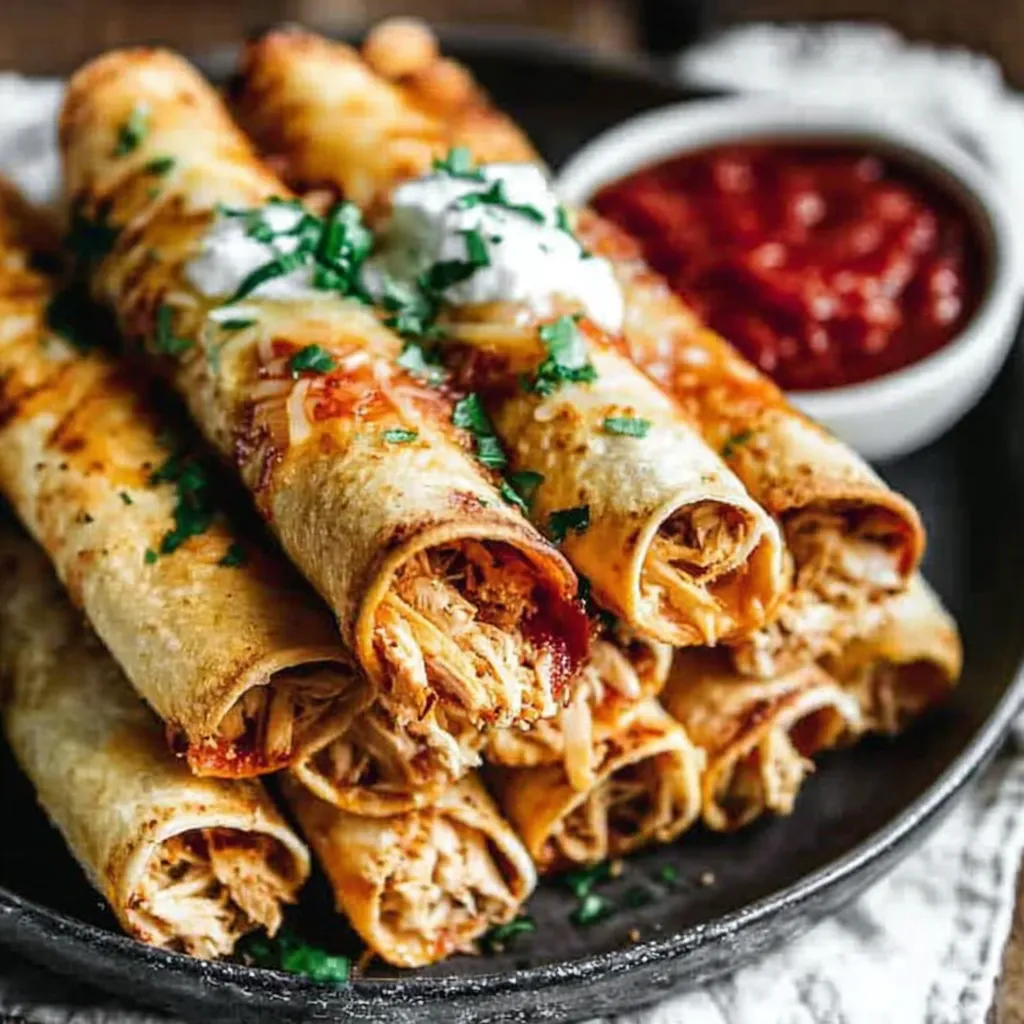
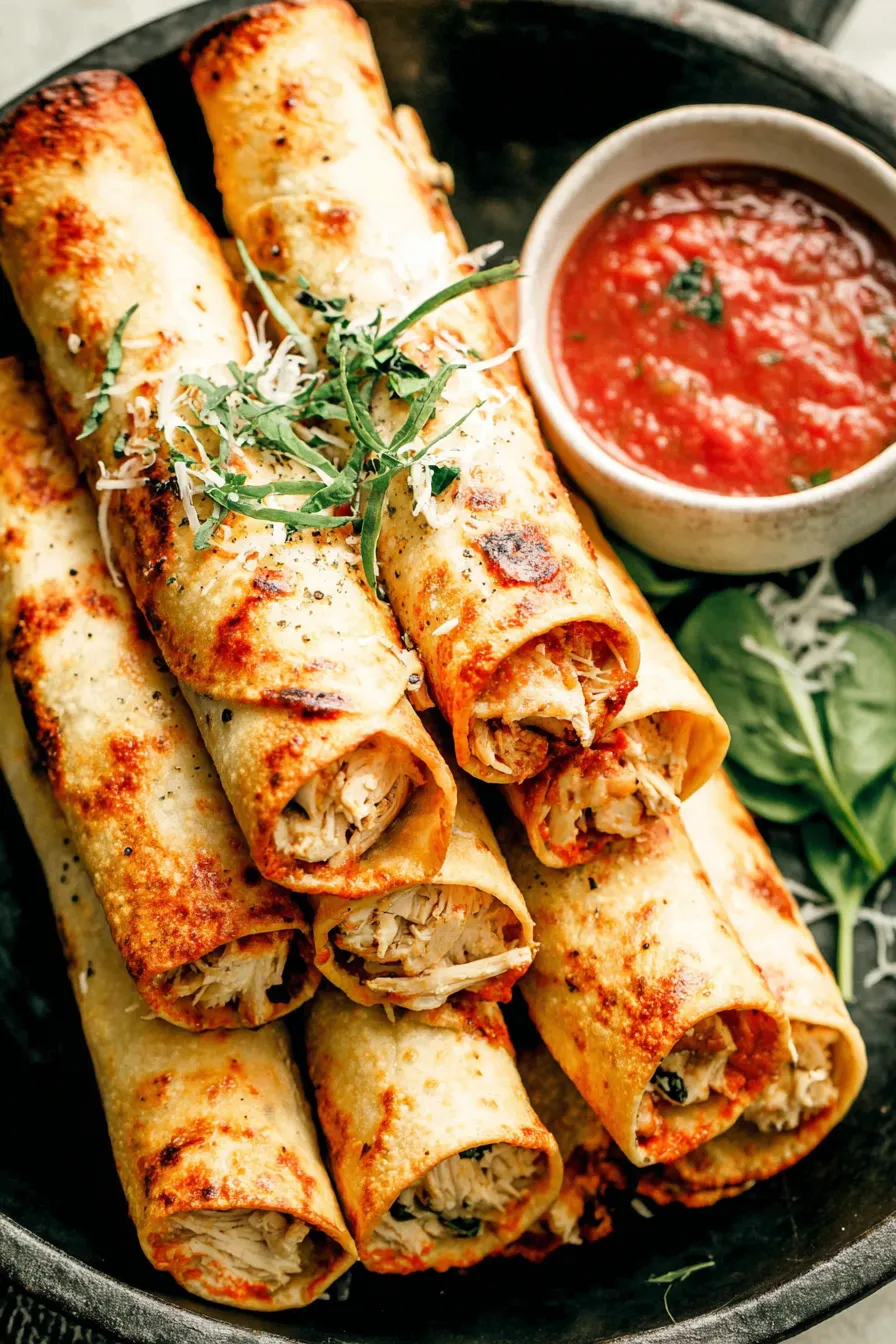
Chicken Taquitos

Crunchy rolled taquitos filled with creamy shredded chicken, spinach and cheddar. Easy to bake or fry and perfect for weeknight dinners, parties, or meal prep.
This recipe for chicken taquitos arrived in my life as a quick solution to a post-game dinner scramble and immediately became a household favorite. I first learned this combination by improvising with a leftover rotisserie bird and pantry staples on a busy weeknight. The creamy filling, bright pop from salsa, and crunchy rolled shell won over everyone at the table. The texture contrast is what keeps me making them again and again. Each bite presents warm, seasoned chicken wrapped in a crisp shell with a soft, cheesy center. It is comfort food that also travels well to potlucks and holiday snack spreads.
I love how forgiving this approach is. Use corn or flour tortillas depending on dietary needs, and choose baking or frying to suit time and comfort level. These taquitos are equally at home as a casual family dinner, a crowd pleasing appetizer, or an easy game day platter. I typically use store bought rotisserie chicken to save time and deliver deep roast flavor without extra work. The spinach is optional but I add it for color, texture and a hit of nutrients. When I make a big batch, they disappear within minutes and become the sort of recipe friends ask me for at every gathering.
Why You'll Love This Recipe
- Ready quickly: assembly takes about 20 minutes and baking is 15 to 20 minutes, so you can have a full tray hot from the oven in under 45 minutes.
- Pantry friendly: the filling uses common ingredients like cream cheese, salsa, and shredded cheddar, so you can usually make these with what you already have.
- Flexible cooking methods: bake for a lighter version or fry for the classic extra crisp exterior; both deliver great flavor and texture.
- Make ahead friendly: you can assemble and freeze before cooking, making them ideal for meal prep and last minute entertaining.
- Crowd pleasing: finger food format makes them perfect for parties and they pair well with guacamole, sour cream, and salsa for dipping.
- Customizable: swap in different cheeses, add roasted corn, or use leftover turkey for a seasonal twist.
I remember serving a platter of these at a summer picnic and watching them vanish while people complimented the balance of creamy filling and crisp shell. My niece insisted on dipping every piece in guacamole and declared them the best taquitos she had ever tasted. That moment sealed this as a repeat recipe in my rotation.
Ingredients
- Chicken: 2 cups cooked shredded chicken. I usually use meat from one 2 pound rotisserie chicken, shredded by hand for varied texture. Leftover roasted or poached chicken works well.
- Cream cheese: 6 ounces softened. Full fat gives the creamiest texture; let it sit at room temperature for 20 minutes to make mixing effortless.
- Salsa: 1/4 cup. Use your favorite jarred or homemade salsa; a medium heat balances the dish well. If using a chunky salsa, drain a touch of excess liquid so the filling is not runny.
- Sour cream: 1/4 cup to add cooling tang and loosen the filling. Greek yogurt is an acceptable swap if you prefer tangier flavor.
- Cheddar: 1 cup shredded. Sharp cheddar melts well and adds depth; you can use Monterey Jack for a milder, creamier profile.
- Spinach: 1 cup baby spinach leaves chopped. Fresh spinach folds into the warm filling without wilting too much, adding color and a light vegetal note.
- Spices: 1/4 teaspoon cumin, 1/4 teaspoon garlic powder, 1/4 teaspoon chili powder, plus salt and freshly ground black pepper to taste.
- Tortillas: 15 to 20 corn or flour tortillas. Use corn for a gluten free option and flour for a softer, more pliable shell that crisps beautifully when baked or fried.
- For serving: guacamole, extra sour cream, salsa, and hot sauce to taste.
Instructions
Mix the filling: In a medium mixing bowl combine the softened 6 ounces cream cheese, 1/4 cup salsa, and 1/4 cup sour cream. Stir until smooth and fully incorporated. Fold in 2 cups shredded cooked chicken, 1 cup shredded cheddar, chopped spinach, 1/4 teaspoon cumin, 1/4 teaspoon garlic powder, 1/4 teaspoon chili powder, and salt and pepper to taste. Taste the mixture and adjust seasoning; adding a touch more salsa or a pinch more salt can elevate the flavors. The filling should be moist but not runny. Soften the tortillas: If using corn tortillas, heat a non stick griddle or skillet over medium high heat. Warm each tortilla for about 15 to 30 seconds per side until soft and pliable. Keep warmed tortillas under a sheet of foil to maintain pliability as you work. If using flour tortillas, briefly warm in the same way for 5 to 10 seconds per side to make rolling easier. Assemble the rolls: Place a warmed tortilla on a flat surface. Spoon a generous line of filling along the center of the tortilla and roll tightly. Secure with a toothpick if needed. Repeat with remaining tortillas and filling. For uniform taquitos, aim for each roll to contain about 2 to 3 tablespoons of filling so you get 15 to 20 taquitos depending on size. Bake option: Preheat the oven to 425 degrees F. Place rolled taquitos seam side down on a rimmed baking sheet lined with parchment. Lightly spray the tops with cooking spray or brush with a tablespoon of neutral oil. Bake for 15 to 20 minutes or until the shells are golden brown and crispy. Rotate the sheet once halfway through for even browning. The interior should be hot and the cheese melted. Fry option: Pour 1 1/2 inches of neutral oil into a large skillet and heat to medium high. The oil is ready when a small piece of tortilla sizzles immediately. Fry a few taquitos at a time for about 30 to 60 seconds per side, rotating to ensure even browning, until deeply golden and crisp. Transfer to a paper towel lined plate to drain excess oil. Watch closely as they brown quickly. Serve: Remove toothpicks if used and arrange on a platter. Serve hot with guacamole, extra sour cream, salsa, and hot sauce. These are best eaten the same day for maximum crispness.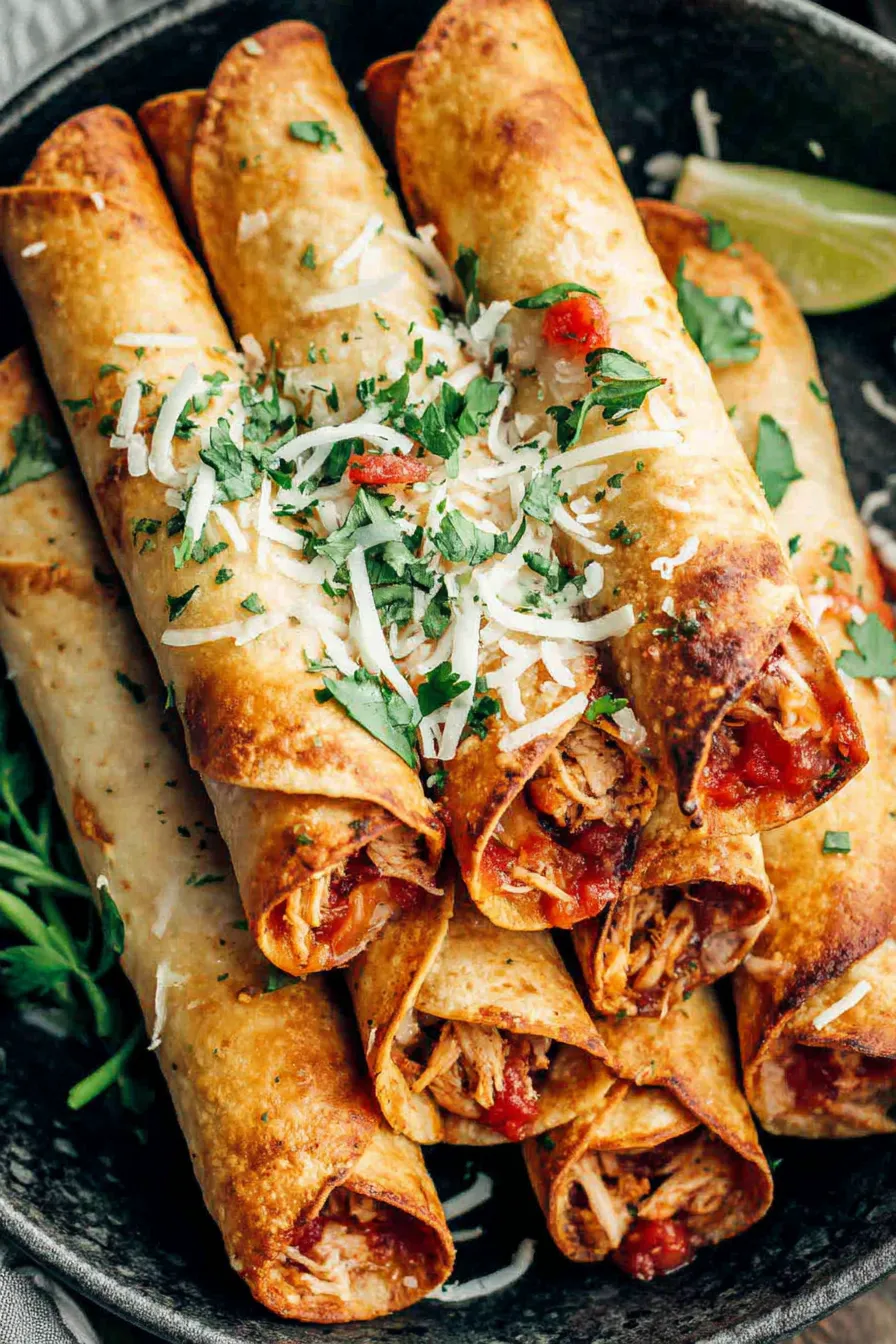
You Must Know
- High in protein: each serving delivers a good amount of protein thanks to the shredded chicken and cheese, making this a satiating choice.
- Storage: cooled cooked taquitos keep well in the refrigerator for up to three days and freeze for up to three months if wrapped tightly.
- Make ahead: assemble rolls and freeze on a sheet pan until firm, then transfer to a bag. Bake from frozen, adding 5 to 8 minutes to the baking time.
- Dietary note: use corn tortillas and check labels to keep the dish gluten free; omit dairy or use substitutes for dairy free variations.
I especially enjoy the ritual of rolling these taquitos with family around the kitchen island. My partner takes charge of the warming station while I spoon the filling and our kids do the rolling. The process becomes part of the meal and that shared effort makes it taste even better.
Storage Tips
Store cooled cooked taquitos in an airtight container in the refrigerator for up to three days. To reheat, place on a baking sheet and bake at 375 degrees F for 8 to 10 minutes, or until heated through and the exterior re-crisps. For freezing, arrange assembled but uncooked rolls on a sheet pan and freeze until solid, then move to a freezer bag. Bake from frozen at 425 degrees F for 20 to 25 minutes. Avoid storing too long in moist containers to prevent sogginess. Paper towels in the container can help absorb excess moisture for short term storage.
Ingredient Substitutions
Swap the 6 ounces cream cheese for a dairy free cream cheese for a non dairy version and replace cheddar with a dairy free shredded cheese. Use Greek yogurt instead of sour cream for a tangier profile. For extra heat, add diced green chiles or a quarter cup of pickled jalapeno. Replace spinach with shredded cabbage or roasted corn if you prefer a different texture. For vegetarian options, substitute shredded jackfruit or seasoned cooked lentils for the chicken and increase the cheese or cheese alternative to maintain creaminess.
Serving Suggestions
Serve with bowls of guacamole, extra sour cream, medium salsa, and a hot sauce for varying heat levels. A crisp citrus slaw with lime and cilantro brightens the plate and pairs well with the warm spices. For a full meal, accompany with Mexican rice, refried beans, and a simple green salad. Garnish the taquitos with chopped cilantro and a squeeze of lime to add brightness and contrast to the rich filling.
Cultural Background
Taquitos, sometimes called rolled tacos, come from Mexican and Tex Mex traditions where small corn tortillas are filled, rolled and fried. The portable nature of these rolled snacks made them a natural choice for street food and social gatherings. Over time, versions with flour tortillas and baked preparations emerged in the United States, especially in home kitchens where ease and speed are priorities. This recipe blends traditional rolling technique with American convenience by using rotisserie chicken and optional baking for a lighter take.
Seasonal Adaptations
In spring and summer, add roasted corn, diced tomatoes, and fresh cilantro to the filling for a fresher profile. In fall and winter, swap in roasted sweet potato or butternut squash with warming spices like smoked paprika and a pinch of cinnamon for a seasonal spin. For holiday gatherings, serve mini taquitos as an appetizer with festive toppings like cranberry salsa for a playful contrast.
Meal Prep Tips
Make a double batch and freeze half for future meals. Assemble rolls and flash freeze on a tray before transferring to freezer bags. Label with the date and bake directly from frozen for convenience. Portion two to three taquitos per container with a side of salsa and store for grab and go lunches. Use sturdy meal prep containers and include a small ice pack to keep dips chilled for transport.
These taquitos are a gateway recipe that invites improvisation. Whether you bake or fry, serve them with a dollop of guacamole and a bright squeeze of lime. Share them with friends and enjoy watching them disappear.
Pro Tips
Soften tortillas briefly before rolling to prevent cracking; keep them covered with foil as you work to maintain pliability.
Use rotisserie chicken for fast and flavorful shredded meat; remove the skin to reduce excess fat.
If baking, brush or spray a little oil on the taquitos to encourage even crisping and golden color.
This nourishing chicken taquitos recipe is sure to be a staple in your kitchen. Enjoy every moist, high protein slice — it is perfect for breakfast or as a wholesome snack any time.
FAQs about Recipes
Can I make these gluten free?
Yes. To keep them gluten free, use corn tortillas that are labeled gluten free and confirm there is no cross contamination with flour in your kitchen.
Can I freeze assembled taquitos?
Assemble and freeze on a sheet pan until solid, then transfer to a freezer bag. Bake from frozen, adding 5 to 8 minutes to the bake time at 425 degrees F.
Tags
Chicken Taquitos
This Chicken Taquitos recipe makes perfectly juicy, tender, and flavorful steak every time! Serve with potatoes and a side salad for an unforgettable dinner in under 30 minutes.
Ingredients
Filling
Tortillas and serving
Instructions
Make the filling
Combine softened cream cheese, salsa and sour cream until smooth. Fold in shredded chicken, shredded cheddar, chopped spinach and spices. Adjust seasoning and ensure mixture is moist but not runny.
Soften tortillas
Warm corn or flour tortillas briefly on a hot griddle for 15 to 30 seconds per side to make them pliable. Keep wrapped in foil to prevent drying.
Assemble taquitos
Place a spoonful of filling along each warmed tortilla and roll tightly. Secure with a toothpick if needed. Arrange seam side down for baking or frying.
Bake method
Preheat oven to 425 degrees F. Place rolls on a parchment lined baking sheet, brush or spray with oil, and bake 15 to 20 minutes until crisp and golden.
Fry method
Heat 1 1/2 inches of oil in a skillet to medium high. Fry taquitos in small batches for about 30 to 60 seconds per side until evenly golden and crisp. Drain on paper towels.
Serve
Remove toothpicks and serve hot with guacamole, sour cream, salsa and hot sauce. These are best eaten the same day for optimal texture.
Last Step: Please leave a rating and comment letting us know how you liked this recipe! This helps our business to thrive and continue providing free, high-quality recipes for you.
Nutrition
Did You Make This?
Leave a comment & rating below or tag
@culinya on social media!
Categories:
You might also like...

Fudgy Marshmallow Mud Brownies
Ultra-fudgy brownies crowned with gooey mini marshmallows and a quick-set chocolate icing. Crowd-pleasing, nostalgic, and irresistibly rich in every bite.

Buttery Pecan Pie Bars
Buttery shortbread crust meets a silky brown sugar pecan topping in these easy pecan pie bars. Just 10 minutes of prep for bakery-level bliss.

Silky No-Crack Pumpkin Cheesecake
A flawlessly smooth pumpkin cheesecake with warm spice, buttery graham crust, and no cracks. Finish with caramel and rum-kissed whipped cream.
Did You Make This?
Leave a comment & rating below or tag @culinya on social media!
Rate This Recipe
Share This Recipe
Enjoyed this recipe? Share it with friends and family, and don't forget to leave a review!
Comments (1)
This recipe looks amazing! Can't wait to try it.
Comments are stored locally in your browser. Server comments are displayed alongside your local comments.

Hi, I'm Sophia!
What's Popular

30-Minute Meals!
Join to receive our email series which contains a round-up of some of our quick and easy family favorite recipes.