
>>

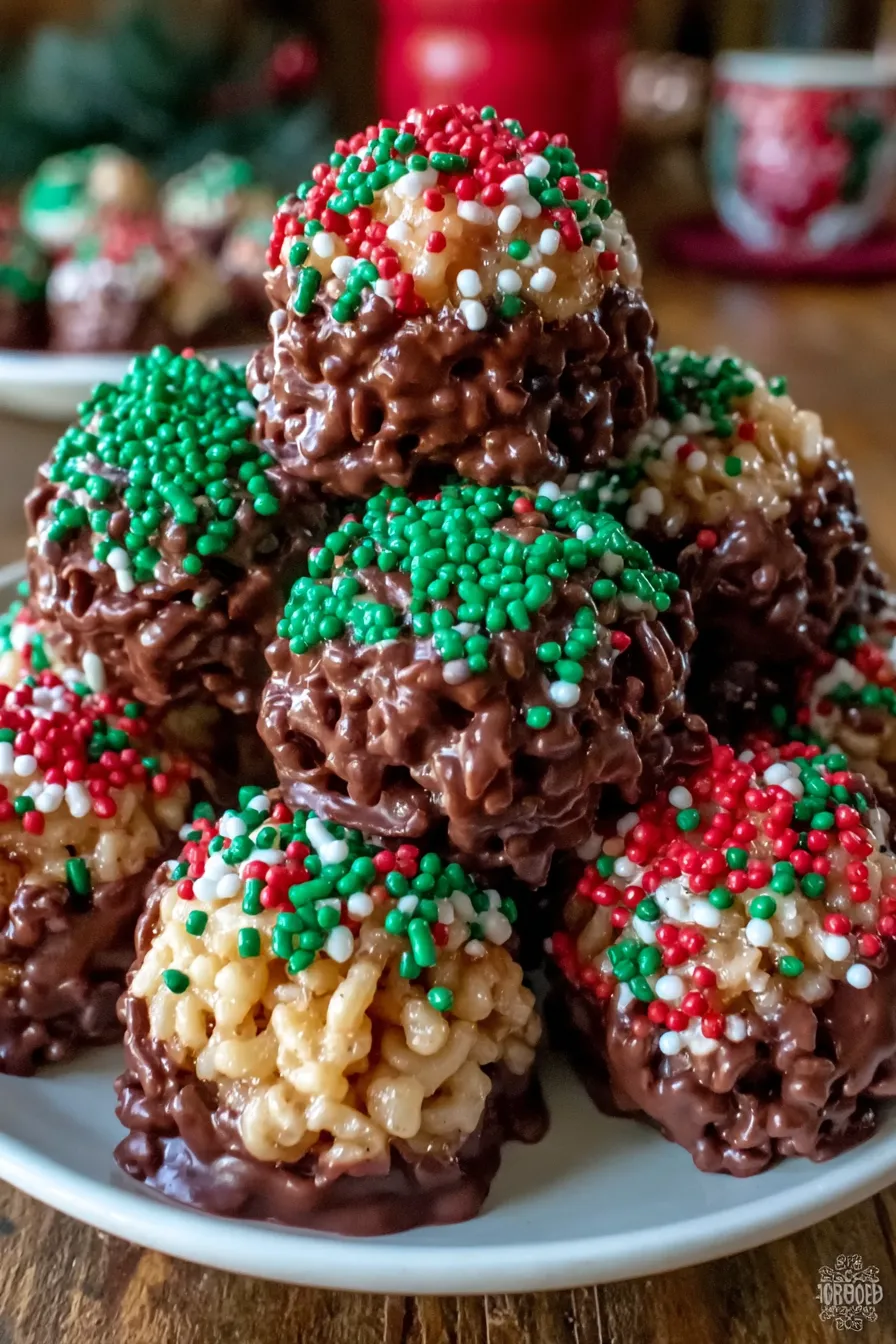
Festive, no-bake chocolate-covered Rice Krispie balls coated in holiday sprinkles — an easy, crowd-pleasing treat perfect for holiday parties and cookie exchanges.
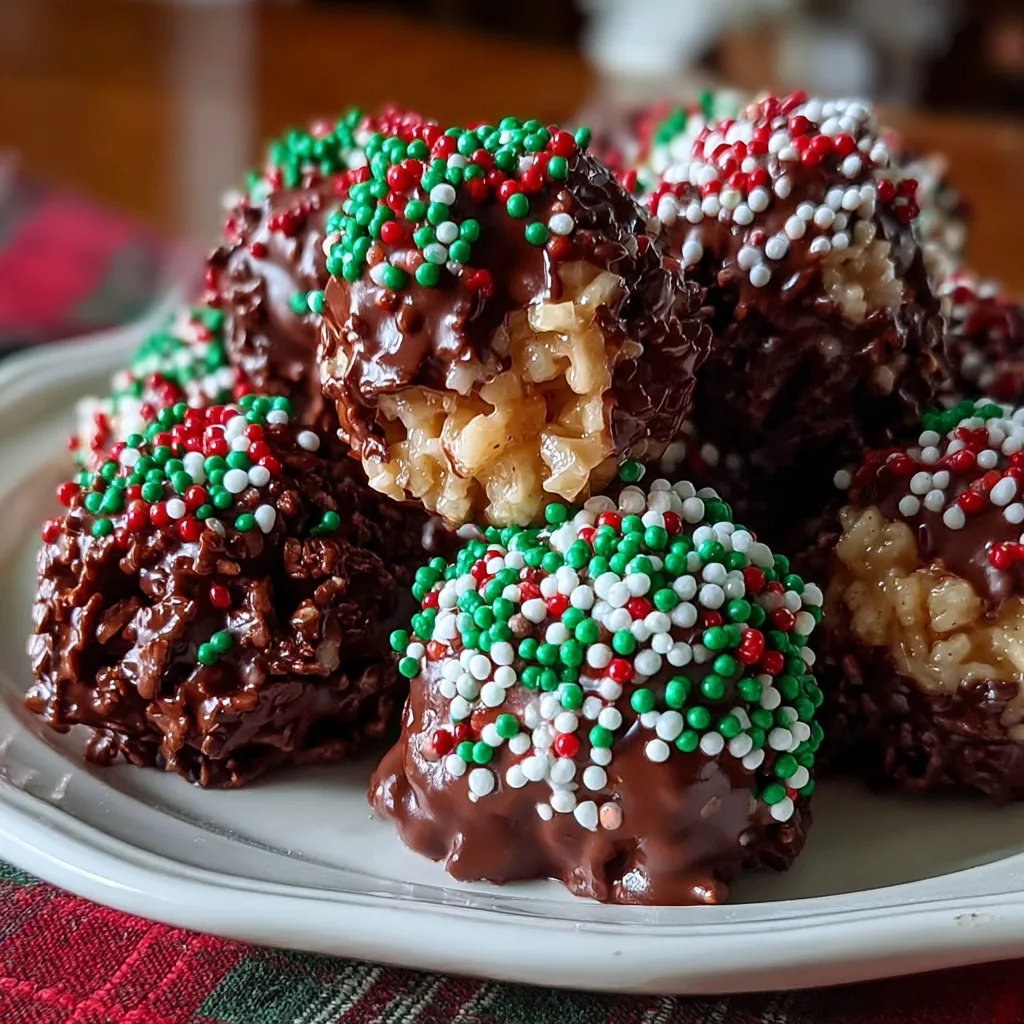
This recipe transforms a handful of pantry staples into an unforgettable holiday sweet that has been a staple at my family's Christmas gatherings for years. I discovered this particular combination one December afternoon while hunting for something quick, portable, and adored by both children and adults. The first time I brought a tray of these to a neighborhood cookie exchange, they disappeared in under fifteen minutes. The texture is a playful contrast between the airy snap of the cereal and the creamy chew of peanut butter, all wrapped in a glossy chocolate shell speckled with festive sprinkles.
What makes these especially memorable is how easily they become nostalgic: the smell of melted chocolate, the feel of rolling each ball between your palms, and the delight when a child spots a sprinkle-strewn cookie on the platter. They are quick enough to prepare during a busy afternoon of wrapping gifts, sturdy enough to ship to distant relatives, and pretty enough to set on the center of a holiday dessert table. If you favor a sweeter chocolate or prefer semi-sweet, this formula is forgiving and adaptable while keeping the same comforting flavors that make the holidays feel like home.
I still remember the first time my daughter decorated a tray of these on her own; the sense of pride on her face and the way neighbors raved made them one of our true holiday classics. Over the years small adjustments like melting the chocolate with a touch of coconut oil and choosing semi-sweet chips have improved the shine and snap. These little rituals make this recipe more than a dessert; they become a memory-making activity for the season.
My favorite part is the assembly line: a kid scoops, another rolls, and an adult dips. That communal rhythm turns dessert-making into a family craft, and the laughter makes the simple steps feel ceremonial. On a snowy afternoon these treats are the quickest way to transform pantry items into something celebratory.
Store finished pieces in an airtight container layered with parchment to prevent sticking. Keep refrigerated for up to one week or freeze in a single layer until solid then stack in a freezer-safe container for up to three months. To thaw, move them to the refrigerator overnight and bring to room temperature before serving to reduce condensation. Avoid leaving them at warm room temperatures for prolonged periods as the chocolate coating will soften and sprinkles may slide off.
For a nut-free option substitute 1/2 cup sunflower seed butter, keeping other ratios the same. Vegan eaters can use vegan milk chocolate chips and a plant-based butter; ensure the powdered sugar is bone-char free. If you prefer less sweetness, reduce the powdered sugar to 1/3 cup and use semi-sweet chocolate. To make them extra crunchy, fold 1/3 cup toasted chopped nuts into the cereal mix before shaping.

Arrange on a festive platter lined with holly or decorative paper liners for parties and cookie swaps. These pair nicely with spiced hot cocoa, mulled cider or a cup of coffee. For a grown-up variation serve with a drizzle of dark chocolate and a sprinkle of flaky sea salt. Use colored sprinkles to match party themes and place on tiered dessert stands for a polished presentation.
These no-bake confections draw from simple childhood treats that rely on cereal and a binding agent to form hand-held sweets. While not traditional in any single culture, their popularity stems from mid-century home cooking when convenience foods became common in family households. The technique of coating a quick base in chocolate and decorating for holidays is a pan-cultural way to celebrate and personalize simple sweets.
For winter brighten with red and green sprinkles and use peppermint chocolate for a festive flavor. In summer swap sprinkles for chopped freeze-dried fruit and use white chocolate to resemble snow. For Halloween choose orange and black sprinkles and add a few drops of natural orange extract to the base to complement milk chocolate.
Prepare the cereal mixture and roll into balls up to two days in advance and store covered in the refrigerator. Melt the chocolate just before dipping to ensure a smooth gloss. For large batches set up a dipping station with bowls for chocolate, a fork for draining, and trays lined with parchment. Work in small batches to prevent the chocolate from cooling and becoming difficult to work with.
These chocolate-covered Rice Krispie balls are simple, adaptable, and nearly universally loved; they are proof that the best holiday treats are often the ones made together. Give them a try this season and make the process part of the celebration.
Chill the shaped balls for 10 minutes before dipping to minimize cracking in the chocolate coating.
Use a tablespoon of coconut oil when melting chocolate to achieve a glossy, smooth finish that sets with a better snap.
Work in small batches and keep unused chocolate warm by placing the bowl over a pan of warm water off heat, stirring occasionally for fluidity.
If the mixture is too sticky to roll, refrigerate for 10 to 15 minutes then resume shaping.
This nourishing christmas chocolate rice krispie balls recipe is sure to be a staple in your kitchen. Enjoy every moist, high protein slice — it is perfect for breakfast or as a wholesome snack any time.
This Christmas Chocolate Rice Krispie Balls recipe makes perfectly juicy, tender, and flavorful steak every time! Serve with potatoes and a side salad for an unforgettable dinner in under 30 minutes.
In a large bowl combine Rice Krispies, peanut butter, powdered sugar, melted butter and vanilla. Fold until cereal is evenly coated and mixture holds together when pressed. If too dry, add a teaspoon of melted butter or peanut butter at a time until cohesive.
Use a 1-tablespoon scoop to portion the mixture and roll between lightly damp palms into 1-inch balls. Place on a parchment-lined sheet spacing them a few centimeters apart to avoid sticking after coating.
Place chocolate chips and optional coconut oil in a microwave-safe bowl and heat in 30-second bursts, stirring after each interval until smooth. Alternatively use a double boiler and stir until glossy and fluid.
Using a fork or dipping tool lower each ball into the chocolate, turn to coat, then let excess drip off before returning to parchment. Sprinkle immediately to ensure decorations adhere while the coating is still wet.
Refrigerate for at least 30 minutes until the coating sets. Store in an airtight container in the refrigerator for up to one week or freeze for up to three months. Thaw in the refrigerator overnight before serving.
Last Step: Please leave a rating and comment letting us know how you liked this recipe! This helps our business to thrive and continue providing free, high-quality recipes for you.
Leave a comment & rating below or tag
@culinya on social media!

Ultra-fudgy brownies crowned with gooey mini marshmallows and a quick-set chocolate icing. Crowd-pleasing, nostalgic, and irresistibly rich in every bite.

Buttery shortbread crust meets a silky brown sugar pecan topping in these easy pecan pie bars. Just 10 minutes of prep for bakery-level bliss.

A flawlessly smooth pumpkin cheesecake with warm spice, buttery graham crust, and no cracks. Finish with caramel and rum-kissed whipped cream.
Leave a comment & rating below or tag @culinya on social media!
Enjoyed this recipe? Share it with friends and family, and don't forget to leave a review!
This recipe looks amazing! Can't wait to try it.
Comments are stored locally in your browser. Server comments are displayed alongside your local comments.

Join to receive our email series which contains a round-up of some of our quick and easy family favorite recipes.
