
>>

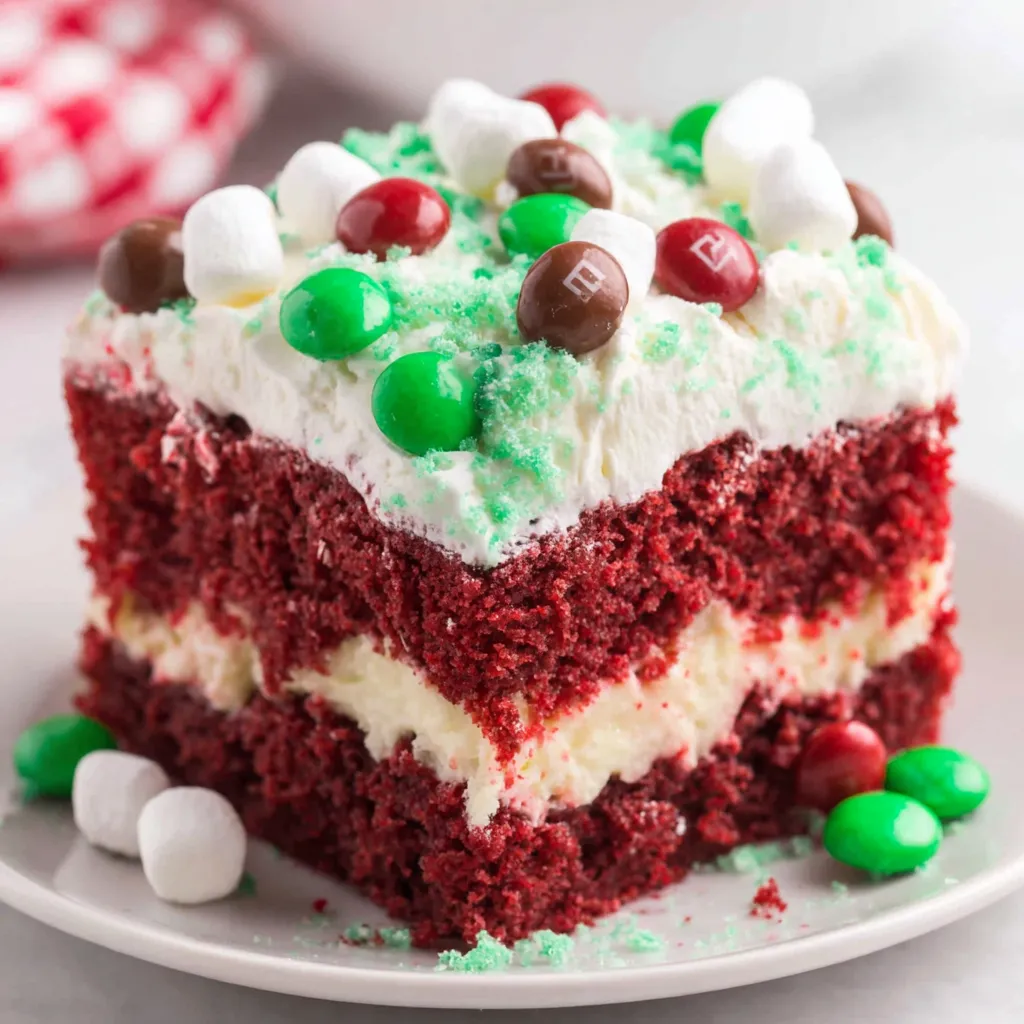
A festive poke cake layered with cheesecake-flavored pudding, green whipped topping, marshmallows and red and green candies, perfect for holiday gatherings.
This Christmas Red Velvet Poke Cake is one of those holiday treats that immediately transports me back to family potlucks and crowded kitchen counters full of laughter. I first made this version during a December when I needed something quick, colorful, and unquestionably festive. The combination of a soft, slightly tangy red velvet base with a glossy cheesecake flavored filling and minty green whipped topping feels like a holiday miracle in dessert form. Every bite balances tender cake crumb with creamy pudding and a playful crunch from the candies on top.
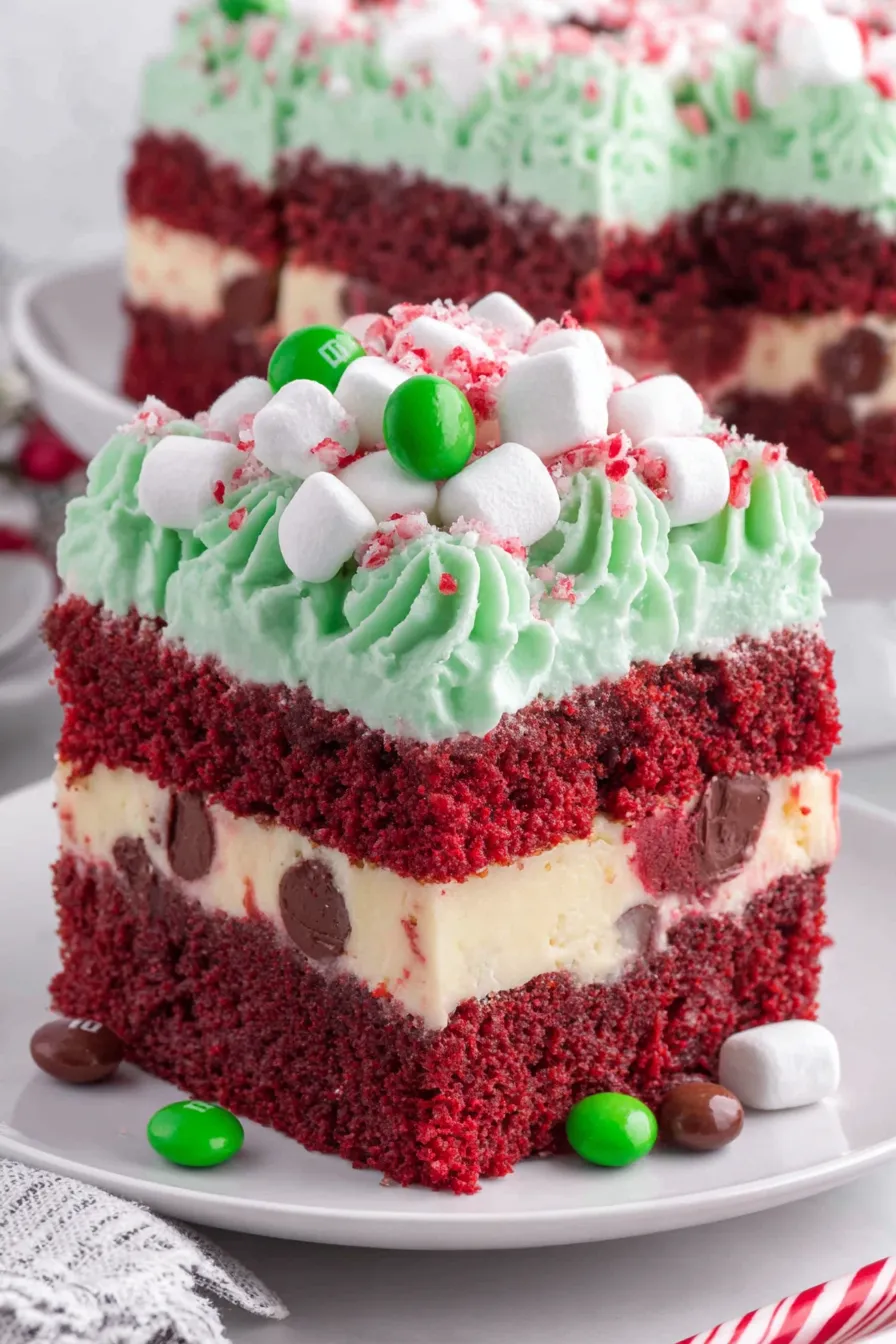
I discovered this method while adapting a boxed cake mix into something more celebratory. The poke technique creates pockets for the cheesecake pudding to settle in, keeping the cake moist while offering concentrated pockets of flavor. The whipped topping tinted a soft green becomes a snowy lawn on which marshmallows and red and green candies stand out. Serving this at holiday gatherings has always brought big reactions, especially from kids who love the bright colors and from adults who appreciate how easy it is to prepare ahead.
When I first served this at a neighbors cookie swap two years ago, everyone asked for the recipe and then for a decoration tutorial. Seeing the kids' faces as they found little pools of cheesecake pudding in their slices became my favorite holiday memory. It is one of those dishes that makes hosting feel effortless and festive at once.
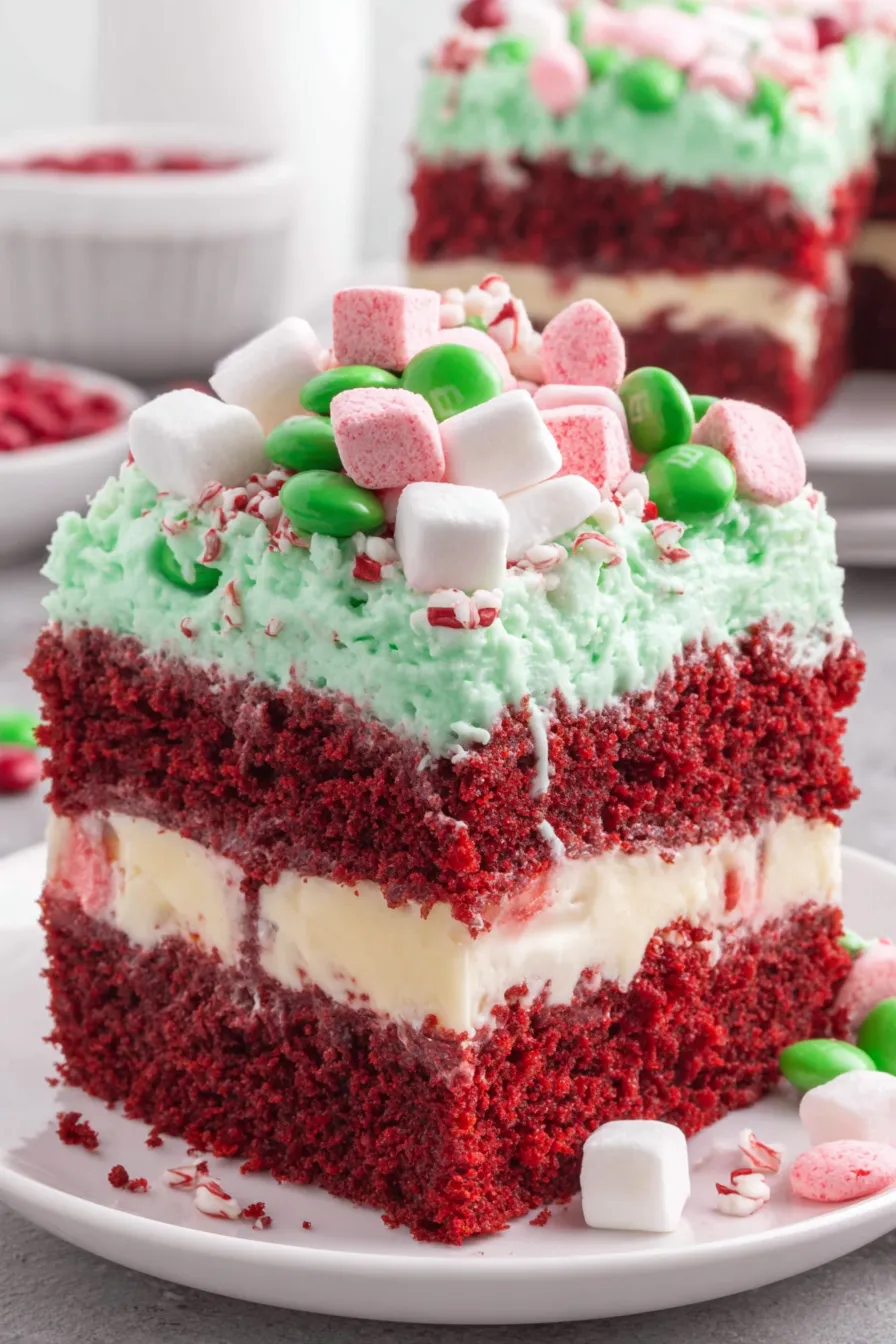
My favorite aspect is how the poke method concentrates flavor without complicated steps. Each slice reveals little pools of cheesecake flavored filling that contrast with the pale green topping and the bright candies on top. This combination always makes guests smile and it is especially popular with children who enjoy finding the hidden pudding pockets.
Store any leftovers covered with a tight lid or plastic wrap in the refrigerator for up to four days. For longer storage, cut the cake into individual squares and wrap each piece in plastic wrap then place in an airtight container and freeze up to three months. To reheat frozen portions, thaw in the refrigerator overnight and bring to room temperature for twenty to thirty minutes before serving. Avoid leaving the topping exposed at room temperature for more than two hours to maintain texture and food safety.
If you need to avoid dairy, substitute the whole milk for a plant based milk that works well with instant pudding, bearing in mind texture will change and thickening may be reduced. Use dairy free whipped topping and gelatin free marshmallows if avoiding animal products, though the final texture will be lighter and less stable. For a gluten free version use a certified gluten free cake mix and verify that all toppings are gluten free. To reduce sugar slightly, choose lower sugar candies or omit sprinkles entirely while keeping the visual contrast with berries or zested citrus.
Serve chilled on a wide platter so the green whipped topping and candy accents are visible. Pair slices with simple garnishes such as a small sprig of fresh mint or a dusting of powdered sugar. For a more adult pairing try a cup of espresso or a small glass of dessert wine. At holiday parties, place small dessert forks or festive napkins next to each slice and consider serving alongside other red and green treats for a themed display.
Red velvet has roots in classic American baking and became particularly popular in the early twentieth century when colored cakes and velvet textures were prized. The vivid red hue combined with a slight cocoa tang made it a favorite for holidays and celebrations. Poke cakes evolved as a home baker s clever shortcut to infuse texture and flavor into boxed mixes, often using condensed milk or pudding. This version blends those traditions and adds modern decorations for a festive twist.
For winter holidays keep the green topping and red accents as shown. For a Valentine s adaptation switch to pink frosting and use pink and red candies. In summer use fresh berries in place of candy for a lighter topping. Swap the cheesecake pudding for vanilla or chocolate pudding for different flavor profiles and color them with natural extracts or fruit purees for seasonal flair.
Bake the cake up to two days ahead and store it wrapped in plastic. Prepare the pudding and pour it over the warm cake a few hours before guests arrive. Tint the whipped topping and apply it within an hour of serving to keep the marshmallows from becoming soggy. Portion into individual containers when freezing for easy grab and go treats during the holidays.
Making this Christmas Red Velvet Poke Cake is joyful because it is forgiving, colorful, and reliably delicious. It invites creativity in decoration and rewards hosts with a dessert that looks fancy but comes together with straightforward steps and ingredients.
Ensure the milk is cold when whisking the instant pudding to achieve a smooth, glossy set.
Poke the warm cake with the rounded handle in a grid about one half inch apart to create evenly distributed pockets for the pudding.
Use a serrated knife warmed under hot water and dried to slice clean pieces without dragging the topping.
Chill for at least four hours to let the pudding set and make slicing easier.
Tint the whipped topping gradually to control the shade and avoid streaks.
This nourishing christmas red velvet poke cake recipe is sure to be a staple in your kitchen. Enjoy every moist, high protein slice — it is perfect for breakfast or as a wholesome snack any time.
Yes, you can prepare the cake a day ahead, pour the pudding and chill overnight. Add the whipped topping and decorations just before serving for best appearance.
Use cold whole milk as directed for best pudding set. Plant based milks may require additional setting time and result in a looser filling.
This Christmas Red Velvet Poke Cake recipe makes perfectly juicy, tender, and flavorful steak every time! Serve with potatoes and a side salad for an unforgettable dinner in under 30 minutes.
Preheat the oven to 350 degrees Fahrenheit and spray a 9 by 13 inch pan with baking spray that contains flour. Set aside.
In a medium bowl use a handheld mixer to combine the cake mix with water, vegetable oil, and eggs until smooth and combined.
Pour batter into the prepared pan and bake for approximately 25 minutes or until a toothpick inserted near the center comes out with a few moist crumbs.
Allow the cake to cool for about 10 minutes then poke holes in the warm cake using the rounded end of a wooden spoon about one half inch apart.
Whisk the cheesecake flavored pudding mix with cold whole milk for one to one and a half minutes until starting to thicken then pour evenly over the cake.
Cover the cake tightly and refrigerate for at least four hours to set the filling.
Stir green food coloring into the thawed whipped topping until uniform, spread over the chilled pudding, and top with mini marshmallows, red and green M and M s and red sprinkles.
Cut the cake into twelve three inch by three inch squares for serving.
Last Step: Please leave a rating and comment letting us know how you liked this recipe! This helps our business to thrive and continue providing free, high-quality recipes for you.
Leave a comment & rating below or tag
@culinya on social media!

Ultra-fudgy brownies crowned with gooey mini marshmallows and a quick-set chocolate icing. Crowd-pleasing, nostalgic, and irresistibly rich in every bite.

Buttery shortbread crust meets a silky brown sugar pecan topping in these easy pecan pie bars. Just 10 minutes of prep for bakery-level bliss.

A flawlessly smooth pumpkin cheesecake with warm spice, buttery graham crust, and no cracks. Finish with caramel and rum-kissed whipped cream.
Leave a comment & rating below or tag @culinya on social media!
Enjoyed this recipe? Share it with friends and family, and don't forget to leave a review!
This recipe looks amazing! Can't wait to try it.
Comments are stored locally in your browser. Server comments are displayed alongside your local comments.

Join to receive our email series which contains a round-up of some of our quick and easy family favorite recipes.
