
>>

Decadent chocolate squares layered with a sweet coconut filling and studded with mini chocolate chips—rich, chewy, and impossible to resist.
This recipe was born out of a late-night pantry raid and a craving for something both chocolaty and tropical. I first made these coconut layered brownies for a family gathering the week after I discovered a can of sweetened condensed milk tucked behind the cereal boxes. The combination of fudgy chocolate, toasted-sweet coconut, and little pops of semi-sweet chips created a texture and flavor contrast that had everyone asking for the recipe. They became the dessert I bring to potlucks when I want something hearty yet a little different from the usual brownie tray.
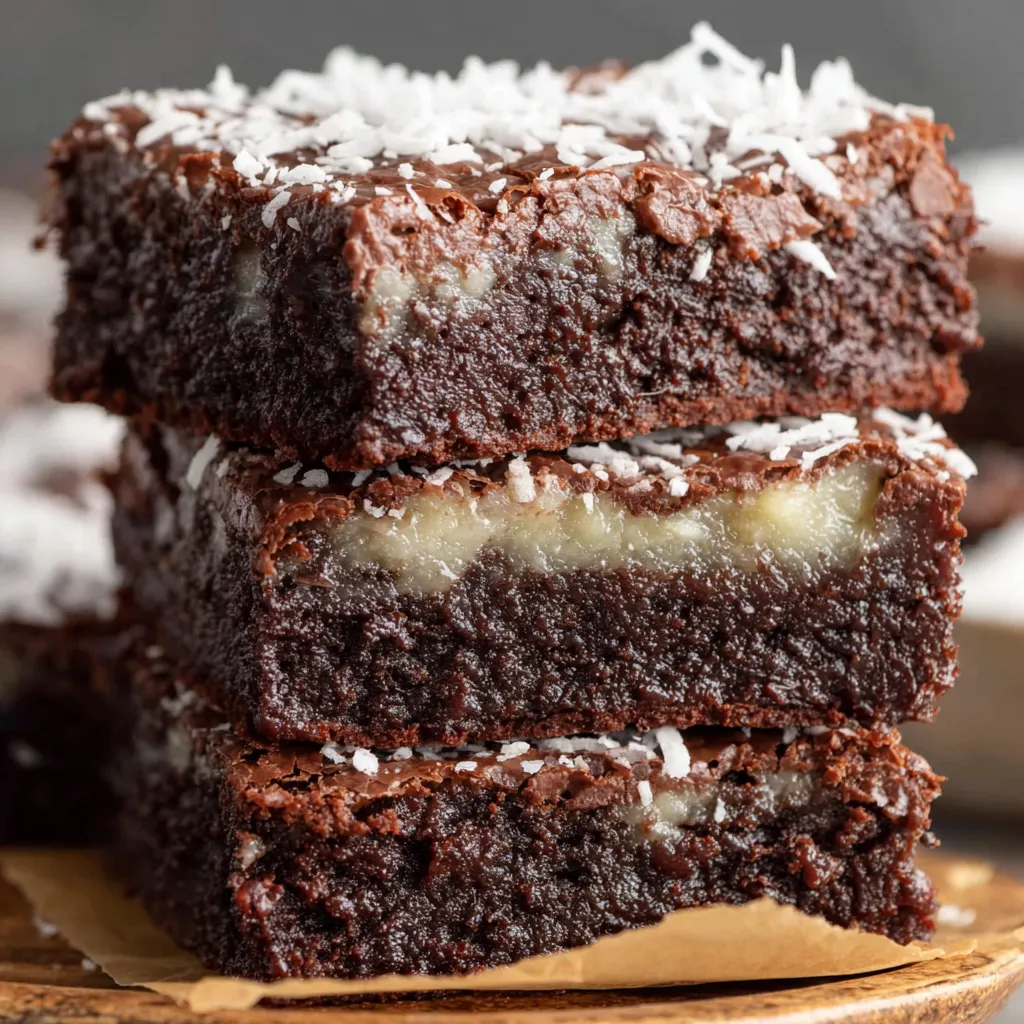
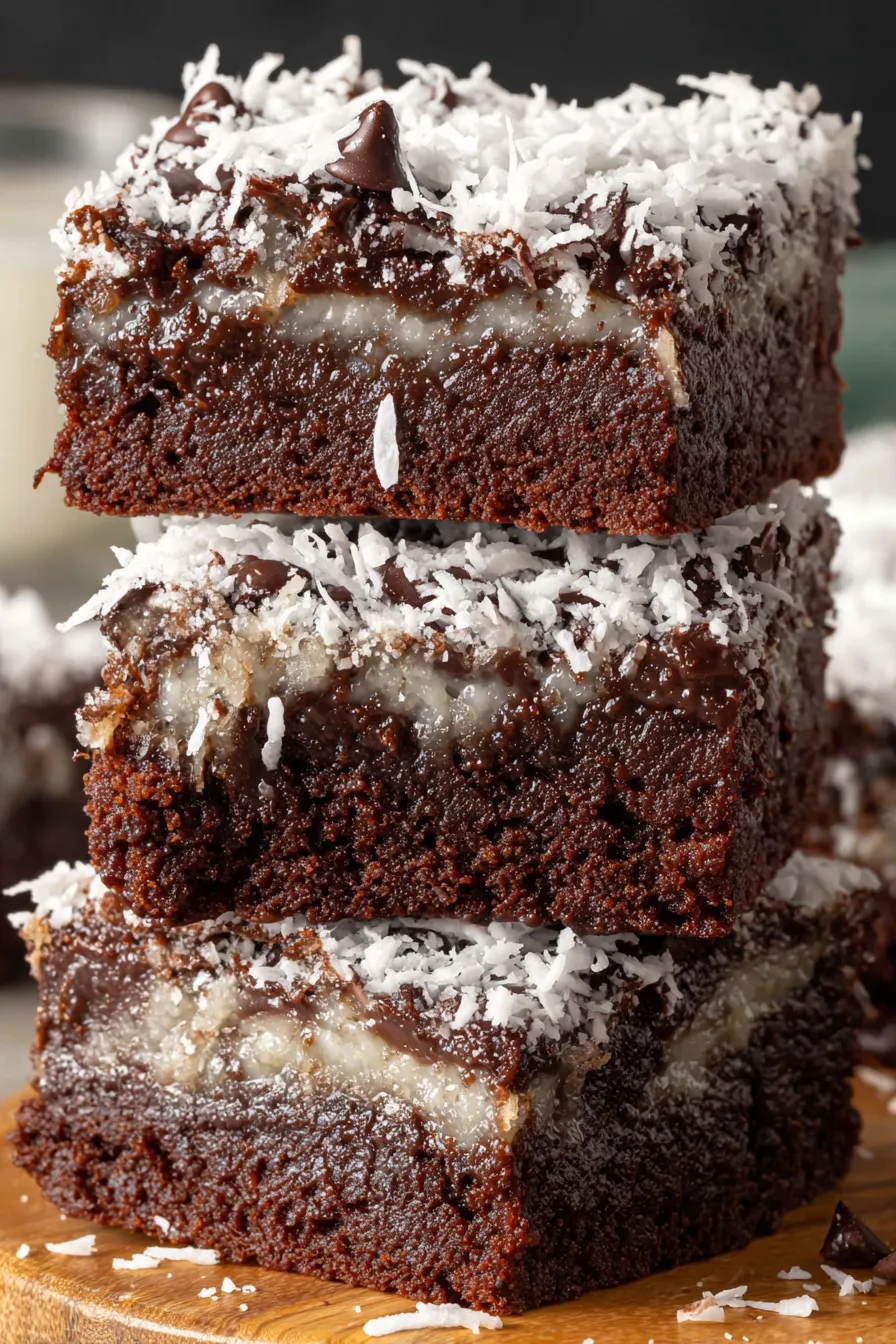
The top and bottom layers bake into a dense, slightly chewy chocolate base while the middle layer—rich with sweetened condensed milk and coconut—stays lusciously glossy and sticky. The batter uses melted butter (I prefer salted sweet cream butter for balance) and a dusting of unsweetened cocoa to give deep, bitter-sweet notes that keep the coconut from becoming cloying. These squares slice neatly once fully cooled, and the 8×8 pan yields generous two-inch pieces perfect for sharing. If you love the combination of chocolate and coconut with a nostalgic, diner-style finish, these are for you.
When I tested this recipe, my neighbor described them as “a magic bar in disguise.” My kids declared them the winner of our family bake-off two years running—everyone loves that coconut layer that strings a little when you lift a warm square. I’ve also learned a few small technique tweaks while perfecting this: dusting the chips with a teaspoon of flour prevents them from sinking, and spreading the coconut filling with an offset spatula keeps layers even and neat.
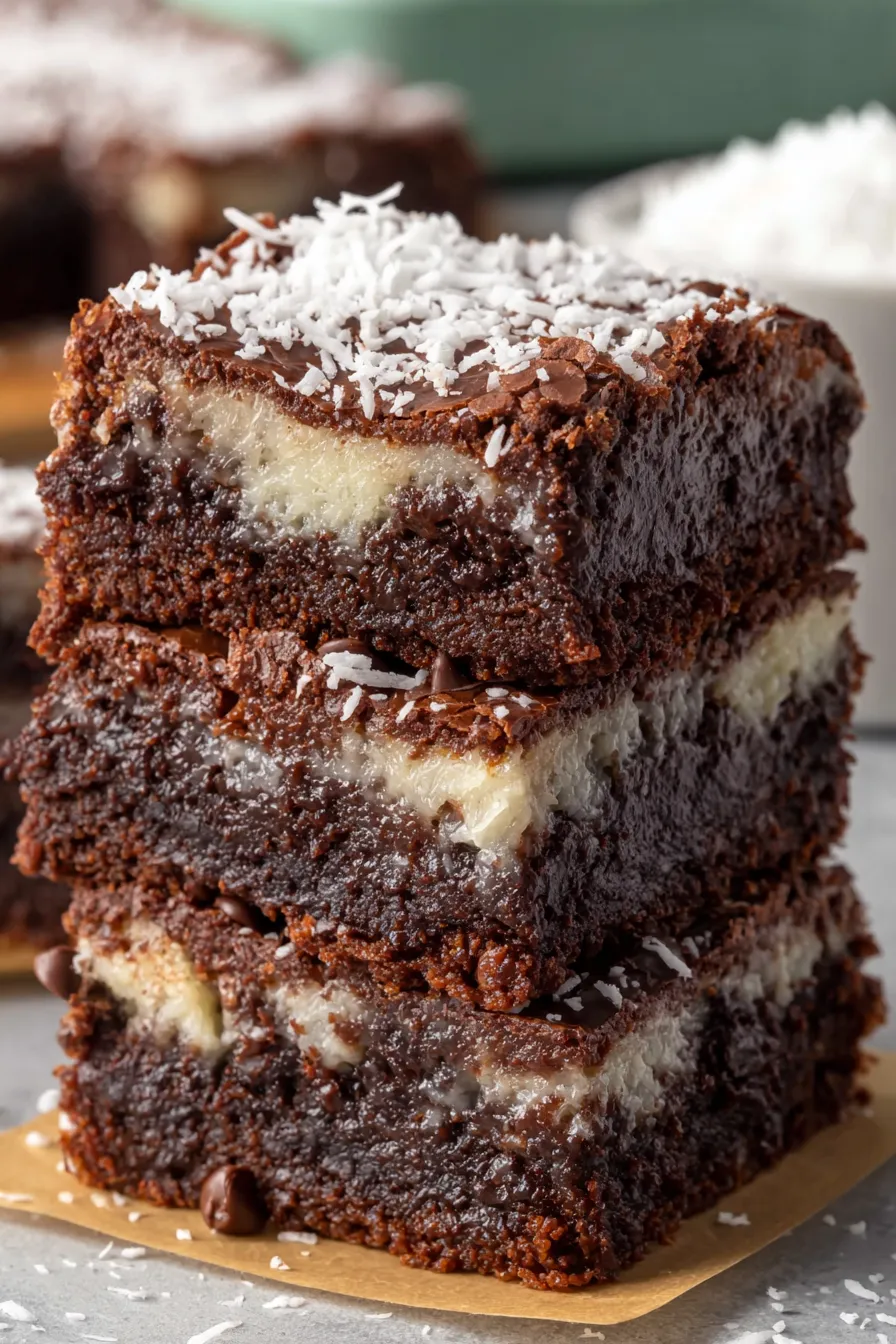
My favorite part is how the coconut layer peeks when you cut into a square; guests always pause before the first bite because it looks so decadent. During the holidays, a neighbor once told me this taste brought back memories of a bakery from her childhood—which is exactly the kind of comfort I hoped to create. I love that these combine approachable technique with a special-occasion finish.
Store cooled squares in an airtight container at room temperature for up to two days; beyond that refrigerate to preserve texture and prevent the coconut from becoming overly soft. For longer storage, wrap individual squares tightly in plastic wrap and place in a freezer-safe bag for up to three months. Thaw in the refrigerator overnight and bring to room temperature or warm for a few seconds in the microwave before serving. Glass containers with tight lids or bakery-style metal tins maintain freshness best—avoid loosely covered bowls which allow the coconut to dry out.
If you prefer less sweetness, replace the sweetened coconut with unsweetened flakes and increase the condensed milk to 3/4 cup while adding 3 tablespoons granulated sugar to the coconut mixture to balance texture. To make them dairy-free, swap the butter for a plant-based baking stick and use a dairy-free condensed milk alternative; note the texture will be slightly different and browning may vary. For a gluten-free version, use a 1:1 gluten-free flour blend and verify the chocolate chips are certified gluten-free.
Serve these squares slightly chilled with a dollop of lightly sweetened whipped cream or a scoop of vanilla bean ice cream to contrast the sticky coconut. For a party platter, dust the tops with a pinch of cocoa or flaked toasted coconut. They pair beautifully with strong coffee or a nutty dessert wine. For holiday presentations, sprinkle with finely chopped toasted macadamia nuts or a drizzle of warmed dark chocolate.
These layered chocolate-and-coconut bars echo many classic American bakery treats—especially magic bars or seven-layer bars—where a sweetened condensed milk binder creates a chewy, caramel-like layer. Coconut has long been used in American baking since the late 19th century when desiccated flaked coconut became commercially available; combining it with chocolate became a popular comfort pairing in mid-20th-century dessert culture.
In summer, use toasted coconut for brightness and serve slightly chilled; add a teaspoon of lime zest to the coconut mixture for a tropical twist. For winter holidays, fold 1/4 cup chopped candied ginger into the coconut layer or top with a sprinkle of flaked sea salt to cut sweetness. For a Thanksgiving-focused dessert, add 1/4 teaspoon cinnamon to the batter and swap mini chips for chopped pecans.
Prepare the batter and the coconut filling separately, then store each in the refrigerator for up to 24 hours before assembly; allow the butter-based batter to come back to room temperature briefly so it spreads easily. Bake as directed and slice once fully cold—place individual squares in meal-prep containers with parchment between layers. These keep well as grab-and-go treats for packed lunches or dessert portions in a freezer stash.
There’s a simple joy in lifting the entire block from the pan and presenting it for slicing—this dessert feels special without requiring advanced technique. I hope you make it your own and discover a few tweaks that become family favorites.
Toss mini chocolate chips with a teaspoon of flour to prevent them from sinking during baking.
Allow the bars to cool completely before slicing to achieve clean, neat squares.
Chill the baked block for at least 60 minutes if you want very tidy slices for serving.
Use an offset spatula to spread the coconut layer to avoid tearing the bottom chocolate layer.
This nourishing coconut brownies recipe is sure to be a staple in your kitchen. Enjoy every moist, high protein slice — it is perfect for breakfast or as a wholesome snack any time.
This Coconut Brownies recipe makes perfectly juicy, tender, and flavorful steak every time! Serve with potatoes and a side salad for an unforgettable dinner in under 30 minutes.
Preheat oven to 350°F. Line an 8×8-inch baking dish with parchment paper leaving an overhang on two sides and lightly spray with nonstick spray.
Whisk together 1 cup flour, 1/2 cup cocoa powder, and 1/4 teaspoon salt in a medium bowl until evenly combined.
Stir 1/2 cup mini semi-sweet chips with 1 teaspoon flour in a small bowl to prevent sinking during baking.
In a separate bowl whisk melted cooled butter, 1 1/2 cups sugar, 2 eggs, and 2 teaspoons vanilla until glossy and slightly thickened.
Fold the dry mix into the wet ingredients with a wooden spoon just until combined, then gently fold in the coated mini chips.
Spread half of the batter evenly into the prepared pan using an offset spatula for a smooth surface.
Stir together 2 1/2 cups sweetened coconut, 2/3 cup sweetened condensed milk, 1 teaspoon vanilla, and 1/4 teaspoon salt until well combined.
Spread the coconut filling evenly over the bottom batter, then dollop and spread the remaining batter to fully cover the coconut.
Bake at 350°F for 35–40 minutes. The center will set but remain slightly soft; a toothpick into the chocolate layer should come out with moist crumbs.
Cool the pan completely on a rack, optionally chill for 60 minutes for cleaner slices, then lift out using parchment and cut into 4×4 for 16 squares.
Last Step: Please leave a rating and comment letting us know how you liked this recipe! This helps our business to thrive and continue providing free, high-quality recipes for you.
Leave a comment & rating below or tag
@culinya on social media!

Ultra-fudgy brownies crowned with gooey mini marshmallows and a quick-set chocolate icing. Crowd-pleasing, nostalgic, and irresistibly rich in every bite.

Buttery shortbread crust meets a silky brown sugar pecan topping in these easy pecan pie bars. Just 10 minutes of prep for bakery-level bliss.

A flawlessly smooth pumpkin cheesecake with warm spice, buttery graham crust, and no cracks. Finish with caramel and rum-kissed whipped cream.
Leave a comment & rating below or tag @culinya on social media!
Enjoyed this recipe? Share it with friends and family, and don't forget to leave a review!
This recipe looks amazing! Can't wait to try it.
Comments are stored locally in your browser. Server comments are displayed alongside your local comments.

Join to receive our email series which contains a round-up of some of our quick and easy family favorite recipes.
