
>>

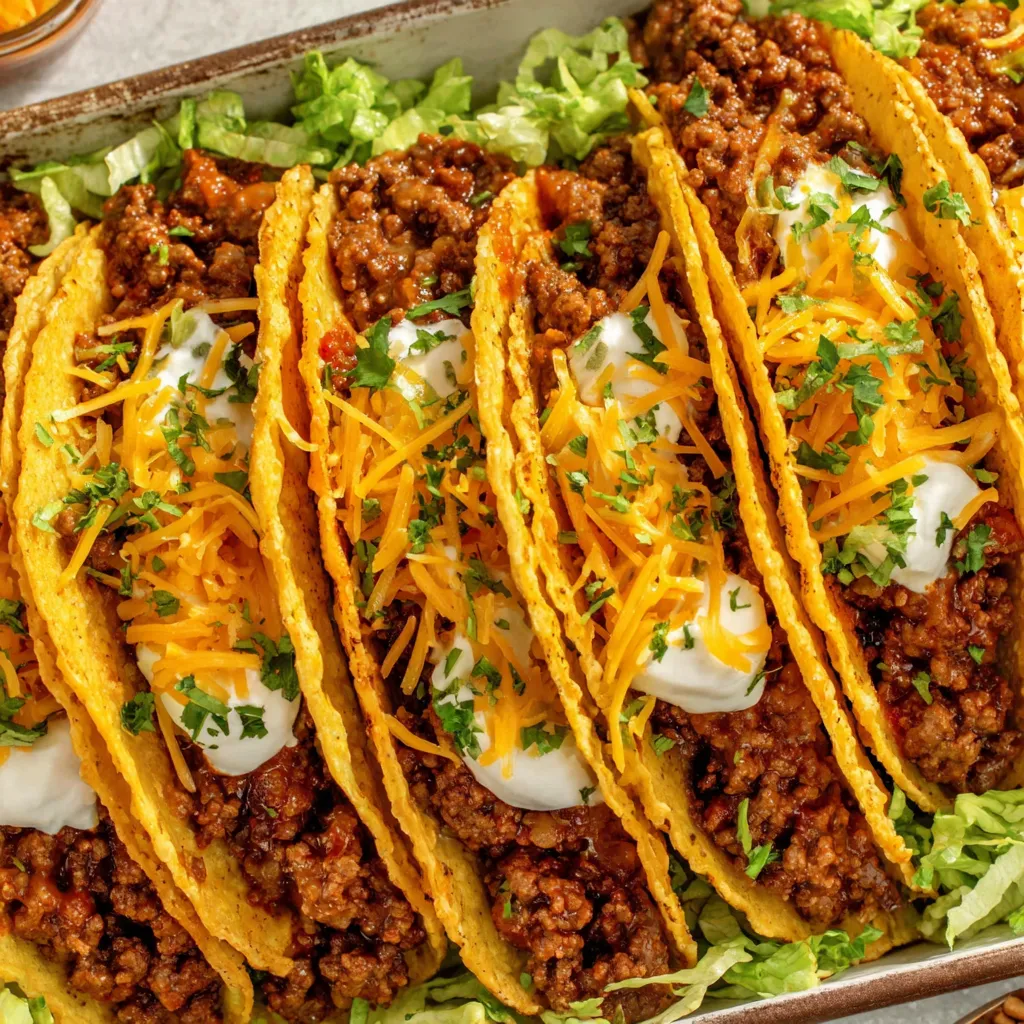
Crispy oven baked tacos filled with seasoned beef and melted cheddar jack, ready in under 30 minutes for an easy family favorite.
This recipe exists to solve weeknight dinner dilemmas with a little bit of nostalgia and a lot of crunch. I first taught myself how to bake hard taco shells upright in a baking dish the winter I needed an easy, hands off way to feed a hungry crowd. The method changed tacos for our family by making the shells reliably crisp while the filling stayed juicy, the cheese melted perfectly on top, and cleanup stayed simple. For busy evenings this approach is a small trick that makes a big difference in texture and timing.
On the first night I tried it, my kids declared these the most store bought tasting tacos I had ever made at home. The combination of well browned ground beef, a modest tomato sauce to bind the spices, and shredded cheddar jack sprinkled on top gives you contrast between creamy cheese and crunchy shell. I still reach for this recipe when friends drop by unexpectedly, because it stretches well, looks festive, and comes together with pantry friendly ingredients that most home cooks already have on hand.
I remember serving this to my book club once and everyone asked for the exact instructions on filling and baking. My brother told me the cheese on top made the tacos feel indulgent without extra effort. Over time I learned small details like draining excess grease and not over saucing the meat to keep the bottoms crisp. Those discoveries are built into these steps so you will have consistent results from the first try.
My favorite part about this approach is how reliably the shells come out crisp while the cheese melts to form a little golden crown on each taco. Family members tend to reach for seconds because the textures are so pleasing. On busy nights I assemble the filling ahead and keep everything chilled on the counter so I can pop them in the oven at the last minute. It makes hosting low fuss and high reward.
Store any leftover filling in an airtight container in the refrigerator for up to three days. Do not assemble and refrigerate filled shells as the bottoms will soften. To freeze the filling, cool completely then transfer to a freezer safe container for up to three months. Reheat filling in a skillet with a splash of water or tomato sauce until piping hot before filling shells and baking. For best texture reheat assembled tacos under a broiler for one minute if needed to quickly refresh the cheese and crisp edges.
If you prefer poultry swap ground turkey or ground chicken using the same weight and adjust cooking time until there is no pink. For a vegetarian option substitute crumbled firm tofu, cooked lentils or a plant based ground substitute and season similarly. Use low sodium taco seasoning if you are watching salt and boost with a pinch of smoked paprika for depth. For dairy free choose a shredded dairy free cheese alternative and omit the cilantro if you are avoiding herbs that might be filtered with dairy processing tools.
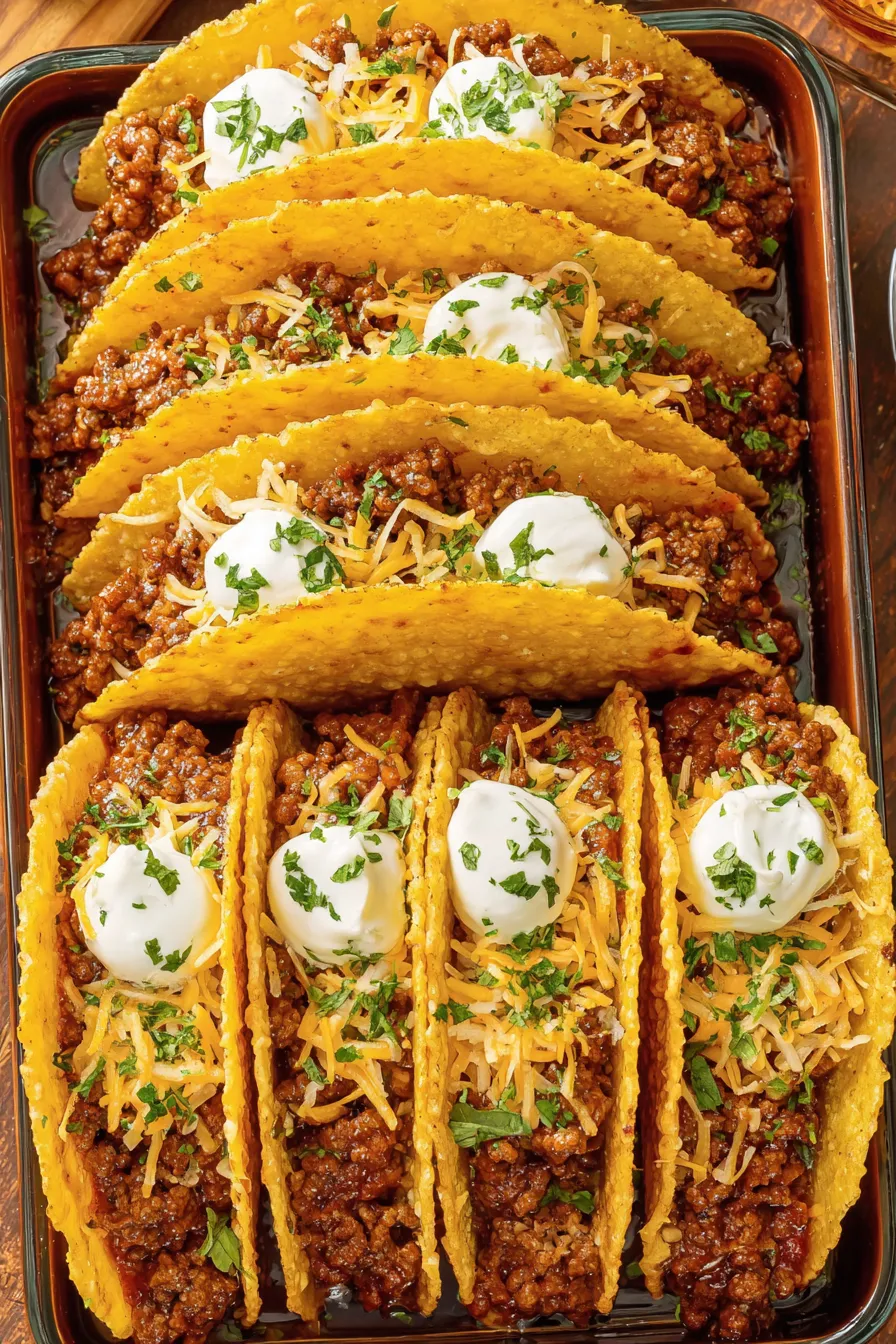
Serve these tacos with a simple chopped cabbage slaw and a drizzle of lime crema for bright contrast. Pair with Spanish rice and black beans for a fuller meal. For a party plate offer bowls of chopped tomatoes, sliced jalapenos, guacamole and pico de gallo so guests can assemble their preferred toppings. Garnish with lime wedges and extra cilantro for visual appeal and fresh citrus brightness.
These baked tacos are an Americanized technique that borrows from traditional Mexican elements. Hard corn shells and seasoned beef reflect classic taco fillings while baking upright adds a convenience driven twist that emerged in home cooking to preserve crispness for larger batches. Variations of filled and baked shells show up in Southern California and Tex Mex cooking where portability and speed are prized. This method bridges authentic flavors and practical home cook techniques to create something that feels familiar and modern.
In summer swap the tomato sauce for fresh chopped tomatoes tossed with a squeeze of lime and a pinch of cumin for a brighter filling. In colder months add a pinch of ground cinnamon or a dash of ancho chili powder to the tomato sauce for warmth. Swap cilantro for chopped parsley if herbs are out of season. For holiday gatherings offer a tray with finished tacos and festive toppings like roasted corn relish or pickled red onions to elevate the presentation and flavor complexity.
Prepare the seasoned filling up to three days ahead and refrigerate in a shallow container so it cools quickly. When ready to eat, set out shells in a baking dish, spoon chilled filling into shells and finish with cheese then bake as directed. If packing lunches fill soft tortillas instead or keep components separated until reheating to maintain texture. Glass containers with tight lids help keep filling fresh and stack neatly in the refrigerator.
These baked tacos are a dependable, crowd pleasing meal that rewards small techniques for big results. Give them a try the next time you need something fast and satisfying, and feel free to personalize the spice level and garnishes to match your family tastes.
Drain excess grease thoroughly after browning to prevent oily filling and soggy shells.
Do not over saucethe meat; aim for a moist but not wet filling so bottoms remain crisp.
Arrange shells upright in a 9 by 13 inch dish so heat circulates evenly and the shells stay upright while baking.
Watch the oven in the final minutes because cheese melts quickly and will brown fast under high heat.
This nourishing culinya baked tacos recipe is sure to be a staple in your kitchen. Enjoy every moist, high protein slice — it is perfect for breakfast or as a wholesome snack any time.
If you want crisp bottoms, do not over saucethe filling and drain excess grease before filling the shells.
Yes, prepare the filling up to three days ahead and refrigerate. Assemble and bake just before serving for the best texture.
This Culinya Baked Tacos recipe makes perfectly juicy, tender, and flavorful steak every time! Serve with potatoes and a side salad for an unforgettable dinner in under 30 minutes.
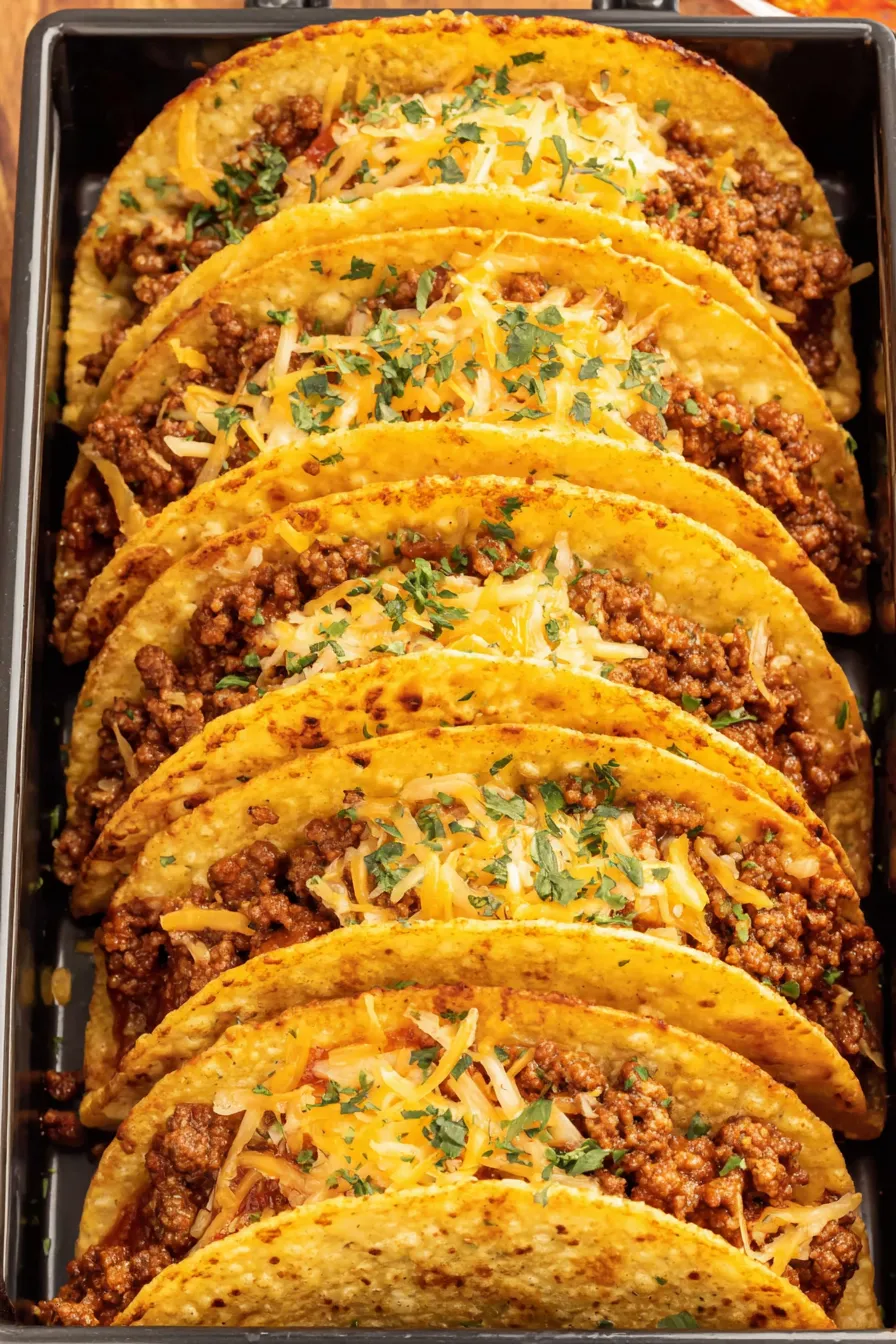
Preheat the oven to 400 degrees Fahrenheit and stand ten hard taco shells upright in a 9 by 13 inch baking dish without overcrowding.
Heat one tablespoon olive oil in a large skillet over medium high. Add diced onion, ground beef, salt and pepper. Cook eight to ten minutes, breaking the meat into even pieces until no pink remains and then drain excess grease.
Stir in three quarters cup tomato sauce and one ounce taco seasoning packet. Cook two to three minutes until the mixture is moist but not wet so the shells stay crisp when baked.
Divide the filling evenly and spoon about one third to one half cup into each shell. Sprinkle shredded cheddar jack evenly over the tops of the filled shells.
Bake for five to seven minutes until cheese is melted and shell edges are crisp. Remove and allow to rest one to two minutes before garnishing with optional cilantro.
Last Step: Please leave a rating and comment letting us know how you liked this recipe! This helps our business to thrive and continue providing free, high-quality recipes for you.
Leave a comment & rating below or tag
@culinya on social media!

Ultra-fudgy brownies crowned with gooey mini marshmallows and a quick-set chocolate icing. Crowd-pleasing, nostalgic, and irresistibly rich in every bite.

Buttery shortbread crust meets a silky brown sugar pecan topping in these easy pecan pie bars. Just 10 minutes of prep for bakery-level bliss.

A flawlessly smooth pumpkin cheesecake with warm spice, buttery graham crust, and no cracks. Finish with caramel and rum-kissed whipped cream.
Leave a comment & rating below or tag @culinya on social media!
Enjoyed this recipe? Share it with friends and family, and don't forget to leave a review!
This recipe looks amazing! Can't wait to try it.
Comments are stored locally in your browser. Server comments are displayed alongside your local comments.

Join to receive our email series which contains a round-up of some of our quick and easy family favorite recipes.
