
>>

Weeknight-friendly sheet pan dinner with crispy pierogies, savory kielbasa, and roasted vegetables finished with garlic butter and a dollop of sour cream.

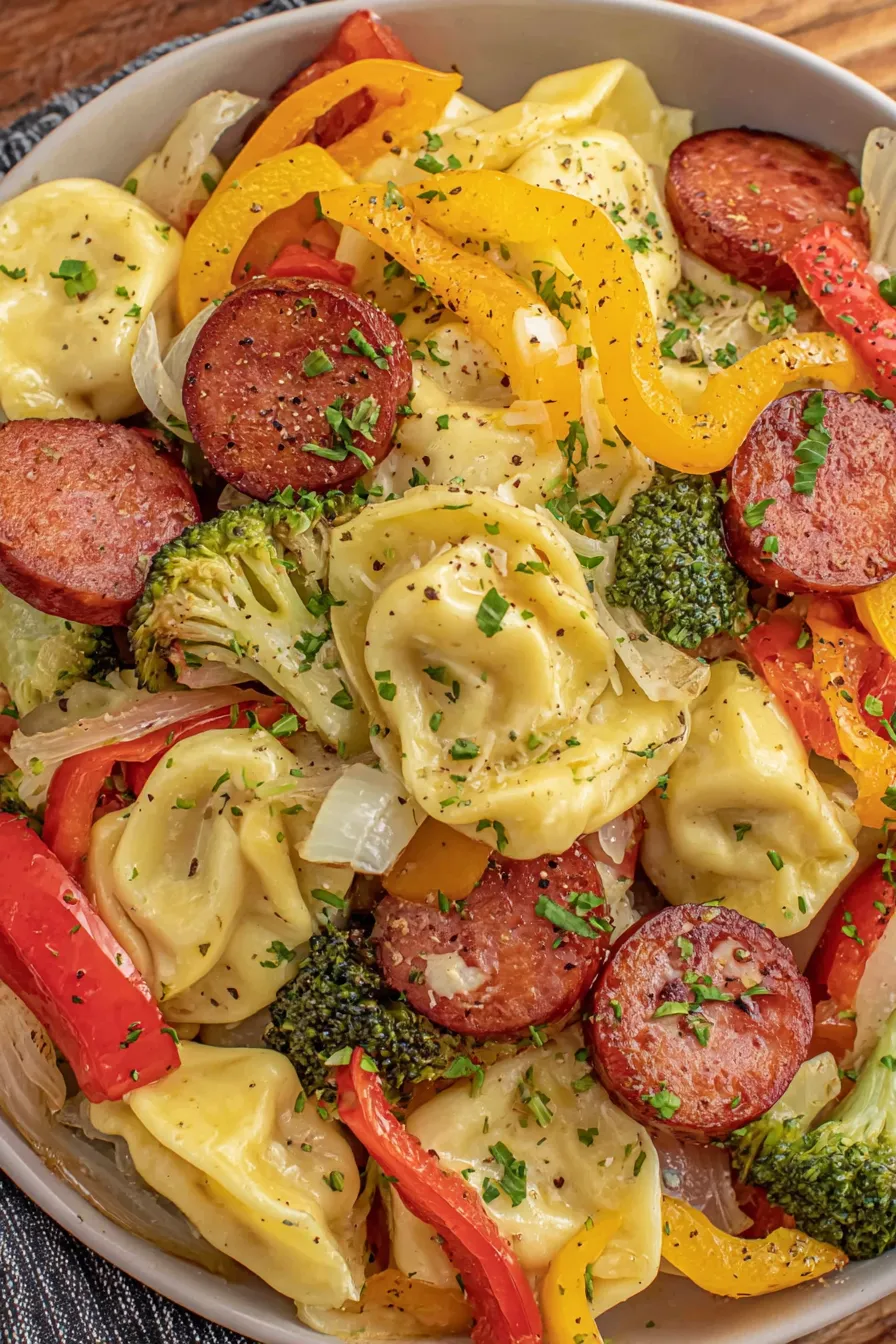
This sheet pan pierogies and kielbasa dinner is the kind of comforting meal I reach for when I want something satisfying with minimal fuss. I first put this combination together on a rushed weeknight when I had a pack of frozen pierogies, a leftover kielbasa, and a handful of vegetables in the fridge. The result was so good that it became a regular in our rotation. The contrast between the golden, slightly crisp exterior of the pierogies and the smoky slices of kielbasa makes every bite interesting, while the roasted bell peppers, onion, and broccoli add color, sweetness, and a pleasant textural contrast.
What I love most about this approach is how forgiving it is. There is no precision work: toss, spread, roast, and finish. The seasoning is straightforward yet flavorful, and the optional garlic butter and fresh herbs at the end lift the whole tray. It makes a generous family-style meal and is a crowd-pleaser for casual dinners or potlucks. Serve it with sour cream for dipping and you have a mix of creamy, smoky, and roasted flavors that everyone will remember.
I remember bringing this tray to a small family gathering and watching a plate after plate disappear. My sister commented that the pierogies had the perfect chew and crunch, and my father asked for the recipe almost immediately. It has earned a permanent spot in my dinner repertoire because of those reactions and how reliably good it is even when I change a vegetable or two.

My favorite aspect of this approach is how it balances simplicity and flavor. I love that I can throw everything together in under ten minutes and still produce a tray that looks and tastes like I spent much longer in the kitchen. Family members often ask for extra sour cream or a second sprinkle of parsley, and I enjoy seeing the smiles when they get that first crunchy bite of pierogie paired with smoky kielbasa and a pop of roasted pepper.
Cool the tray to room temperature for no more than an hour before storing. Transfer leftovers to an airtight container and refrigerate for up to three days. For longer storage, portion into freezer-safe bags or containers and freeze for up to three months. When reheating from frozen, thaw overnight in the refrigerator for best texture, then re-crisp in a 400 F oven for 10 to 15 minutes. Use parchment or a light spray of oil to prevent sticking during reheating and to restore some surface crisp.
If you prefer a lighter protein, substitute chicken or turkey sausage cut into 1/2-inch slices and adjust seasoning to taste. For a vegetarian option, use plant-based sausage or extra firm roasted tofu cubes. Swap broccoli for zucchini or cauliflower depending on seasonality. If dairy-free, skip the butter finish and serve with a dairy-free yogurt dip. Keep in mind that fresh pierogies will cook faster than frozen; reduce oven time by 5 to 8 minutes and watch for browning.
Serve family-style right from the pan with small bowls of sour cream for dipping. Add a crisp green salad dressed with lemon vinaigrette to cut through the richness. For a heartier meal, pair with braised cabbage or a pot of probiotic-rich pickles. Garnish with chopped parsley, green onions, or a squeeze of fresh lemon for brightness. This also makes a great appetizer at a casual gathering—transfer to a platter and provide toothpicks for easy serving.
Pierogies are a staple of Eastern European cuisine, especially Polish households, where they are traditionally filled with potato, cheese, sauerkraut, or meat. Pairing them with kielbasa reflects a common home-cooking practice in Central and Eastern Europe: combining dumplings with smoked sausages and simple roasted accompaniments. This sheet pan method modernizes the traditional preparations by using frozen dumplings and a one-tray roasting technique for convenience.
In the summer, use sweet corn kernels and cherry tomatoes with a lighter sausage to keep the tray bright. In fall and winter, swap bell peppers for roasted root vegetables like carrots and parsnips and add a pinch of smoked paprika or caraway seeds for deeper autumnal notes. For holiday gatherings, consider adding apple slices to the tray for a sweet-savory contrast that pairs wonderfully with smoked kielbasa.
Assemble the seasoned mixture in a large bowl and store in the fridge for up to 12 hours before roasting. This allows flavors to meld and saves time on busy evenings. For packed lunches, portion into airtight containers and refrigerate; reheat in an oven or toaster oven to retain texture. If you double the recipe, spread across two pans to maintain space between pieces to ensure proper roasting and crisping.
This dish proves that simple ingredients and a hot oven can result in a memorable, homey meal. Try it once and you will likely find it becoming a dependable favorite for busy nights and casual gatherings alike. Invite friends or family to customize toppings and watch how this tray disappears.
Toss the pierogies and vegetables in enough oil to just coat them; too much oil prevents crisping.
Flip the pierogies and give the tray a gentle stir halfway through roasting to ensure even browning.
Spread everything in a single layer; crowding causes steaming and soft results rather than roasted crispness.
Use a rimmed sheet pan to catch any drips and allow good airflow around ingredients for even roasting.
This nourishing easy sheet pan pierogies and kielbasa recipe is sure to be a staple in your kitchen. Enjoy every moist, high protein slice — it is perfect for breakfast or as a wholesome snack any time.
Yes. If you prefer, use fully cooked chicken or turkey sausage in the same quantity and roast exactly as instructed. Adjust salt to taste.
Yes. Spread items in a single layer and roast for 8 to 12 minutes in a 400 F oven to re-crisp leftovers, rather than using a microwave which makes them soft.
This Easy Sheet Pan Pierogies and Kielbasa recipe makes perfectly juicy, tender, and flavorful steak every time! Serve with potatoes and a side salad for an unforgettable dinner in under 30 minutes.
Preheat oven to 425 F and prepare a large rimmed sheet pan with parchment paper or a light spray of oil so the tray is ready when you finish tossing everything together.
In a large mixing bowl add frozen pierogies, sliced kielbasa, chopped bell peppers, sliced onion, and broccoli florets. Work quickly so pierogies stay frozen until they hit the oven.
Drizzle 3 tablespoons olive oil over the mixture and sprinkle garlic powder, paprika, onion powder, salt, and pepper. Toss gently until everything is evenly coated to promote even browning.
Arrange the mixture on the prepared sheet pan in a single layer with space between pieces to avoid steaming. Use a second pan if necessary to maintain airflow around ingredients.
Bake for 25 to 30 minutes, flipping pierogies and stirring vegetables and kielbasa about halfway through. Look for golden-brown edges and caramelized vegetables as visual cues.
Remove from oven and, if desired, drizzle with 2 tablespoons melted garlic butter and sprinkle with chopped parsley or green onions. Serve warm with sour cream for dipping.
Last Step: Please leave a rating and comment letting us know how you liked this recipe! This helps our business to thrive and continue providing free, high-quality recipes for you.
Leave a comment & rating below or tag
@culinya on social media!

Ultra-fudgy brownies crowned with gooey mini marshmallows and a quick-set chocolate icing. Crowd-pleasing, nostalgic, and irresistibly rich in every bite.

Buttery shortbread crust meets a silky brown sugar pecan topping in these easy pecan pie bars. Just 10 minutes of prep for bakery-level bliss.

A flawlessly smooth pumpkin cheesecake with warm spice, buttery graham crust, and no cracks. Finish with caramel and rum-kissed whipped cream.
Leave a comment & rating below or tag @culinya on social media!
Enjoyed this recipe? Share it with friends and family, and don't forget to leave a review!
This recipe looks amazing! Can't wait to try it.
Comments are stored locally in your browser. Server comments are displayed alongside your local comments.

Join to receive our email series which contains a round-up of some of our quick and easy family favorite recipes.
