
Homemade Almond Joys

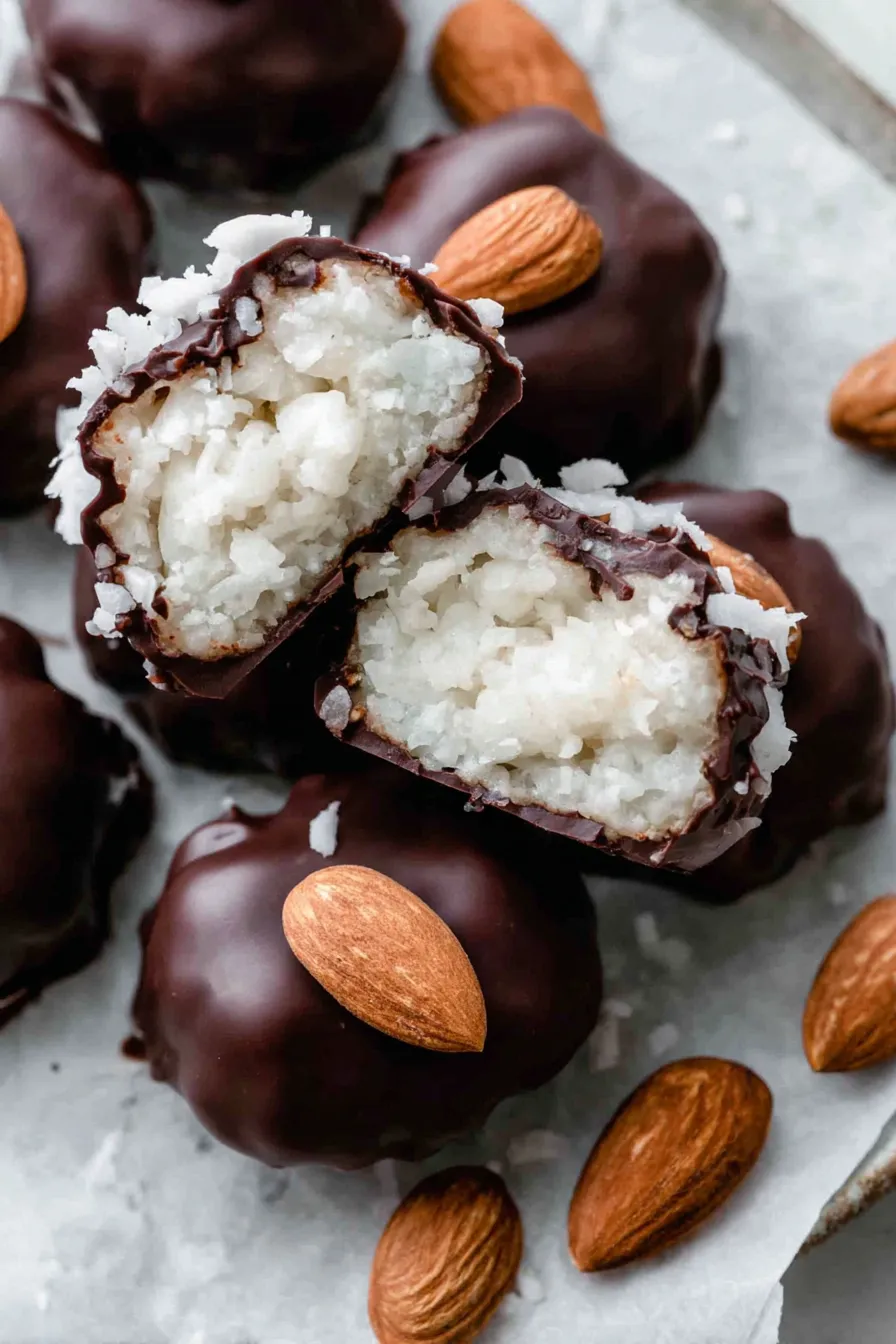
Classic homemade Almond Joys: chewy coconut logs topped with roasted almonds and dipped in rich semi-sweet chocolate—easy, nostalgic, and perfect for gifting.
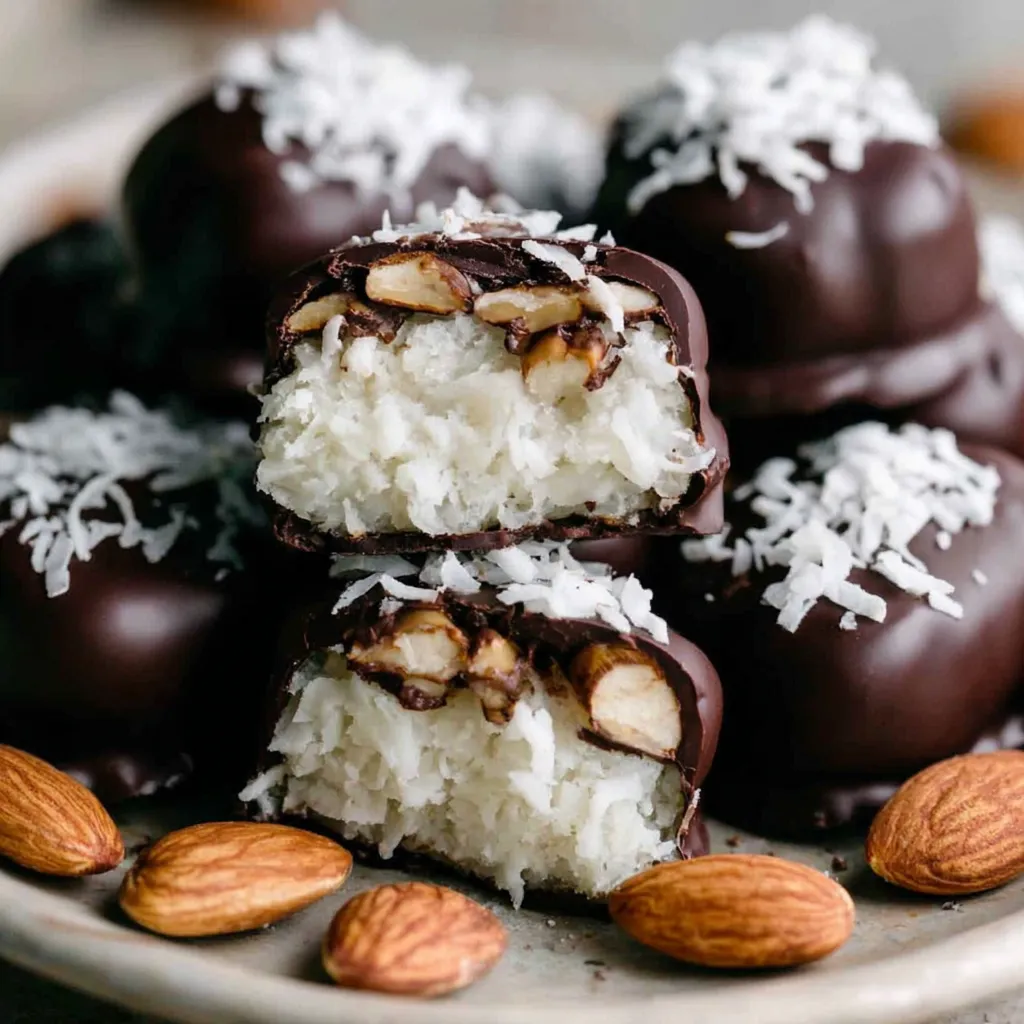
This recipe for homemade Almond Joys is my grown-up answer to the candy bars I begged for as a kid. I first learned to make these one rainy afternoon when the pantry was full of shredded coconut and a lonely bag of marshmallows; the first batch was an experiment that turned into an immediate favorite. The contrast—chewy, sweet coconut nestled under a toasted almond and all enrobed in glossy chocolate—is exactly the sort of texture play that turns simple ingredients into something memorable. I love how each bite offers a crisp almond, chewy coconut center, and a smooth chocolate shell that melts on the tongue.
What makes this approach special is the focus on homemade texture: the coconut is bound with a marshmallow-corn syrup base instead of condensed milk, which gives the centers a light chew and keeps the flavors bright. I prefer using roasted whole almonds because they add that toasty note that offsets the sweetness; a lightly salted almond makes each piece sing. These candies are ideal for holiday plates, thoughtful gifts wrapped in parchment, or as a weekend project with kids—mixing and forming is hands-on and satisfying.
Why You'll Love This Recipe
- Made with pantry staples—mini marshmallows, shredded coconut, and chocolate—so you can whip a batch in a single trip to the store.
- Quick active time: about 20 minutes of hands-on work and a short chill period; great for last-minute treats and parties.
- Customizable size and sweetness—make them small for bite-sized snacks or larger for richer bars; choose dark or semi-sweet chocolate to control sweetness.
- Freezer-friendly centers and make-ahead options: form and store the coconut logs in the freezer, then dip as needed for fresher coating.
- Crowd-pleaser for nut lovers—each piece has a full roasted almond for a satisfying crunch and attractive presentation.
- Great for gifting: stack them in a small box with parchment for a beautiful homemade present.
My family gobbled these up the first time I made them during holiday cookie season. I remember wrapping a box for our neighbor and hearing the next day that they were gone within hours; the texture and almond on top make them feel special even though they’re so easy to make. Over the years I’ve tweaked the chocolate ratio and tried different almonds—roasted, salted, and even smoked—to discover the small variations that make each batch unique. This recipe consistently brings smiles at gatherings.
Ingredients
- Mini marshmallows: 1 1/3 cups mini marshmallows (about 13 regular marshmallows). They melt evenly and create the ideal chew when combined with corn syrup—use name-brand marshmallows for consistent texture.
- Light corn syrup: 1/2 cup. Helps stabilize the marshmallow base and prevents crystallization; it keeps the centers soft and pliable after chilling.
- Salt: A pinch. Balances sweetness and enhances the toasted almond flavor—use fine sea salt or kosher.
- Shredded coconut: 8 ounces (sweetened or unsweetened). Sweetened coconut gives a candy-like finish; unsweetened yields a slightly more toasted, coconut-forward profile. Prefer medium-fine shred for easy forming.
- Vanilla extract: 1 teaspoon. Adds warmth and rounds the sugar notes; pure vanilla extract gives the best aroma.
- Whole almonds: 25–30 roasted whole almonds. Roasted almonds add crunch and depth—lightly salted or plain both work; toast raw almonds for 8–10 minutes at 350°F for a fresher flavor.
- Semi-sweet chocolate: 12 ounces good-quality semi-sweet chocolate or almond bark. Choose a chocolate with 50–60% cacao for a balance of bitterness and sweetness; chop finely for even melting.
Instructions
Melt the marshmallow base: In a medium saucepan set over medium heat, combine 1/2 cup light corn syrup, 1 1/3 cups mini marshmallows, and a pinch of salt. Stir constantly with a heatproof rubber spatula until the marshmallows are completely melted and glossy—about 3 to 5 minutes. Continue stirring for an additional minute off-heat to ensure even consistency and prevent a grainy texture. Fold in coconut and vanilla: Remove the pan from heat and quickly stir in 8 ounces shredded coconut and 1 teaspoon vanilla extract until fully incorporated. The mixture will look sticky and slightly loose; it firms as it cools. Transfer to a bowl, cover tightly, and refrigerate for at least 1 hour or until well chilled—this step is crucial for shaping. Shape the centers: Line a baking sheet with parchment. Using a small cookie scoop or wet hands, scoop the chilled coconut mixture into small logs roughly the size of a fat Tootsie Roll (or double for larger pieces). Press a single roasted almond firmly into the top of each log. Aim for about 25 small pieces; spacing on the pan prevents sticking. Chill before coating: Place the pan with formed pieces in the refrigerator or freezer until very firm—15 minutes in the freezer or 30–60 minutes in the fridge. Colder centers are easier to dip and keep their shape when you coat them in chocolate. Melt the chocolate: Chop 12 ounces semi-sweet chocolate and place in a microwave-safe bowl. Microwave in 20-second bursts at medium power, stirring between each interval, until fully melted and smooth. Alternatively, use a double boiler over gently simmering water, stirring frequently to avoid seizing. Dip and set: Using two forks, dip each coconut-almond piece into the melted chocolate, tapping the fork gently on the bowl rim to remove excess. Place coated pieces on a parchment-lined tray. Allow chocolate to set at room temperature or chill briefly in the fridge until fully firm.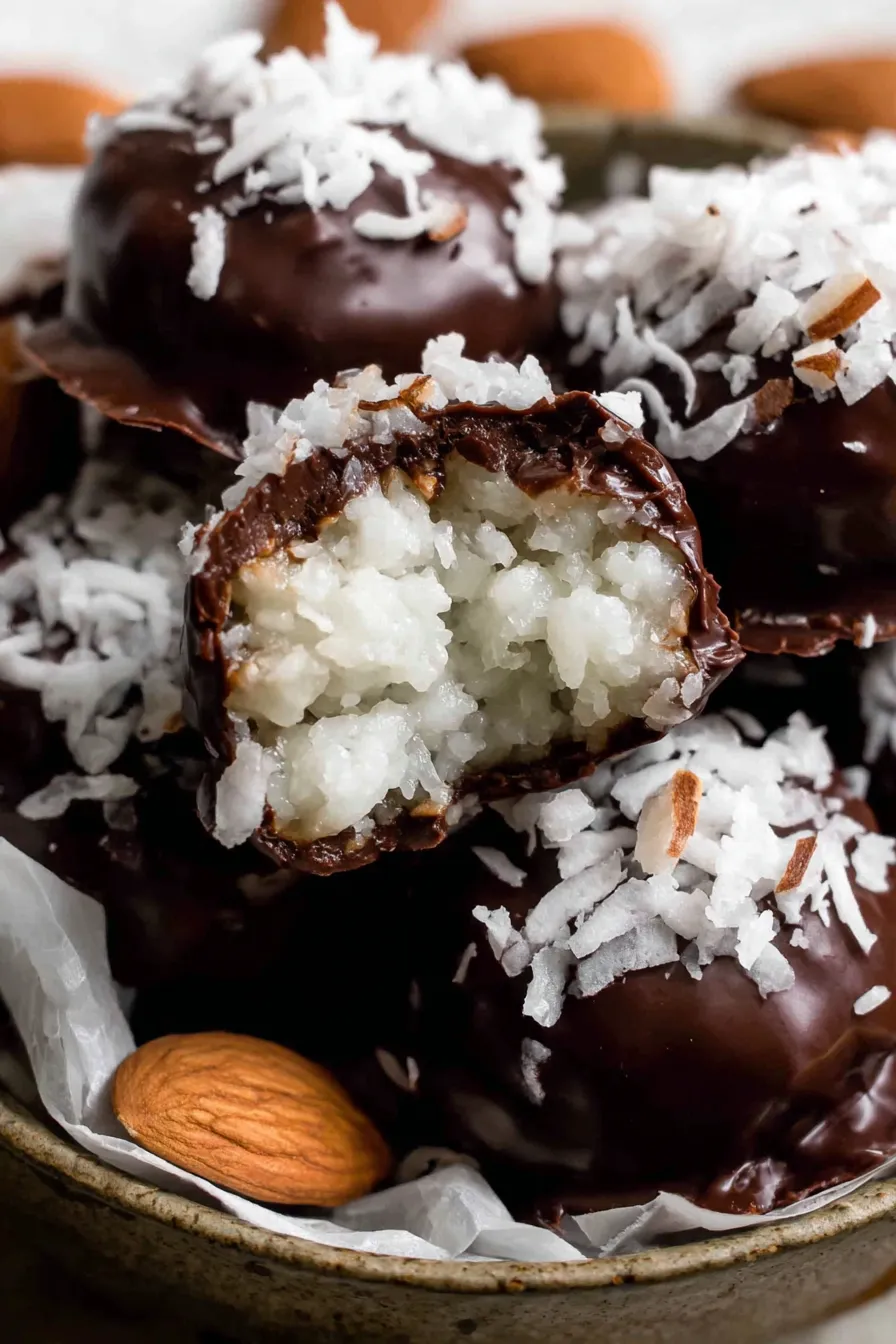
You Must Know
- These treats are freezer-friendly: formed coconut logs can be frozen for up to 3 months; dip straight from frozen for a crisper shell.
- Using good-quality chocolate dramatically improves flavor—choose couverture or a trustworthy baking chocolate for gloss and snap.
- Substitute vegan marshmallows to make them vegetarian-friendly; note texture will vary slightly without gelatin.
- Store in an airtight container at cool room temperature for up to 5 days or refrigerate for up to 2 weeks; avoid humid environments to keep the chocolate from sweating.
My favorite aspect of these is their assembly-line efficiency: make the coconut center one day, chill or freeze, and dip the next. That separation of work makes them perfect for busy hosts—one evening for prep, the next for dipping and packaging. I’ve gifted these in small tins during holiday bake sales and always get requests for the “secret” ingredient: the corn syrup, which gives the centers a professional chew that canned fillings can’t match.
Storage Tips
For best texture, store finished pieces in an airtight container layered with parchment between layers at cool room temperature (65–70°F) for up to 5 days. If you live in a warm climate, refrigerate to prevent melting, but allow candies to come to room temperature for 15–20 minutes before serving to avoid a dull, cold chocolate flavor. For long-term freezing, place dipped pieces on a tray until firm, then transfer to an airtight freezer-safe container with parchment, separating layers; freeze up to 3 months. To rehydrate slightly after freezing, thaw in the fridge and then bring to room temperature to restore chewiness.
Ingredient Substitutions
If you prefer less sugar, swap semi-sweet for dark chocolate (60–70% cacao) which cuts sweetness while adding complexity. For a dairy-free option, use dairy-free chocolate and vegan marshmallows—note the texture may be slightly less glossy. Unsweetened shredded coconut yields a toastier, less candy-like center; increase vanilla to 1 1/2 teaspoons for extra warmth. If you don’t have corn syrup, use 1/3 cup honey plus 2 tablespoons light syrup as a last resort—expect a more honeyed flavor and slightly different chew.
Serving Suggestions
Arrange these on a small platter with other confections like salted caramels or shortbread for contrast. Garnish trays with toasted coconut flakes or a light dusting of flaky sea salt on top of the chocolate for a gourmet touch. They pair beautifully with coffee or a nuttier port for an after-dinner treat. For party favors, stack three pieces in a small cellophane bag tied with ribbon—guests appreciate the homemade charm and attractive presentation.
Cultural Background
Almond Joys are an American candy bar inspired by the classic combination of coconut, almonds, and chocolate—flavors popularized in the mid-20th century snack market. This homemade version honors that nostalgic profile while allowing hands-on technique. Coconut became a popular dessert ingredient in North America due to improved importation and processing in the early 1900s, and its pairing with chocolate and nuts has long been a mainstay in confectionery traditions across the United States.
Seasonal Adaptations
Customize for seasons by switching chocolate: use white chocolate in spring and summer and dark chocolate in winter for a richer finish. For a holiday twist, press a candied orange peel strip beside the almond and dust the chocolate with a touch of edible gold for festive sparkle. In autumn, toast the coconut longer and add a pinch of ground cinnamon to the coconut mix for an aromatic seasonal note.
Meal Prep Tips
Break the process into stages for efficient prep: make and chill the coconut centers up to 3 days ahead, or freeze them for longer storage. Melt chocolate in small batches to maintain temper and avoid repeated reheating which can dull gloss. Use two forks or a dipping tool to speed up coating, and keep a bowl of warm water nearby to occasionally smooth the forks for quicker, cleaner dips. Label containers with dates if gifting or freezing.
These homemade Almond Joys reward small investments of time with a luxurious result—crisp almond, chewy coconut, and rich chocolate in every bite. Share them, wrap them, and make the flavors your own.
Pro Tips
Chill the coconut centers thoroughly before dipping to get a cleaner chocolate coat.
Chop chocolate finely so it melts evenly; use a microwave in short bursts or a double boiler.
If the chocolate thickens, add a teaspoon of coconut oil to loosen it slightly, but avoid too much or the shell will be soft.
Press almonds firmly but gently into the centers so they remain centered during dipping.
This nourishing homemade almond joys recipe is sure to be a staple in your kitchen. Enjoy every moist, high protein slice — it is perfect for breakfast or as a wholesome snack any time.
FAQs about Recipes
Can I freeze the coconut centers before coating?
Yes. Formed coconut centers can be frozen for up to 3 months; dip them from frozen for best convenience.
How can I make these dairy-free or vegetarian?
Use vegan marshmallows and dairy-free chocolate, but expect a slight change in texture and shine.
Tags
Homemade Almond Joys
This Homemade Almond Joys recipe makes perfectly juicy, tender, and flavorful steak every time! Serve with potatoes and a side salad for an unforgettable dinner in under 30 minutes.
Ingredients
Coconut-Almond Filling
Coating
Instructions
Melt the marshmallow base
Combine corn syrup, mini marshmallows, and a pinch of salt in a medium saucepan over medium heat. Stir constantly until marshmallows melt and the mixture is glossy, about 3–5 minutes, then remove from heat and stir an additional minute.
Mix in coconut and vanilla
Stir shredded coconut and vanilla into the melted marshmallow mixture until fully incorporated. Transfer to a bowl, cover, and refrigerate for at least 1 hour until well chilled.
Form the centers
Scoop chilled mixture into small logs using a small cookie scoop or wet hands. Place on a parchment-lined baking sheet and press a roasted almond on top of each log. Aim for about 25 small pieces.
Chill before coating
Chill the formed pieces in the refrigerator or freezer until very firm—15 minutes in the freezer or 30–60 minutes in the fridge—to make dipping easier.
Melt the chocolate
Place chopped chocolate in a microwave-safe bowl and heat in 20-second intervals, stirring between each until smooth. Alternatively, melt in a double boiler over simmering water.
Dip and set
Dip each coconut-almond piece into the melted chocolate using two forks, tap to remove excess, and place on parchment to set. Allow the chocolate to firm at room temperature or chill briefly.
Last Step: Please leave a rating and comment letting us know how you liked this recipe! This helps our business to thrive and continue providing free, high-quality recipes for you.
Nutrition
Did You Make This?
Leave a comment & rating below or tag
@culinya on social media!
Categories:
You might also like...

Fudgy Marshmallow Mud Brownies
Ultra-fudgy brownies crowned with gooey mini marshmallows and a quick-set chocolate icing. Crowd-pleasing, nostalgic, and irresistibly rich in every bite.

Buttery Pecan Pie Bars
Buttery shortbread crust meets a silky brown sugar pecan topping in these easy pecan pie bars. Just 10 minutes of prep for bakery-level bliss.

Silky No-Crack Pumpkin Cheesecake
A flawlessly smooth pumpkin cheesecake with warm spice, buttery graham crust, and no cracks. Finish with caramel and rum-kissed whipped cream.
Did You Make This?
Leave a comment & rating below or tag @culinya on social media!
Rate This Recipe
Share This Recipe
Enjoyed this recipe? Share it with friends and family, and don't forget to leave a review!
Comments (1)
This recipe looks amazing! Can't wait to try it.
Comments are stored locally in your browser. Server comments are displayed alongside your local comments.

Hi, I'm Sophia!
What's Popular

30-Minute Meals!
Join to receive our email series which contains a round-up of some of our quick and easy family favorite recipes.