
>>

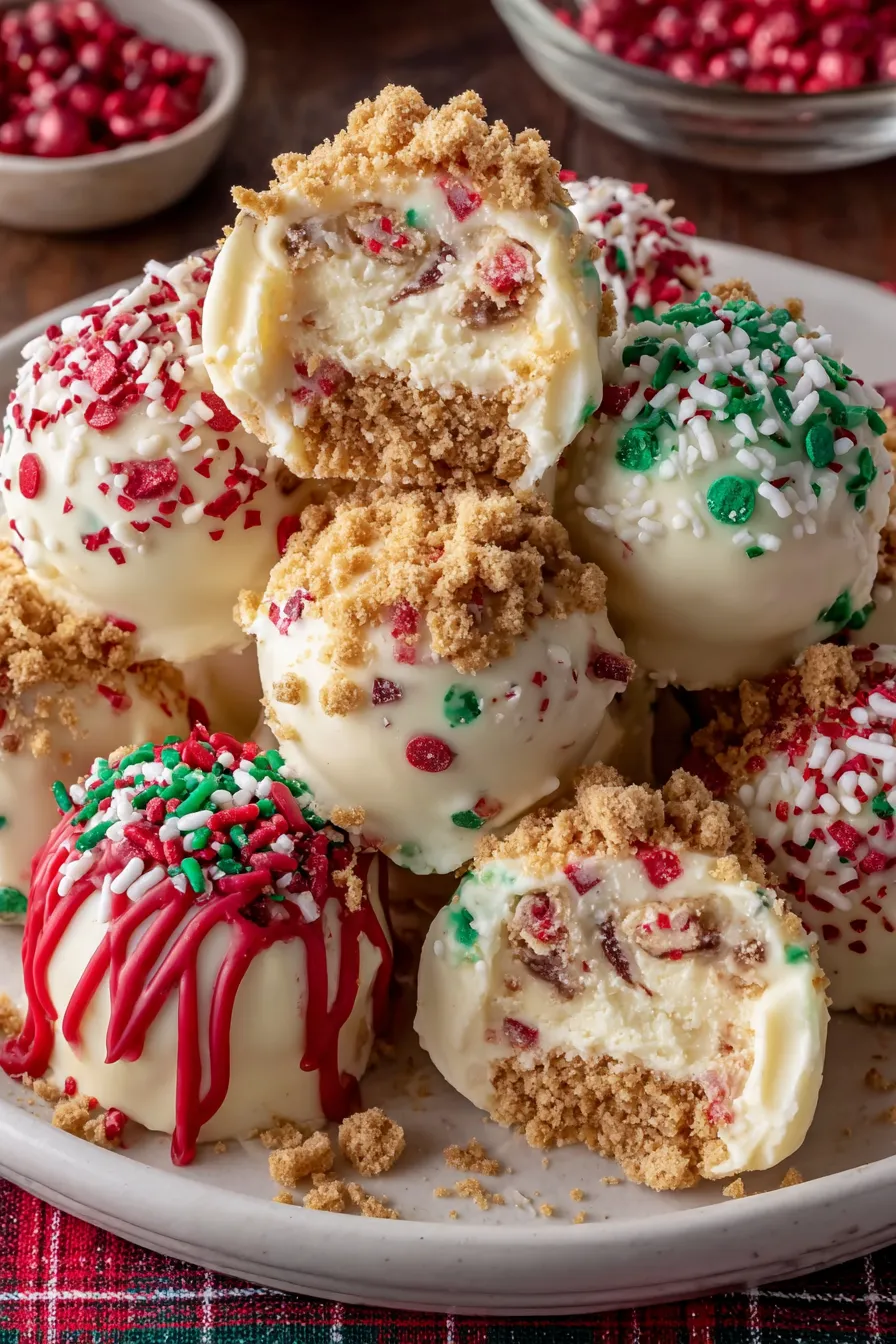
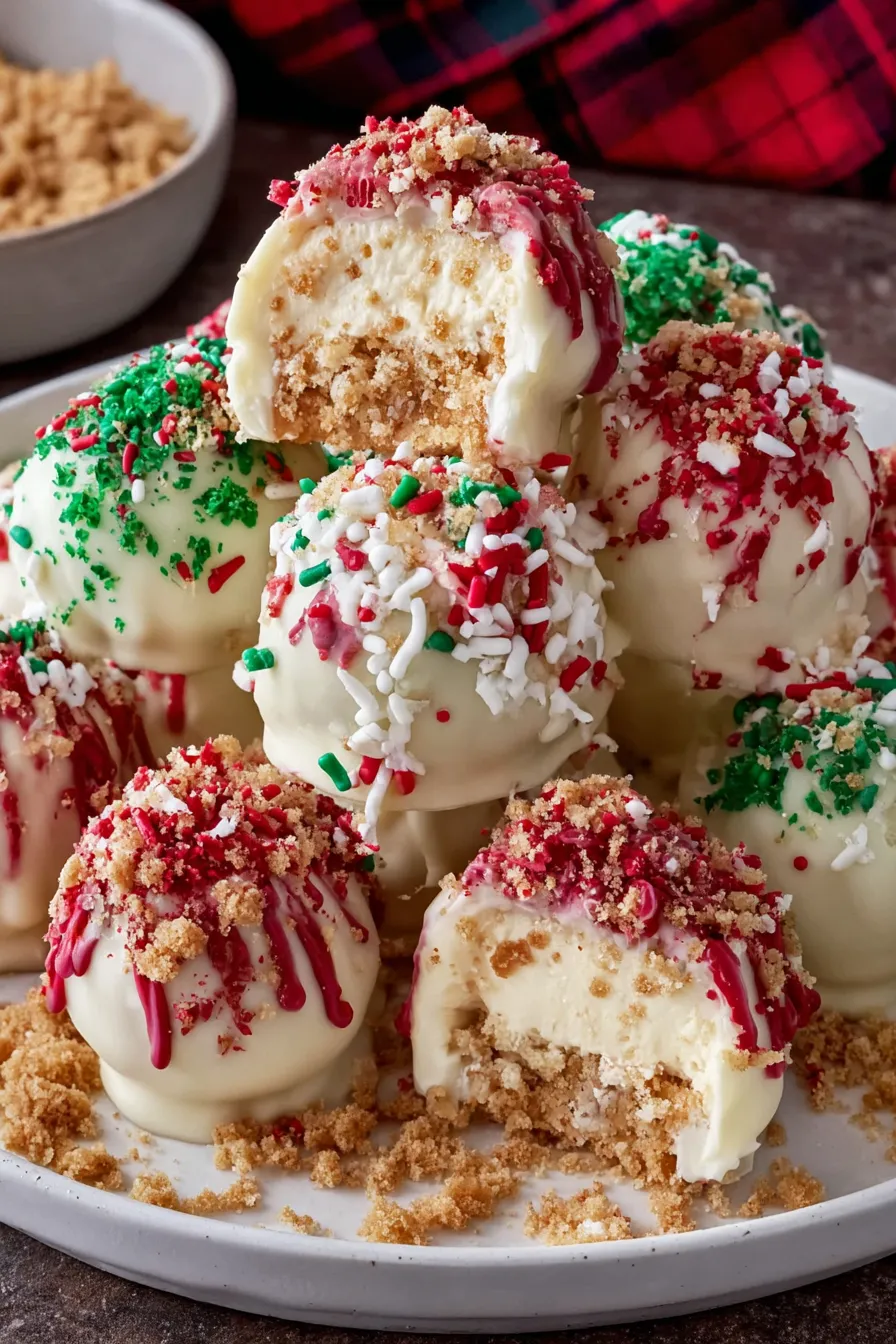
Festive, bite-sized no-bake treats made with creamy cheesecake centers, white chocolate coating, and colorful holiday decorations — perfect for parties and cookie exchanges.
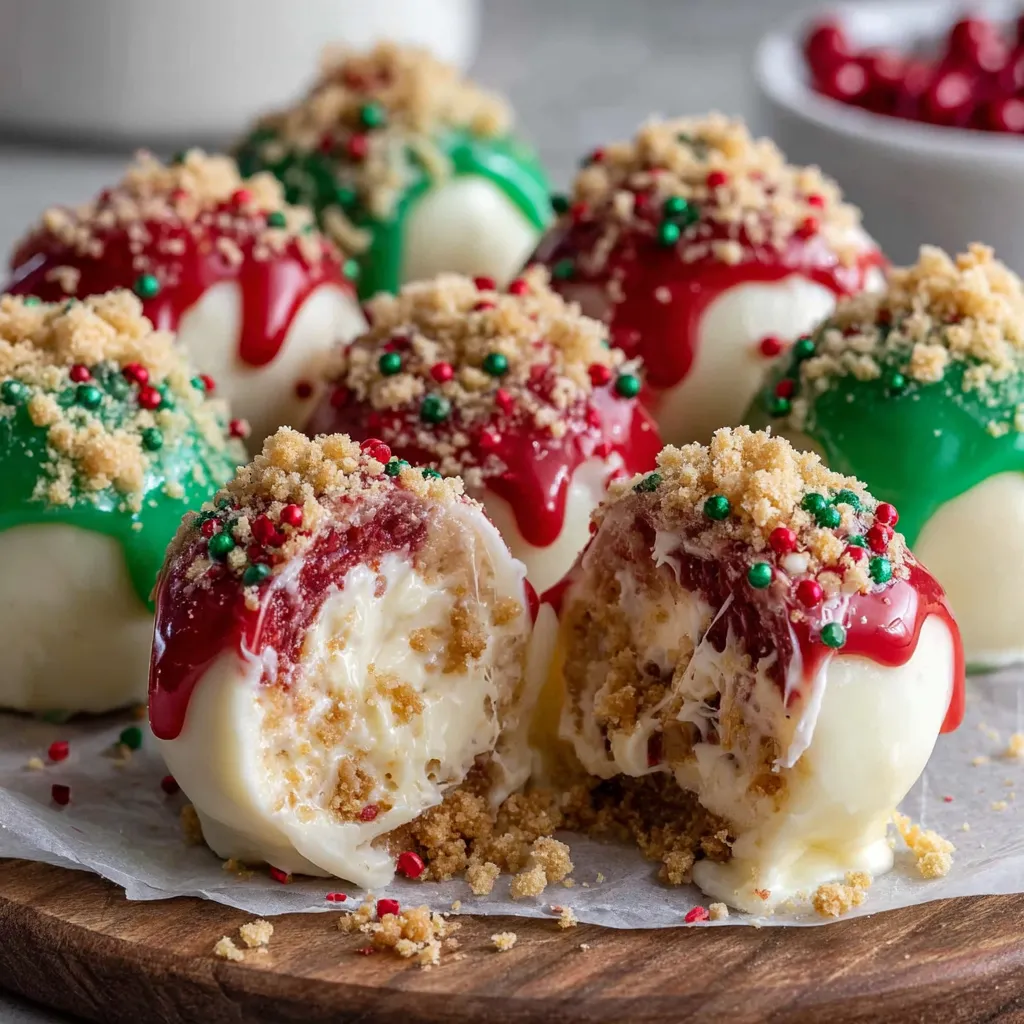
This recipe for No-Bake Christmas Cheesecake Bites began as a last-minute idea one snowy December when I needed something sweet, festive, and quick for a neighborhood cookie swap. I discovered this combination by adapting a classic no-bake cheesecake filling and turning it into small, hand-sized bites that travel well and disappear fast. The first batch I made used crushed graham crackers for a lightly crunchy interior note; my neighbors declared them the best little holiday morsels they'd tasted that season. What makes these special is the silky white chocolate that surrounds the creamy center — it gives a candy-like snap and a pretty canvas for red and green candy melts and sprinkles.
Texture is everything here: the interior is smooth and tangy from cream cheese balanced by powdered sugar and vanilla, while the graham crumbs add a subtle crumbly contrast. The whipped topping lightens the mixture so the bites are airy rather than dense, and chilling firms them up for easy shaping. I first learned how forgiving the mixture is when I overbeat the cream cheese one year; a quick addition of more whipped topping saved the texture and taught me to trust visual cues over timers. These bites have become my go-to when I want a pretty plate with minimal oven time — great for potlucks, gift tins, and family gatherings.
My family loves the ritual of dipping and decorating these together; one year my youngest insisted on a “sprinkle snowstorm” and each bite came out uniquely charming. I’ve found the recipe forgiving for new bakers — even if your coating is slightly warm, a quick pop in the fridge sets everything beautifully.
I love how these make a holiday platter look polished with minimal effort. One year my elderly neighbor told me they reminded her of the candy trays her mother kept at Christmas — a small compliment that made our tin exchange feel like a true tradition.
Store the bites in a single layer or with parchment between layers inside an airtight container. Refrigerate for up to 5 days; for longer storage freeze on a tray for 1 hour until firm, then transfer to a freezer-safe container with parchment between layers for up to 3 months. Thaw in the refrigerator for a few hours before serving to prevent condensation on the coating. If coatings sweat slightly after refrigeration, allow to rest at room temperature 10–15 minutes before serving for the best flavor.
For a gluten-free version, substitute gluten-free graham crumbs or crushed gluten-free cookies. If avoiding dairy, use dairy-free cream cheese and dairy-free white chocolate alternatives, but note the texture and flavor will be slightly different. Swap white chocolate chips for almond bark if preferred — it melts similarly. For a tangier center, use 1–2 tablespoons of sour cream instead of some whipped topping, but keep the mixture firm enough to shape.
Serve on a festive platter lined with doilies or add edible gold leaf for an upscale look. These pair well with coffee, mulled wine, or a simple dessert wine. For a kid-friendly display, arrange them in colorful paper candy cups. They make excellent additions to cookie tins and can be presented in bakery boxes for gifting.
Miniature no-bake cheesecake confections are an American adaptation of classic chilled cheesecakes that became popular as home refrigeration improved. Turning desserts into bite-sized pieces is a modern entertaining practice that helps with portion control and presentation. Decorating with colored candy melts and sprinkles is a festive tradition tied to holiday confections and party baking culture.
For winter flavors, add 1/4 teaspoon ground cinnamon or orange zest to the filling. At Valentine’s Day, use pink and red candy melts with heart sprinkles; for spring, choose pastel colors. Incorporate peppermint extract (start with 1/4 teaspoon) for a minty holiday variation, or fold in 2 tablespoons crushed candy cane into the crumbs for crunch.
Make the filling up to two days ahead, cover, and refrigerate. Form and freeze shaped balls on a tray, then dip and decorate from frozen — this shortens assembly time for parties. Bring chilled bites to room temperature for 10–15 minutes before serving for the best mouthfeel.
These no-bake bites are a small, joyful way to celebrate the season. They’re forgiving, quick, and always a crowd favorite — give them a try and make them your own with colors and flavors that fit your holiday table.
Soften cream cheese to room temperature for a smooth, lump-free filling.
Chill the mixture before shaping to make rolling easy and tidy.
Work in small batches when dipping to prevent the filling from softening.
If candy melts thicken, add a small amount of vegetable shortening as directed on the package to thin.
Use a fork or dipping tool and tap gently to remove excess coating for an even shell.
This nourishing no-bake christmas cheesecake bites recipe is sure to be a staple in your kitchen. Enjoy every moist, high protein slice — it is perfect for breakfast or as a wholesome snack any time.
Yes. Freeze shaped balls on a tray for 1 hour, then transfer to a freezer-safe container for up to 3 months. Thaw in the fridge before dipping or dip from frozen then allow extra setting time.
Use a good-quality white chocolate or candy melts and ensure melted chocolate cools slightly before folding into the cream cheese. If it seizes, gently warm in very short bursts and stir.
This No-Bake Christmas Cheesecake Bites recipe makes perfectly juicy, tender, and flavorful steak every time! Serve with potatoes and a side salad for an unforgettable dinner in under 30 minutes.
In a large bowl, beat 8 ounces of softened cream cheese until smooth and free of lumps. Add 1/2 cup powdered sugar and 1 teaspoon vanilla extract and mix until glossy and combined, scraping the bowl as needed.
Melt 1 cup white chocolate chips in 20-second bursts in the microwave, stirring between each until smooth. Let cool for 2–3 minutes so it is warm but not hot.
Stir in 1 cup finely crushed graham crackers, then gently fold in 1/2 cup thawed whipped topping to keep the mixture light. Adjust crumbs if mixture is too soft.
Cover and refrigerate the mixture for 30–40 minutes to firm up, which makes shaping into balls much easier.
Using a 1-inch scoop or spoon, portion and roll the chilled mixture into 1-inch balls. Place on a parchment-lined baking sheet and keep chilled until ready to coat.
Dip each ball into the melted white chocolate, tap off excess, then set on parchment. Pipe or drizzle red and green candy melts for festive decoration and add sprinkles while coating is wet.
Let coatings set at room temperature for 15–20 minutes or chill briefly. Store refrigerated up to 5 days or freeze for longer storage.
Last Step: Please leave a rating and comment letting us know how you liked this recipe! This helps our business to thrive and continue providing free, high-quality recipes for you.
Leave a comment & rating below or tag
@culinya on social media!

Ultra-fudgy brownies crowned with gooey mini marshmallows and a quick-set chocolate icing. Crowd-pleasing, nostalgic, and irresistibly rich in every bite.

Buttery shortbread crust meets a silky brown sugar pecan topping in these easy pecan pie bars. Just 10 minutes of prep for bakery-level bliss.

A flawlessly smooth pumpkin cheesecake with warm spice, buttery graham crust, and no cracks. Finish with caramel and rum-kissed whipped cream.
Leave a comment & rating below or tag @culinya on social media!
Enjoyed this recipe? Share it with friends and family, and don't forget to leave a review!
This recipe looks amazing! Can't wait to try it.
Comments are stored locally in your browser. Server comments are displayed alongside your local comments.

Join to receive our email series which contains a round-up of some of our quick and easy family favorite recipes.
