
>>

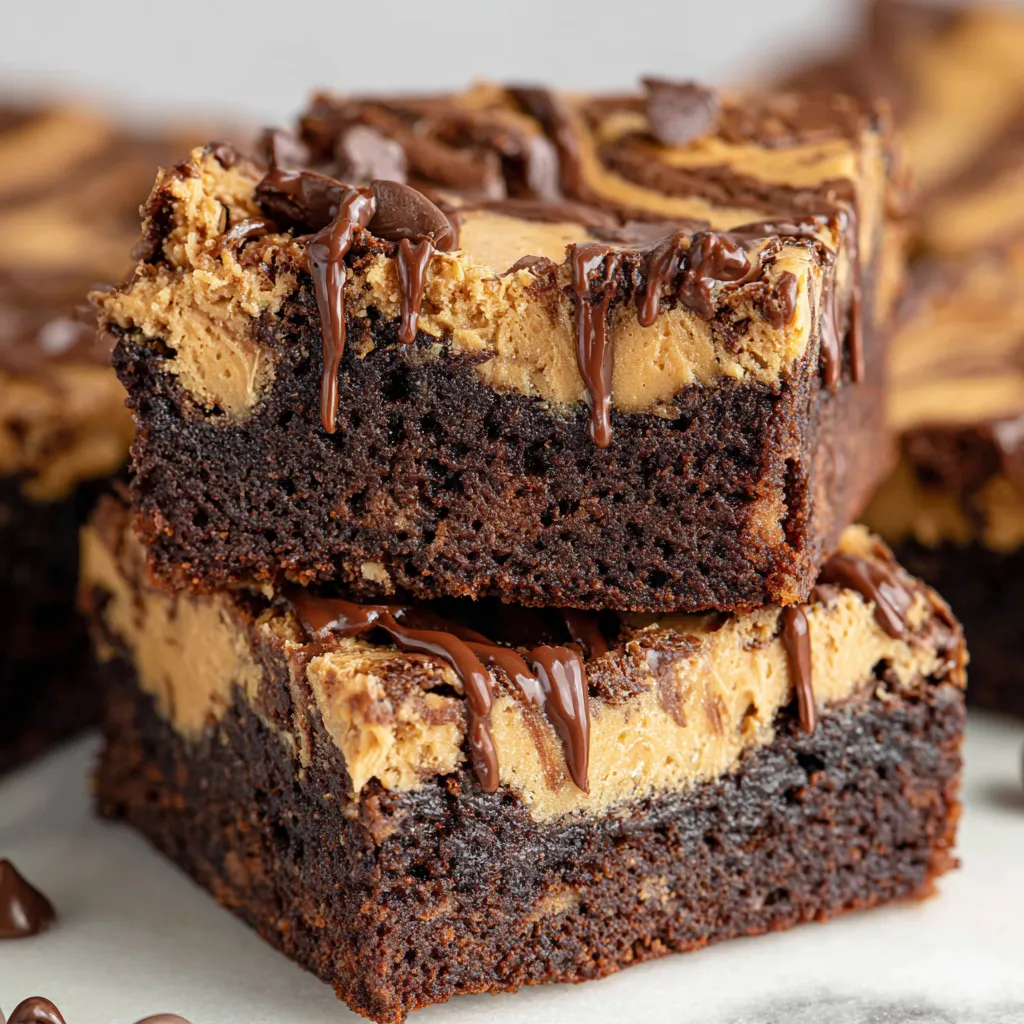
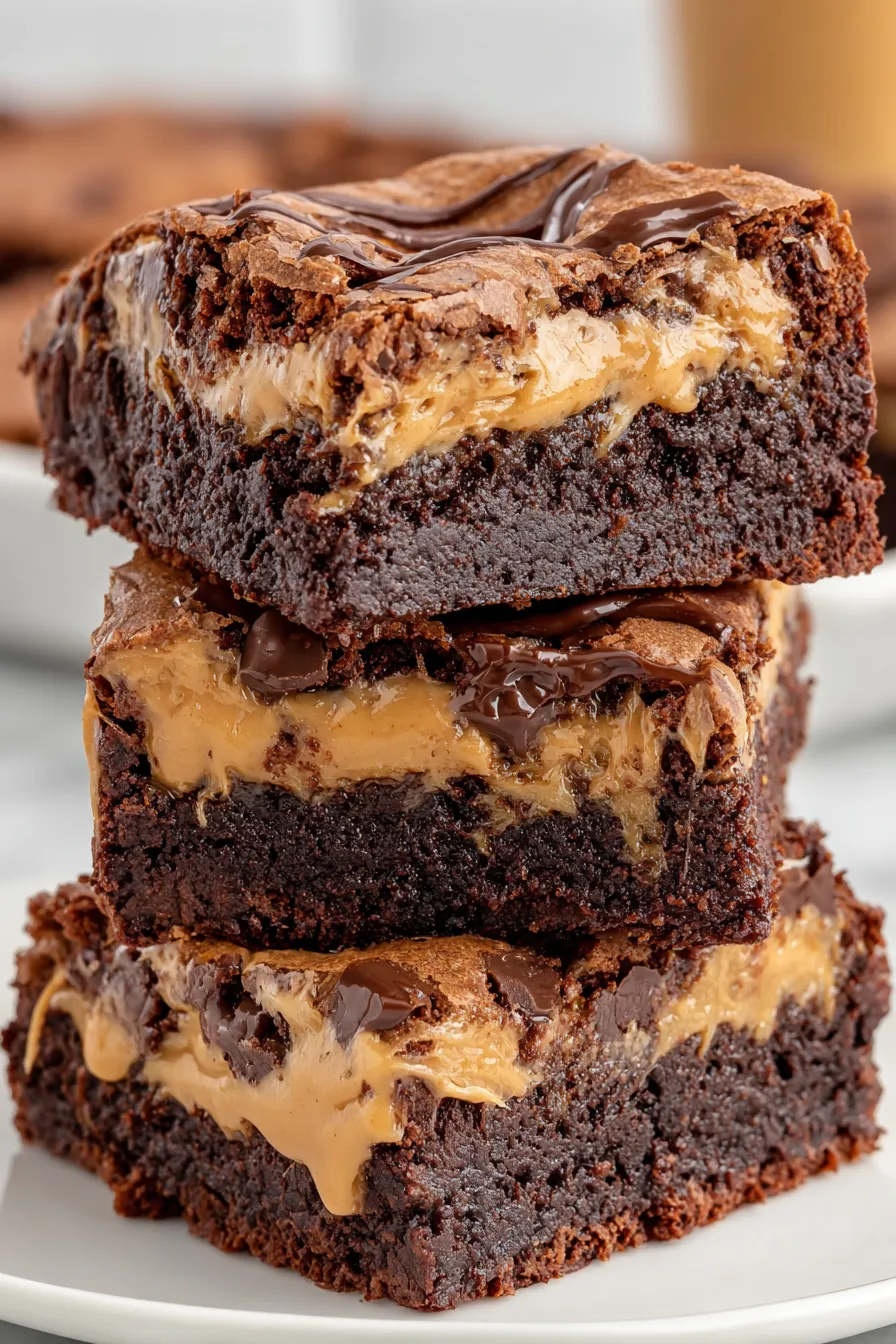
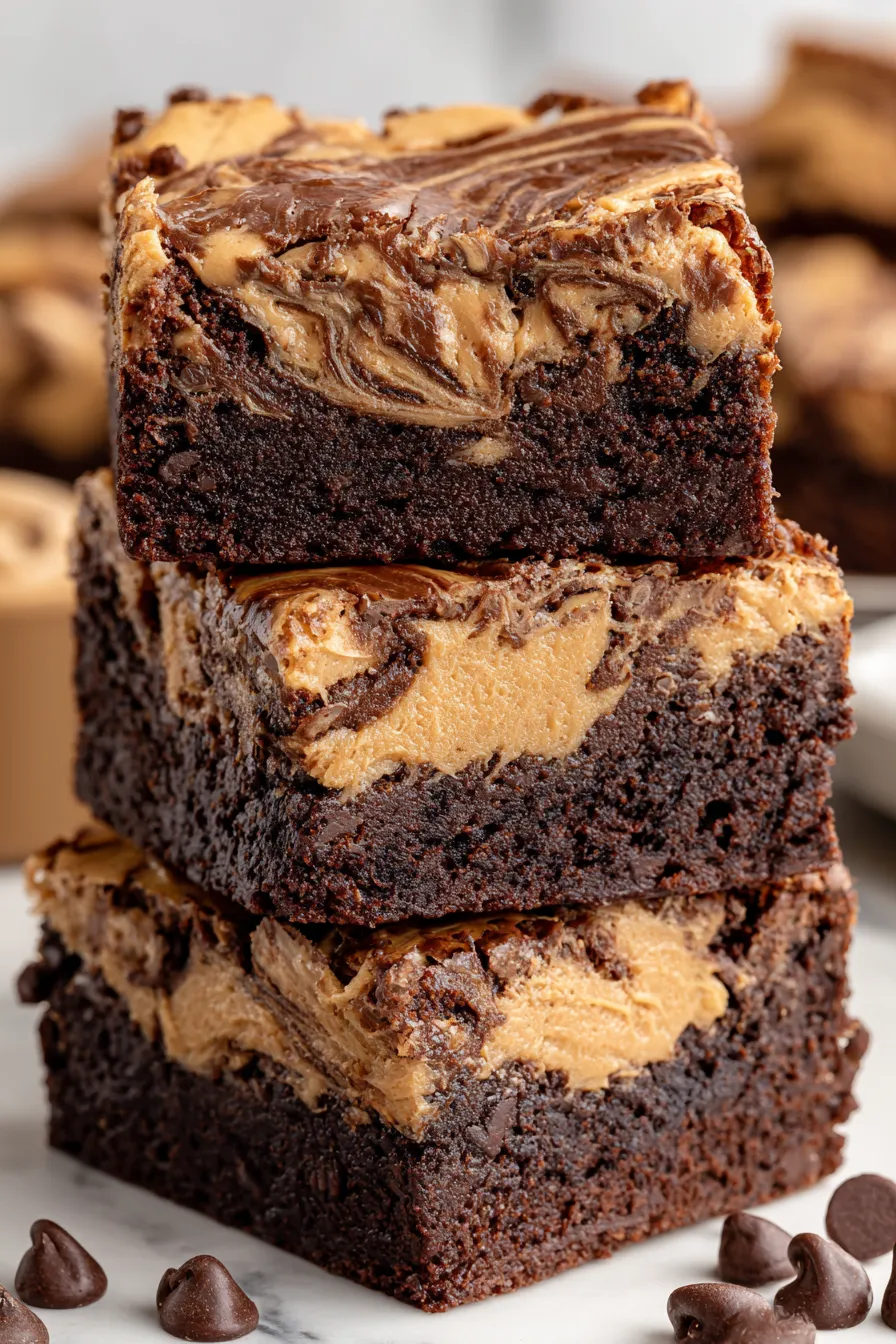
Fudgy chocolate brownies studded with chocolate chips and swirls of creamy peanut butter for a perfect balance of sweet and salty.
This batch of peanut butter brownies arrived in my life on a rainy Saturday afternoon when I wanted something that felt both nostalgic and a little indulgent. I first made them years ago when a friend dropped off a jar of exceptional creamy peanut butter and I wanted to highlight its flavor without masking it. The result was a dense, fudgy square with pockets of peanut butter that melt on the tongue and tiny bursts of chocolate from the chips. Every time I bake this, the house fills with a warm cocoa and roasted nut aroma that draws everyone into the kitchen.
What makes these brownies special is their simplicity and the contrast of textures. The batter is glossy and thick, forming a tender crumb when baked, and the peanut butter swirls add a creamy, slightly salty counterpoint. I love how the chocolate chips keep small molten pockets of chocolate and how the swirl pattern looks rustic and inviting when the pan comes out of the oven. These are the kind of sweets that become part of weekend ritual, sliced into squares and shared over coffee or a glass of cold milk.
I have watched friends and family reach for these brownies repeatedly at gatherings. My niece once declared them her favorite treat and requested them for a small celebration; watching the plate clear in minutes is the kind of reward that keeps me baking this recipe again and again.
My favorite aspect is how forgiving this method is. Even on the first trial I made small adjustments to the swirl and the brownies still came out moist and decadent. Family and friends have commented that the peanut pockets make each square feel like two desserts in one, and that contrast of chocolate warmth and creamy peanut butter is what turns a simple bake into something memorable.
Store cooled squares in an airtight container. At room temperature, keep them on the counter for up to two days away from direct heat. For longer storage refrigerate up to five days; bring to room temperature before serving to allow flavors to bloom. For freezing, place the cooled slices on a baking sheet to flash freeze for an hour, then transfer to a labeled freezer bag. Thaw overnight in the refrigerator or for a few hours on the counter. To refresh, warm at 300 degrees Fahrenheit for 6 to 8 minutes or microwave a single piece for 8 to 12 seconds.
For a gluten-free version, use a 1-to-1 gluten-free flour blend, but expect a slightly different crumb and possibly a shorter bake time. Swap the creamy peanut butter for almond butter or sunflower seed butter for a nut-free option; if using sunflower butter, add a teaspoon of vanilla to balance flavor. For dairy-free brownies choose dairy-free butter and vegan chocolate chips. Reduce sugar by up to 25 percent if you prefer less sweetness, but know it will slightly change the texture and moisture level.
Serve warm with a scoop of vanilla ice cream or a drizzle of warmed chocolate ganache for a decadent presentation. For a casual gathering, arrange squares on a platter with berries to cut the richness. Add flaky sea salt on top of the warm brownies for an extra contrast. These hold well in lunchboxes and pair beautifully with coffee or a glass of cold milk.
Brownies are a classic American treat with origins traced to early 20th-century cookbooks. The combination of chocolate and nuts has been popular for generations; peanut butter variations are a more modern adaptation that celebrate American peanut butter culture. This recipe blends traditional fudgy brownie technique with a swirl inspired by layered desserts that use ribbons of nut butter for texture and flavor contrast.
In cooler months, fold in a tablespoon of espresso powder to deepen the chocolate flavor and use roasted salted peanuts on top for crunch. For summer, serve chilled with a dollop of whipped cream and fresh strawberries. During holidays, add a teaspoon of orange zest to the batter or swap some chocolate chips for peppermint pieces to create festive variations.
To make ahead, bake and cool completely, then cut and separate layers with parchment paper in a shallow container. Store in the refrigerator if serving within five days or freeze for longer keeping. Pack single servings for on-the-go snacks. If making for events, prepare batter the day before, refrigerate tightly covered, and bake fresh the next day for the best texture.
These peanut butter brownies are one of those reliably comforting bakes that become part of family rhythm. They are easy enough for weeknight baking yet special enough for celebrations. I encourage you to make them your own with the suggested swaps and enjoy sharing them with people you care about.
Use room temperature eggs so the batter emulsifies smoothly and the texture is consistent.
Do not overmix after adding flour; fold until just combined to prevent a tough crumb.
Warm the smaller portion of peanut butter slightly before drizzling so it creates distinct swirls instead of sinking.
Coat the chocolate chips in a little flour before adding to the batter to help them stay suspended.
Allow the pan to cool completely before slicing to achieve clean edges.
This nourishing peanut butter brownies recipe is sure to be a staple in your kitchen. Enjoy every moist, high protein slice — it is perfect for breakfast or as a wholesome snack any time.
Check for a few moist crumbs on a toothpick inserted in the center. Overbaked brownies will be dry, so check starting at 25 minutes.
Yes. Use a 1-to-1 gluten-free flour blend and dairy-free butter and chocolate chips. Texture may vary slightly.
This Peanut Butter Brownies recipe makes perfectly juicy, tender, and flavorful steak every time! Serve with potatoes and a side salad for an unforgettable dinner in under 30 minutes.
Preheat oven to 350 degrees Fahrenheit. Line a 9x9 inch pan with parchment paper leaving an overhang. Lightly spray parchment with nonstick spray to ensure easy removal.
Whisk together 3/4 cup flour, 1/2 cup cocoa powder, and 1/2 teaspoon baking powder in a small bowl. Stir in 1/2 cup chocolate chips so they are evenly distributed.
In a medium bowl add 1/2 cup melted cooled butter. Stir in 3/4 cup granulated sugar and 3/4 cup light brown sugar. Add 2 room-temperature extra large eggs, 2 teaspoons vanilla, and 1/2 teaspoon kosher salt. Mix until glossy and combined.
Gently fold the dry mixture into the wet ingredients until just combined. Avoid overmixing to keep the crumb tender and fudgy.
Spread half of the batter into the prepared pan. Dollop teaspoons of 2/3 cup peanut butter over the batter. Add the remaining batter and smooth the top carefully.
Warm the remaining 1/3 cup peanut butter for about 10 seconds, drizzle over the top and swirl with the tip of a knife. Bake 25 to 35 minutes until a toothpick shows moist crumbs. Cool completely before slicing.
Last Step: Please leave a rating and comment letting us know how you liked this recipe! This helps our business to thrive and continue providing free, high-quality recipes for you.
Leave a comment & rating below or tag
@culinya on social media!

Ultra-fudgy brownies crowned with gooey mini marshmallows and a quick-set chocolate icing. Crowd-pleasing, nostalgic, and irresistibly rich in every bite.

Buttery shortbread crust meets a silky brown sugar pecan topping in these easy pecan pie bars. Just 10 minutes of prep for bakery-level bliss.

A flawlessly smooth pumpkin cheesecake with warm spice, buttery graham crust, and no cracks. Finish with caramel and rum-kissed whipped cream.
Leave a comment & rating below or tag @culinya on social media!
Enjoyed this recipe? Share it with friends and family, and don't forget to leave a review!
This recipe looks amazing! Can't wait to try it.
Comments are stored locally in your browser. Server comments are displayed alongside your local comments.

Join to receive our email series which contains a round-up of some of our quick and easy family favorite recipes.
