
>>

A no-bake, crowd-pleasing layered dessert that combines peanut butter cookies, creamy cheese, pudding and whipped topping for an indulgent finish.
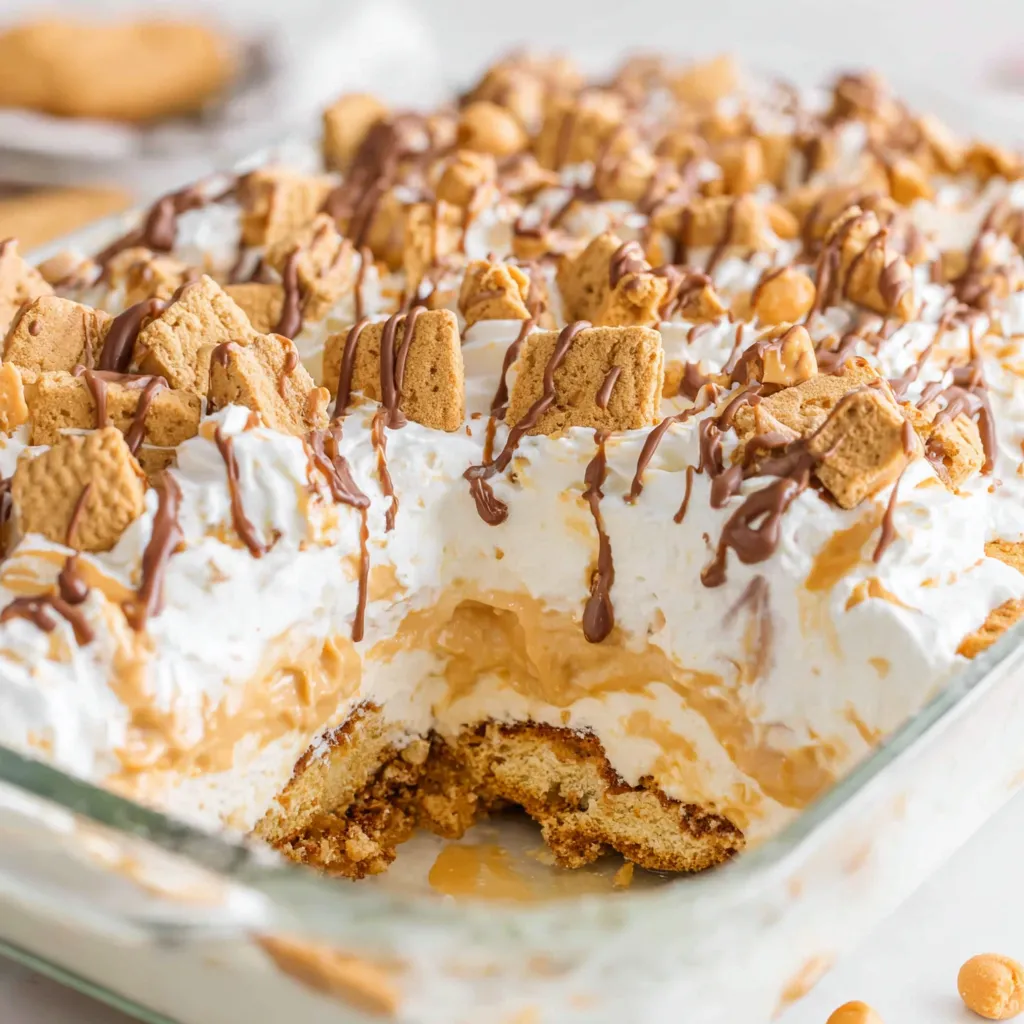
This Peanut Butter Lasagna is the kind of no-bake dessert that turned an ordinary weekend into a small celebration at my house. I first made it for a summer potluck when my neighbor brought a jar of extra-creamy peanut butter and a stack of peanut butter sandwich cookies. The combination of crunchy cookie base, tangy-smooth cream cheese layer, and a silky peanut butter pudding middle created a texture contrast that made everyone come back for seconds. The flavors are nostalgic — like peanut butter & fluff in an upgraded, layered form — and it travels well from kitchen to picnic blanket.
I discovered this assembly-style treat while experimenting with make-ahead desserts that required no oven time but delivered big on flavor. The recipe is simple, forgiving and entirely adaptable: swap cookies, change the chips, or make it lighter with reduced-fat components. The finished dish is sweet and nutty, with a satisfying cream cheese tang that balances the peanut butter. It sets up firm enough for neat slices yet soft enough to scoop, making it perfect for gatherings where you want something showy but easy to prepare.
I remember serving this at a summer cookout where even the most dessert-averse guests took a plate. My sister called it a “grown-up PB&J” because of the layered nostalgia, and my kids loved helping crush the cookies for the topping. Over time I tuned the salt-sweet balance and discovered that a touch of tang from room-temperature cream cheese keeps the dessert from becoming cloying.
My favorite aspect is how adaptable it is — I once swapped the peanut butter chips for dark chocolate shavings and everyone raved about the slight bitterness balancing the sweet layers. Family gatherings turned this into a tradition; several guests told me they keep a mental note to request this dish for every holiday because it’s so easy to scale and transport.
Store leftovers in an airtight container or cover the 9x13 dish tightly with plastic wrap to prevent the whipped topping from absorbing fridge odors. Refrigerated slices will keep well for up to 3 days and remain creamy; for neat slices, freeze the pan for 15–20 minutes before slicing, then transfer portions to a freezer-safe container if you plan to keep them longer. Frozen pieces last up to 3 months — wrap each piece in plastic wrap and a layer of foil. To reheat, let frozen slices thaw in the refrigerator overnight; avoid microwaving to melt the topping.
If you need gluten-free, swap the sandwich cookies for a certified gluten-free peanut butter sandwich cookie or use gluten-free graham-style crumbs mixed with 2–3 tablespoons melted butter. For a lower-fat version, use reduced-fat cream cheese and light whipped topping, though this affects firmness and richness; add an extra 2 tablespoons powdered sugar to stabilize lighter whipped toppings. For a stronger peanut flavor, use natural peanut butter—stir thoroughly before measuring—or mix in 2 tablespoons smooth peanut butter powder if available.
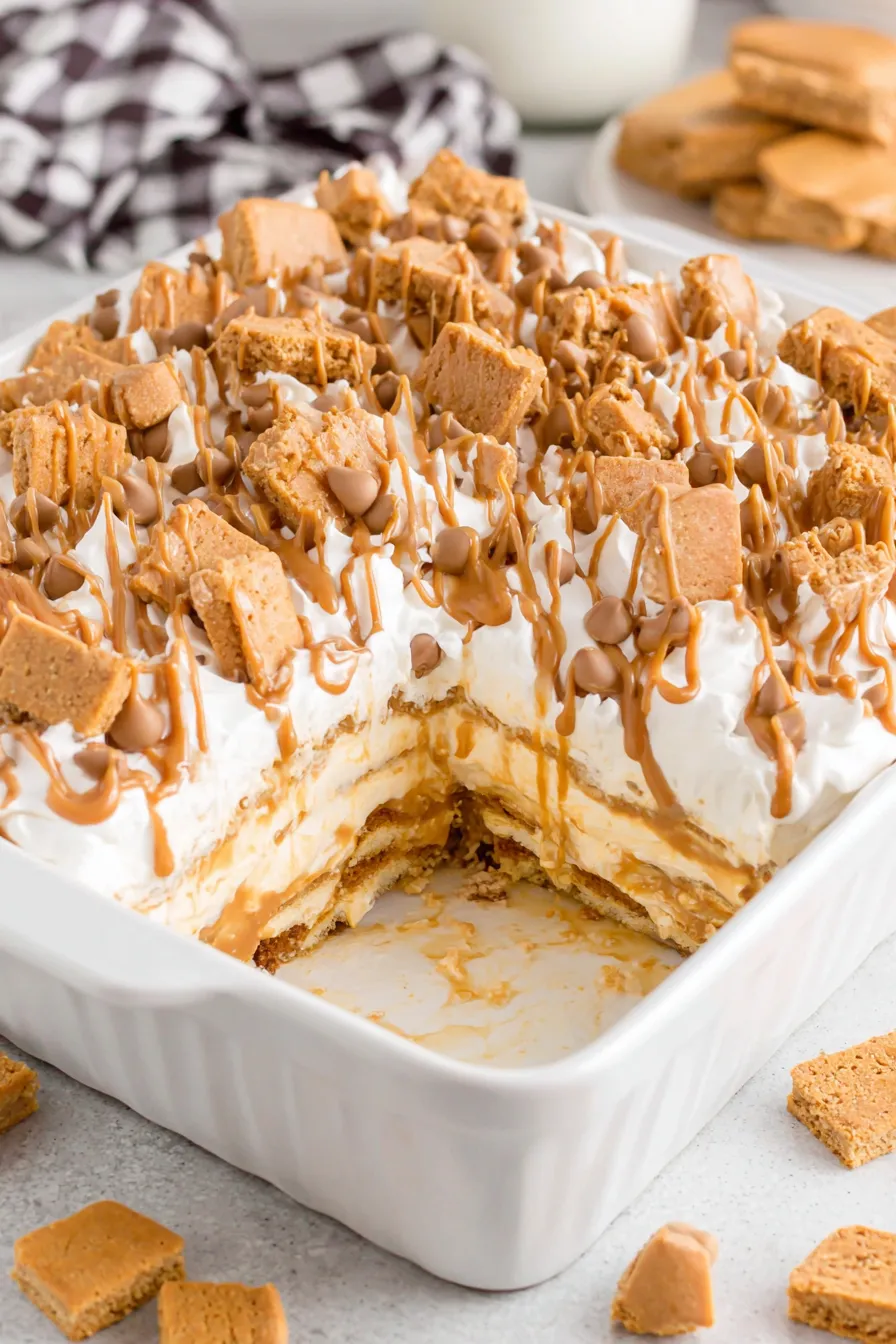
Serve chilled with a small scoop of vanilla ice cream or a dollop of extra whipped topping and a sprinkle of chopped salted peanuts for contrast. It’s lovely alongside fresh berries in summer — strawberries or sliced bananas complement peanut butter beautifully. For a party, cut into small squares and serve on a platter with mini forks; garnish with a light dusting of cocoa powder or drizzle extra melted peanut butter in a zigzag pattern for visual appeal.
Layered, no-bake desserts have a long place in American home cooking where convenience meets nostalgia. This variation borrows the layered assembly idea from classic dessert casseroles—think layered pies and refrigerator desserts—and combines the distinctly American love of peanut butter sandwiches with instant pudding convenience. The result is a modern comfort dish that nods to childhood treats while offering grown-up texture and presentation.
In summer, lighten the dessert with whipped coconut topping (for dairy-free guests), fresh berries and a thin honey drizzle. For winter holidays, stir 1 teaspoon cinnamon or pumpkin pie spice into the pudding layer and top with chopped roasted pecans instead of peanut butter chips. For Valentine’s Day, add a swirl of melted dark chocolate across the top for a festive contrast to the peanut butter.
Assemble the layers up to 24 hours ahead and keep covered in the refrigerator; add cookie crumb topping and chocolate or peanut butter drizzle just before serving to preserve crunch. For potlucks, transport chilled in an insulated carrier and pop into a cooler until time to plate. If making multiple pans, prepare the cookie layer in advance and press into pans immediately before adding the cream cheese mixture for the freshest base.
This layered peanut butter dessert brings people together: it’s easy enough for a beginner to master and versatile enough for a seasoned home cook to customize. Try it once and you’ll have a new go-to for gatherings, holidays or any moment when you want a comforting, no-bake treat to share.
Soften the cream cheese to room temperature to avoid lumps and ensure a smooth, spreadable cream layer.
Chill the pan between layers: a short freeze between spreads helps layers stay distinct for clean slices.
For clean cuts, freeze the pan for 10–15 minutes before slicing and wipe the knife between cuts.
If using natural peanut butter, stir it thoroughly so the oil is reincorporated before measuring.
This nourishing peanut butter lasagna recipe is sure to be a staple in your kitchen. Enjoy every moist, high protein slice — it is perfect for breakfast or as a wholesome snack any time.
This Peanut Butter Lasagna recipe makes perfectly juicy, tender, and flavorful steak every time! Serve with potatoes and a side salad for an unforgettable dinner in under 30 minutes.
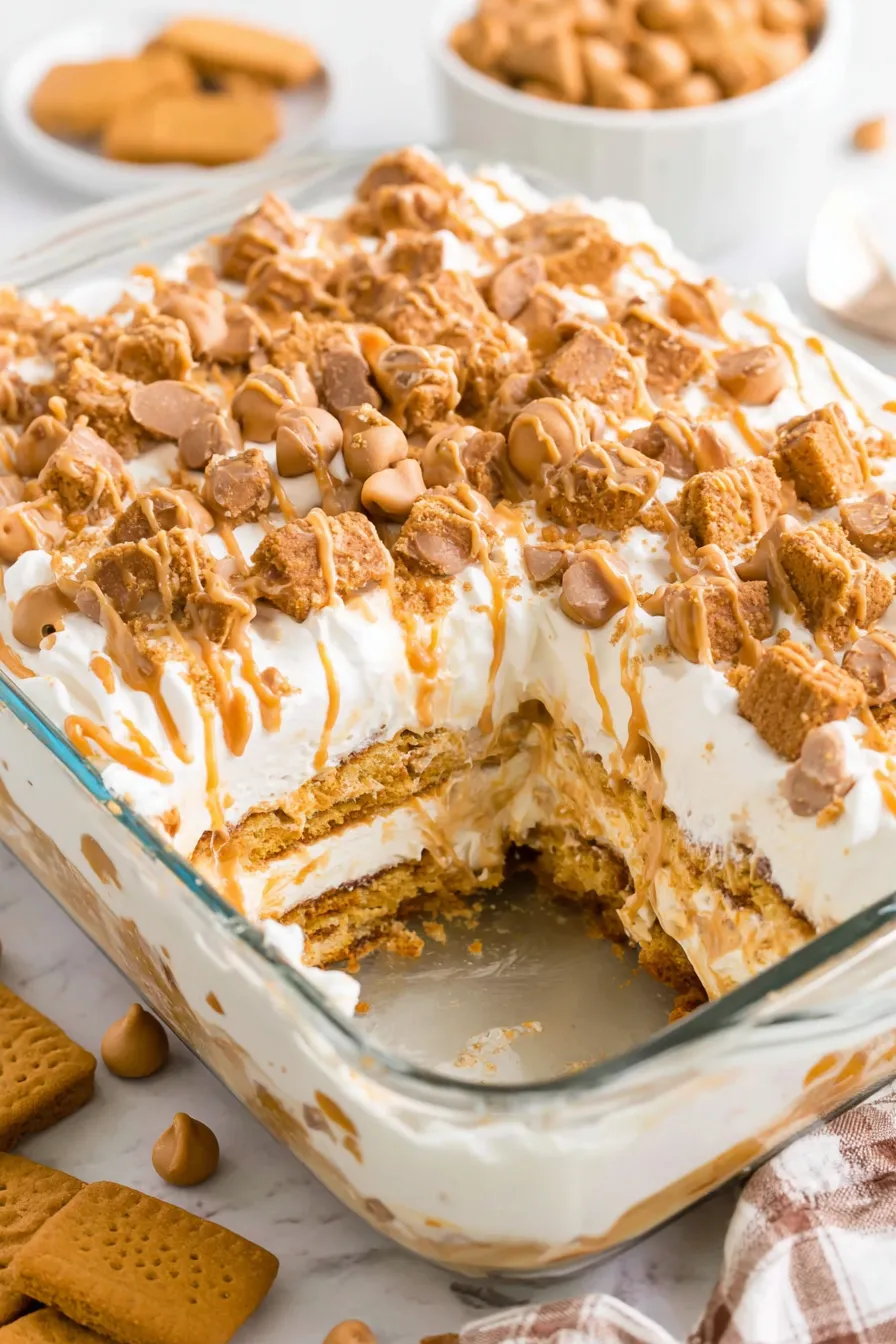
Grease a 9x13-inch glass baking dish and arrange a single layer of peanut butter sandwich cookies to cover the bottom. Press gently for an even base.
Beat softened cream cheese until smooth, add powdered sugar and mix until lump-free. Fold in 1 cup whipped topping until spreadable and smooth.
Spread the cream cheese mixture over the cookie base and place in the freezer for 15 minutes to firm up before adding the pudding layer.
Whisk instant vanilla pudding mix with 1½ cups cold milk until it begins to thicken. Beat in 1 cup creamy peanut butter and fold in 1 cup whipped topping until combined.
Spread the peanut butter mixture over the chilled cream cheese layer and return the pan to the freezer for 15 minutes to set.
Gently spread remaining whipped topping over the set layers. Sprinkle peanut butter chips and chopped reserved cookies. Drizzle melted peanut butter over the top for visual appeal.
Chill in the refrigerator for 30 minutes or freezer for 15 minutes before serving. For cleaner slices, freeze briefly then slice with a warmed knife.
Last Step: Please leave a rating and comment letting us know how you liked this recipe! This helps our business to thrive and continue providing free, high-quality recipes for you.
Leave a comment & rating below or tag
@culinya on social media!

Ultra-fudgy brownies crowned with gooey mini marshmallows and a quick-set chocolate icing. Crowd-pleasing, nostalgic, and irresistibly rich in every bite.

Buttery shortbread crust meets a silky brown sugar pecan topping in these easy pecan pie bars. Just 10 minutes of prep for bakery-level bliss.

A flawlessly smooth pumpkin cheesecake with warm spice, buttery graham crust, and no cracks. Finish with caramel and rum-kissed whipped cream.
Leave a comment & rating below or tag @culinya on social media!
Enjoyed this recipe? Share it with friends and family, and don't forget to leave a review!
This recipe looks amazing! Can't wait to try it.
Comments are stored locally in your browser. Server comments are displayed alongside your local comments.

Join to receive our email series which contains a round-up of some of our quick and easy family favorite recipes.
