
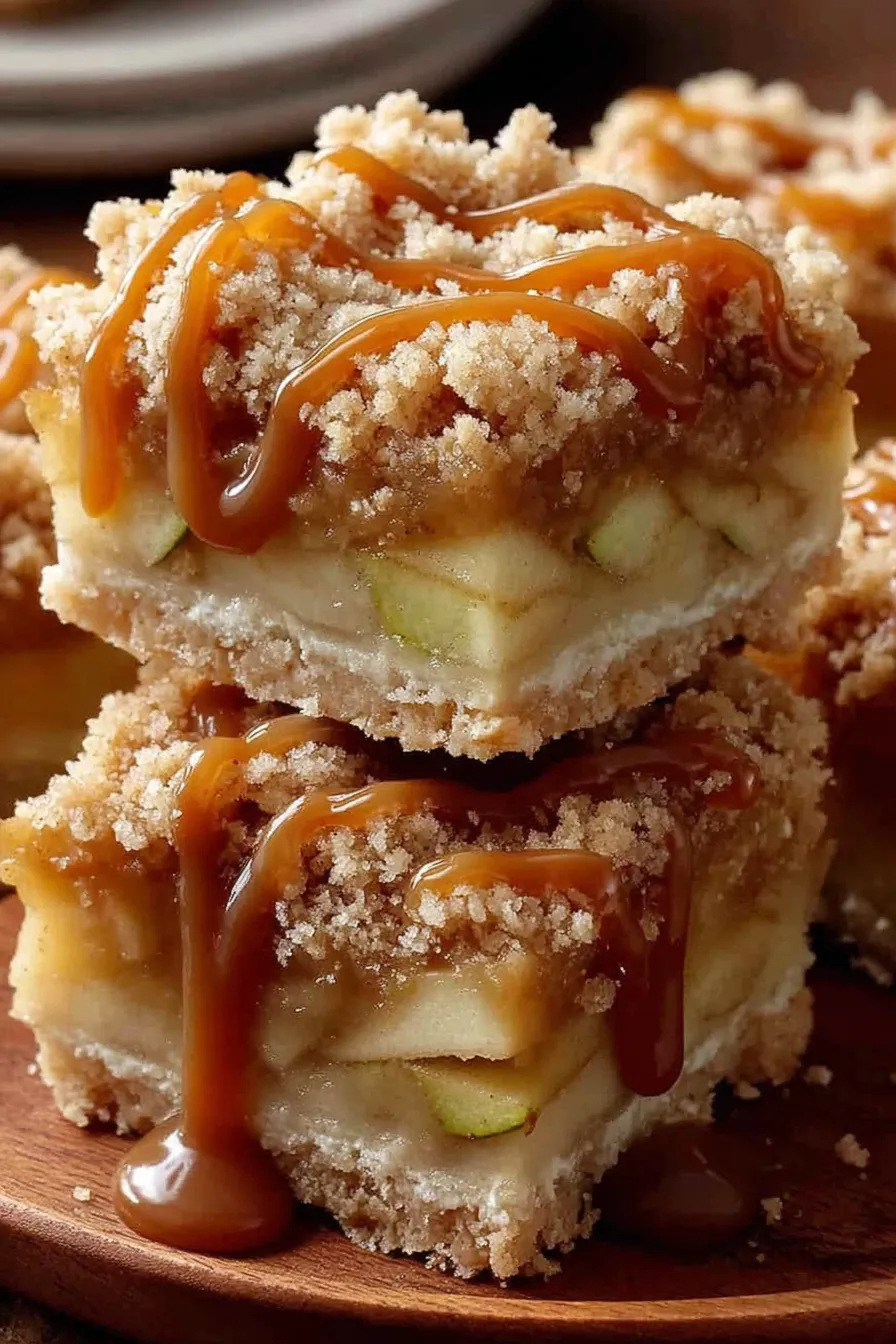
Salted Caramel Apple Crumble Bars

Buttery crumble layers sandwich tender cinnamon-spiced apples and a drizzle of salted caramel for a perfect balance of sweet and tart in every bite.
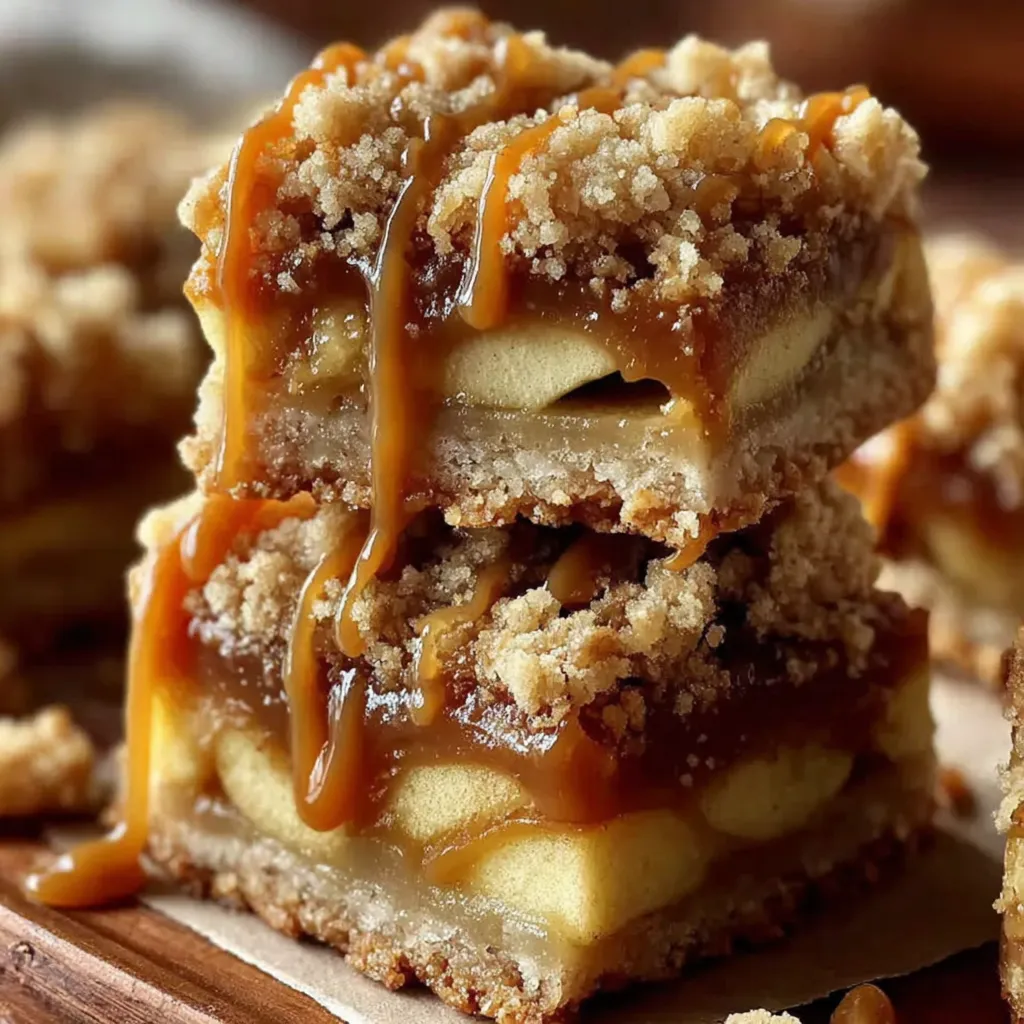
This salted caramel apple crumble bars recipe is the kind of dessert that announces the season the moment you pull it from the oven. I first developed this version during an autumn afternoon when the market had an overabundance of crisp apples and I wanted something that combined the nostalgia of apple pie with the ease of a bar. The result is a tender, buttery base with a crisp, streusel-like topping that sandwiches a warmly spiced apple layer and a generous ribbon of salted caramel. Each bite delivers crisp edges, tender apple, and a buttery crumble finish that has become a favorite at holiday gatherings and weeknight treats alike.
What makes this preparation special is the texture contrast: a firm, slightly crunchy bottom that holds together for neat bars, a soft-cooked apple filling with just the right chew, and a caramel layer that adds glossy salt-sweet complexity. I remember the first time I brought these to a potluck — conversations stopped and forks started a polite rush to the pan. It’s simple enough to pull together on a busy afternoon but impressive enough for company, which is why it lives permanently in my baking rotation.
Why You'll Love This Recipe
- Buttery crumble that acts as both a sturdy base and crunchy topping so you get two textures from the same mixture, cutting prep time and dishes.
- Uses pantry-friendly ingredients like flour, sugar, and butter plus three apples — no special equipment or rare spices required.
- Ready to bake in about 20 minutes of active time and then 40 to 45 minutes in the oven, making it a reliable choice for weeknights and holidays.
- Salted caramel adds a gourmet touch and balances the tartness of the apples; use store-bought or homemade depending on time and preference.
- Make-ahead friendly: it keeps well refrigerated and slices neatly after cooling, so you can prepare it the day before entertaining.
- Crowd-pleasing and easy to portion — yields 24 bars, perfect for large gatherings or to divide and freeze for later.
I’ve served these at school bake sales, Thanksgiving brunches, and simple Sunday coffee breaks. My family particularly loves the edges — they argue playfully over who gets the crispest corner. Over the years I’ve tuned the cinnamon and nutmeg to the exact balance that lets the apple shine while still tasting slightly autumnal and spiced.
Ingredients
- Unsalted butter: 1 cup (2 sticks), melted. Use European-style butter for a slightly richer flavor if available; melting it first makes it easier to form the crumble texture for both base and topping.
- Granulated sugar: 1 1/2 cups. This provides sweetness and structure — if you prefer a deeper flavor, swap 1/4 cup for light brown sugar to introduce a subtle molasses note.
- Vanilla extract: 1 teaspoon. Pure vanilla adds aromatic depth that complements the caramel and cinnamon; avoid imitation for the best results.
- Salt: 1/2 teaspoon. Enhances the overall flavor and balances sweetness; reduce slightly only if using salted butter.
- All-purpose flour: 2 1/2 cups. Standard AP flour creates a tender but stable crumb; spoon and level for accurate measurement.
- Apples: 3 cups peeled and thinly sliced (about 3 medium apples). Choose firm, baking apples like Honeycrisp, Granny Smith, or Braeburn for texture and balanced sweetness.
- Ground cinnamon: 1 teaspoon. Adds warmth and pairs with the caramel without overpowering the apples.
- Ground nutmeg: 1/4 teaspoon. Use freshly grated if possible for a brighter aroma.
- Salted caramel sauce: 1/2 cup, homemade or store-bought. A good quality jarred sauce works fine; for homemade, use a cream-based caramel with a pinch of flaky sea salt.
Instructions
Step 1: Preheat Oven Set the oven to 375°F (190°C). Line a 9×13 inch baking pan with parchment paper, leaving an overhang on two sides to lift the finished bars easily. Proper preheating ensures even baking and a golden topping within the specified time. Step 2: Prepare Crumble Mixture In a large bowl, whisk together the melted butter, granulated sugar, vanilla extract, and salt until homogenized. Add the flour and stir with a spatula until the mixture clumps into coarse crumbs. The texture should hold together when squeezed but still be loose enough to break apart for topping. Step 3: Form Base Layer Reserve about one third of the crumb mixture for the top. Press the remaining two thirds evenly into the bottom of the prepared pan, using the bottom of a measuring cup for an even, compact layer. Chill briefly in the refrigerator for 5 minutes if the butter feels overly soft to help the crust set. Step 4: Prepare Apple Filling Peel, core, and thinly slice the apples so they cook evenly. Toss the slices in a bowl with the ground cinnamon and nutmeg, making sure each slice is lightly coated — this helps the spices distribute while the apples release their juices in the oven. Step 5: Assemble Filling Spread the seasoned apple mixture evenly over the pressed crust, overlapping slices so the apples are in a single layer with a slight mound; this prevents sogginess and ensures tender, not mushy, fruit. Step 6: Add Caramel Drizzle Warm the caramel sauce slightly so it’s pourable, then drizzle it evenly over the apple layer. Using a spoon in a back-and-forth motion will create a thin, even ribbon — resist the urge to over-pour, one half cup is sufficient for a pronounced flavor without drowning the apples. Step 7: Top with Crumble Scatter the reserved crumb mixture across the caramel and apples. Aim for good coverage but allow some apples and caramel to peek through; the contrast in textures is key to the finished bars. Step 8: Bake the Bars Bake for 40 to 45 minutes, rotating the pan halfway through. The topping should be golden brown and crisp and juices should bubble at the edges when done. If the top browns too quickly, tent loosely with foil for the final 10 minutes. Step 9: Cool and Serve Remove from oven and cool completely in the pan to let the caramel set and the bars stabilize. Use the parchment overhang to lift the slab from the pan, transfer to a cutting board, and slice into 24 bars. Serve at room temperature or lightly warmed.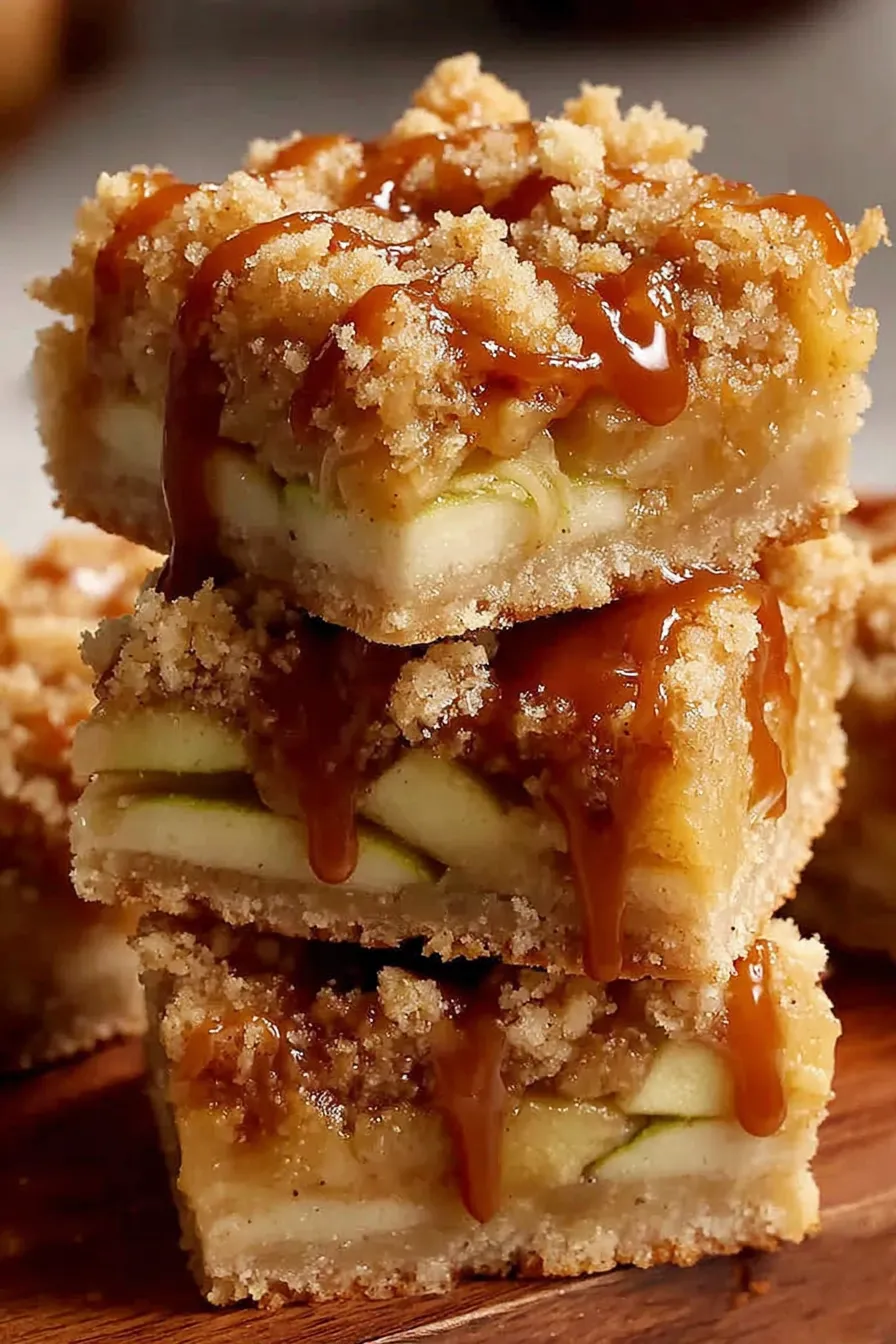
You Must Know
- These bars refrigerate well for up to 5 days and freeze for up to 3 months; wrap slices tightly in plastic then foil to prevent freezer burn.
- Because the bars contain wheat and butter, they are not gluten-free or dairy-free; swap ingredients carefully if adapting for allergies.
- The apples release natural juices as they bake; a 9×13 pan is ideal for even distribution — smaller pans will cause overflow and longer baking times.
- Using a slightly tart apple like Granny Smith helps balance the caramel sweetness and prevents the filling from being cloying.
My favorite part is watching the caramel bubble at the edges as it bakes — it’s the best visual clue that everything is melding correctly. Friends who prefer traditional pie often tell me they appreciate the simplified prep and cleaner slices these bars provide.
Storage Tips
To store, cool completely then cover the pan tightly with plastic wrap or aluminum foil and refrigerate for up to five days. For longer storage, cut into individual bars, wrap each in plastic, then place in a freezer bag and freeze for up to three months. Thaw overnight in the refrigerator and warm briefly in a low oven or microwave for a few seconds before serving. When reheating, place on a baking sheet and warm at 325°F until just heated through to preserve texture and prevent the caramel from becoming too runny.
Ingredient Substitutions
If you need to adapt the ingredient list, substitute light brown sugar for up to 1/4 cup of granulated sugar for richer flavor. For a dairy-free version, replace the butter with a vegan buttery spread high in fat and use a dairy-free caramel. To make a gluten-free option, use a 1-to-1 gluten-free flour blend designed for baking; note the texture will be slightly different and you may need to chill the crust briefly before pressing to help it bind.
Serving Suggestions
Serve bars warm with a scoop of vanilla ice cream for a classic presentation, or dust lightly with cinnamon sugar for more visual appeal. They pair beautifully with black coffee, chai, or a lightly sweet dessert wine. For brunch, cut bars slightly smaller and serve alongside yogurt and fruit for a balanced plate. Garnish with flaky sea salt on each slice for a restaurant-quality touch.
Cultural Background
These bars are a hybrid of classic fruit desserts and the practicality of squares or bars that emerged in home baking when cooks wanted pie flavors without the fuss of rolling dough. The salted caramel element is a more recent adaptation inspired by modern confectionery trends that favor the sweet-salty contrast, elevating humble apple desserts into something that feels contemporary while still rooted in traditional autumn baking.
Seasonal Adaptations
In fall, spotlight crisp apples and add a touch of ground cloves for deeper warmth. During the holidays, stir in 1/4 cup chopped toasted pecans into the crumble for a nutty note. In summer, swap apples for firm peaches or nectarines and use a lemon-scented caramel for a brighter profile. Small changes like adding citrus zest or different nuts will adapt the bars to each season while using the same straightforward technique.
Meal Prep Tips
For meal prep, bake the slab and section into individually wrapped portions. Store layered in an airtight container with parchment between layers to prevent sticking. These bars travel well for packed lunches or picnics and are easy to warm in a microwave or small oven. When preparing ahead for events, consider par-baking the crust, cooling, then adding filling and topping shortly before serving to maintain maximum crunch.
These salted caramel apple crumble bars strike a satisfying balance between fuss-free prep and memorable flavor. Whether you’re making them for a weekday dessert or a special occasion, they’re forgiving, adaptable, and reliably loved. Invite friends, slice neatly, and enjoy the cozy aroma that fills the kitchen — it’s the kind of baking that always brings people together.
Pro Tips
Press the base firmly and chill for 5 minutes if the butter is too soft to ensure a compact crust.
Warm the caramel slightly before drizzling so it forms a thin, even ribbon and bakes smoothly into the filling.
Rotate the pan halfway through baking to avoid hot spots and ensure even browning of the topping.
Allow the bars to cool completely before slicing so the caramel sets and bars hold their shape.
This nourishing salted caramel apple crumble bars recipe is sure to be a staple in your kitchen. Enjoy every moist, high protein slice — it is perfect for breakfast or as a wholesome snack any time.
FAQs about Recipes
Can I freeze the bars?
Yes. Once fully cooled, wrap tightly and freeze up to 3 months. Thaw overnight in the refrigerator and warm before serving.
What kind of apples should I use?
Choose firm baking apples like Granny Smith, Honeycrisp, or Braeburn for the best texture and balance with the caramel.
Tags
Salted Caramel Apple Crumble Bars
This Salted Caramel Apple Crumble Bars recipe makes perfectly juicy, tender, and flavorful steak every time! Serve with potatoes and a side salad for an unforgettable dinner in under 30 minutes.
Ingredients
Crust and Topping
Apple Filling
Topping
Instructions
Preheat Oven
Preheat the oven to 375°F (190°C) and line a 9×13 inch baking pan with parchment paper, leaving an overhang for easy removal.
Prepare Crumble Mixture
Combine melted butter, granulated sugar, vanilla, and salt in a large bowl. Stir in the flour until mixture becomes crumbly and holds together when pressed.
Form Base Layer
Press about two-thirds of the crumbly mixture firmly and evenly into the bottom of the prepared pan to create a compact crust.
Prepare Apple Filling
Peel and thinly slice the apples, then toss with ground cinnamon and ground nutmeg until coated evenly.
Assemble Filling
Spread the seasoned apple slices evenly over the pressed crust, arranging in a single layer for even cooking.
Add Caramel Drizzle
Warm the salted caramel slightly and drizzle 1/2 cup evenly over the apple layer to provide a sweet-salty contrast.
Top with Crumble
Sprinkle the remaining third of the crumb mixture over the caramel and apples, ensuring good coverage for a crunchy top.
Bake the Bars
Bake for 40–45 minutes until the topping is golden brown and apples are tender; tent with foil if the top browns too quickly.
Cool and Serve
Cool completely in the pan so the caramel sets, then lift out using the parchment overhang and cut into 24 bars.
Last Step: Please leave a rating and comment letting us know how you liked this recipe! This helps our business to thrive and continue providing free, high-quality recipes for you.
Nutrition
Did You Make This?
Leave a comment & rating below or tag
@culinya on social media!
Categories:
You might also like...

Fudgy Marshmallow Mud Brownies
Ultra-fudgy brownies crowned with gooey mini marshmallows and a quick-set chocolate icing. Crowd-pleasing, nostalgic, and irresistibly rich in every bite.

Buttery Pecan Pie Bars
Buttery shortbread crust meets a silky brown sugar pecan topping in these easy pecan pie bars. Just 10 minutes of prep for bakery-level bliss.

Silky No-Crack Pumpkin Cheesecake
A flawlessly smooth pumpkin cheesecake with warm spice, buttery graham crust, and no cracks. Finish with caramel and rum-kissed whipped cream.
Did You Make This?
Leave a comment & rating below or tag @culinya on social media!
Rate This Recipe
Share This Recipe
Enjoyed this recipe? Share it with friends and family, and don't forget to leave a review!
Comments (1)
This recipe looks amazing! Can't wait to try it.
Comments are stored locally in your browser. Server comments are displayed alongside your local comments.

Hi, I'm Sophia!
What's Popular

30-Minute Meals!
Join to receive our email series which contains a round-up of some of our quick and easy family favorite recipes.