
>>

A nostalgic twist on handheld pastries — a flaky double-crust pie filled with glossy strawberry filling and a sweet vanilla glaze finished with rainbow sanding sugar.
This strawberry pop tart pie began as an experiment to combine the chewy nostalgia of toaster pastries with the comfort of a homemade pie. I first made it on a rainy Saturday morning when the farmers market had an incredible bounty of fragrant strawberries. The filling simmered down into a glossy, jammy spread that tasted like summer concentrated, and the refrigerated pie crusts gave a reliable, buttery flake that everyone loved. It has since become my go-to dessert when I want something familiar but a little playful.
The texture is what keeps people coming back: bright, jammy strawberry pieces within a thickened filling that remains spoonable, encased by a crisp, golden crust that cracks pleasingly when sliced. The final touch — a white vanilla glaze and rainbow sanding sugar — recreates that pop tart look and adds a sweet, slightly crunchy contrast. This dish is great for casual gatherings, holiday brunches, or an indulgent afternoon treat paired with coffee.
From my kitchen to yours, this was the pie that convinced my skeptical husband that pastries could look cute and still taste homemade. Guests always ask whether I used store-bought jam; the answer is no, and that surprise alone makes it feel special.

My favorite aspect is the contrast between the warm, jammy fruit and the crisp crust — it evokes summer even in the middle of winter. Friends often ask whether the glaze is necessary; it is a small step that transforms the pie into a playful centerpiece, especially for casual celebrations.
Store leftovers loosely covered at room temperature for up to 24 hours if the glaze has set and the weather is cool. For longer storage, cover tightly and refrigerate for up to 4 days; bring slices to room temperature for best flavor. To freeze, wrap the whole pie or individual slices in plastic wrap then foil and freeze up to 3 months. Thaw overnight in the refrigerator and apply glaze fresh if you prefer a brighter finish.
If berries are out of season, use a mix of thawed frozen strawberries (well-drained) and 1/2 to 3/4 cup granulated sugar to compensate for lost sweetness. For a gluten-free version, use a 9-inch gluten-free refrigerated crust and bake according to manufacturer notes; note texture will differ slightly. Swap cornstarch with an equal amount of arrowroot for a clearer filling finish, but reduce cooking time by 30 seconds to avoid thinning.
Serve slices with lightly whipped cream or a scoop of vanilla bean ice cream for contrast. For a brunch feel, plate with a handful of fresh berries and a small mint sprig. This pie works well at potlucks — slice into wedges and arrange on a serving board for easy sharing. For a tea party, cut into smaller portions and garnish each with a tiny mint leaf.
This hybrid celebrates both American pie traditions and the nostalgic toaster pastry. While pies have long anchored family gatherings across the U.S., the pop tart aesthetic taps into midcentury convenience pastry culture. Combining them creates a modern homage — a handcrafted pastry that nods to mass-market treats but prioritizes fresh ingredients and texture.
In summer, use local heirloom strawberries for maximum aroma. In autumn, switch to apples or pears with cinnamon and a touch of nutmeg, and finish with a brown butter glaze. For winter holidays, add a splash of orange liqueur to the glaze and garnish with crystallized ginger for warmth that complements the fruit.
Make the filling two days ahead and refrigerate in an airtight container. When ready to bake, bring the filling to room temperature, rewarm gently if it becomes too firm, and assemble. Egg wash and glazing are quick steps that can be done just before baking and after cooling respectively, making the day-of work minimal for entertaining.
This strawberry pop tart pie blends playful presentation with reliable technique; treat it like a project worth savoring and share it widely — the smiles it brings are worth every minute of patience.
Ensure the strawberry filling is warm, not hot, before adding to the crust to avoid weakening the bottom dough.
Brush the bottom crust with egg wash to create a moisture barrier that keeps the crust from becoming soggy.
Cool the pie completely before glazing; warm pie will cause the glaze to slide and thin out.
Use a rimmed baking sheet while baking to catch any drips and make oven transport safer.
This nourishing strawberry pop tart pie recipe is sure to be a staple in your kitchen. Enjoy every moist, high protein slice — it is perfect for breakfast or as a wholesome snack any time.
This Strawberry Pop Tart Pie recipe makes perfectly juicy, tender, and flavorful steak every time! Serve with potatoes and a side salad for an unforgettable dinner in under 30 minutes.
Place diced strawberries and granulated sugar in a 4-quart saucepan and cook over medium heat, stirring frequently, until juices release and mixture reaches a rapid boil (about 10 to 12 minutes). Monitor to avoid boiling over.
Whisk cornstarch and fresh lemon juice together in a small bowl until completely smooth, creating a slurry that will thicken the filling without lumps.
With the strawberry mixture boiling, slowly whisk in the slurry and cook 1 to 2 minutes until the filling is thick and glossy. Remove from heat, stir in vanilla, and transfer to a shallow bowl to cool until warm to the touch (about 30 minutes).
Preheat oven to 375°F and set racks for lower two-thirds. Place a 9-inch pie dish on a rimmed baking sheet. Unroll one crust into the dish; whisk the egg and brush the bottom and sides of the crust to help seal against sogginess.
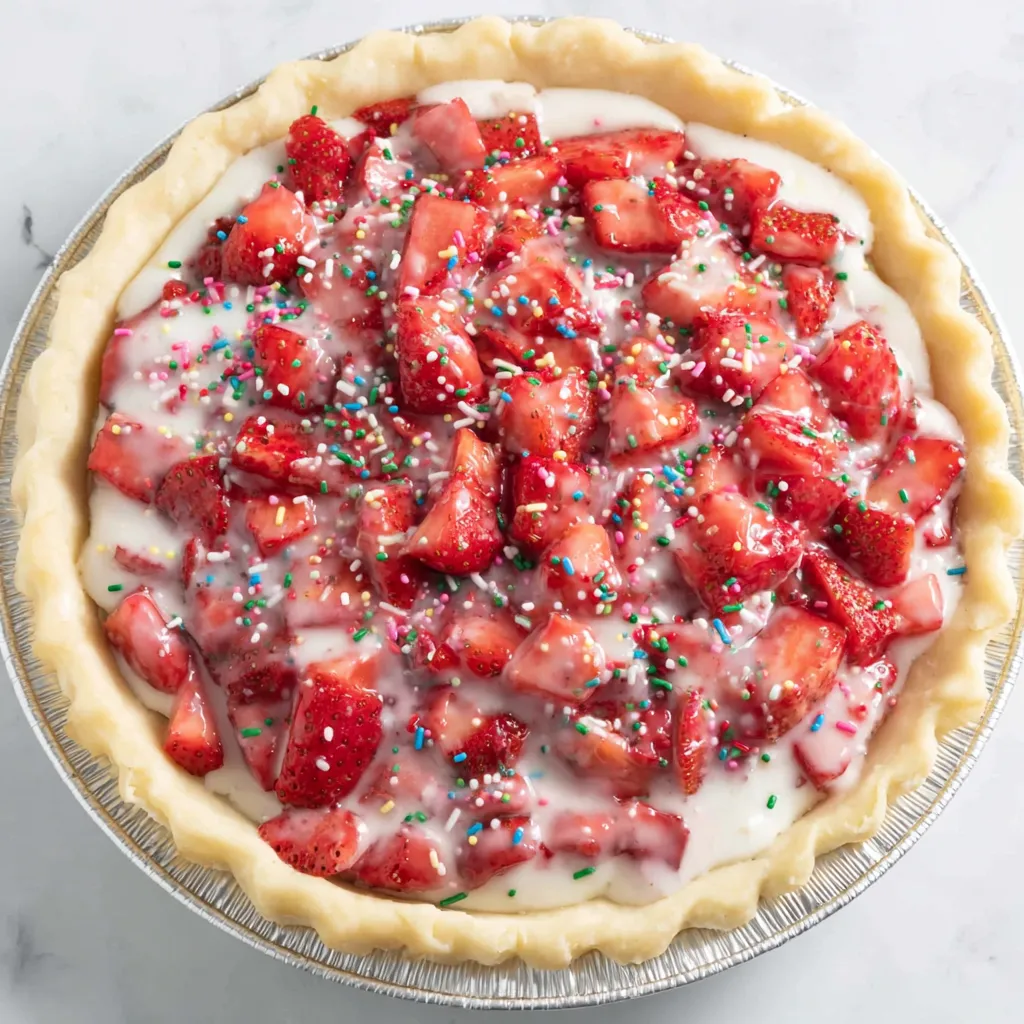
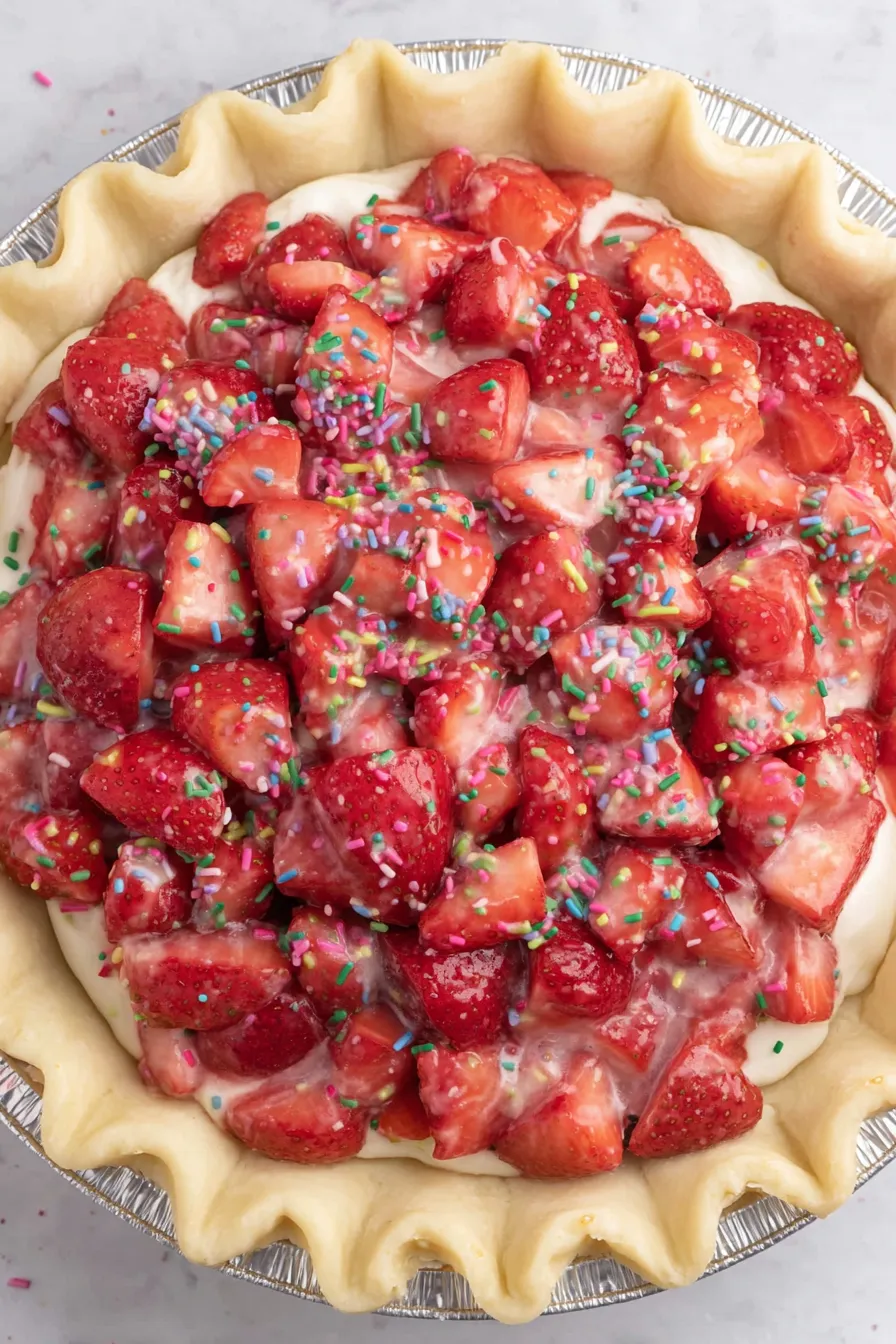
Pour the warm filling into the bottom crust, cover with the second crust, trim and crimp edges, brush the top with egg wash, and cut four 1-inch slits to vent steam.
Bake 40 to 45 minutes until golden brown. Remove from oven and let cool fully at room temperature for at least 5 to 6 hours before glazing; chilling can speed firming but allow surface to cool first.
Whisk sifted powdered sugar, 2 tablespoons milk and vanilla until smooth. Adjust milk by teaspoon to reach a thick, spreadable consistency. Spread glaze over the cooled pie, sprinkle sanding sugar, and allow to set at least 30 minutes before slicing.
Last Step: Please leave a rating and comment letting us know how you liked this recipe! This helps our business to thrive and continue providing free, high-quality recipes for you.
Leave a comment & rating below or tag
@culinya on social media!

Ultra-fudgy brownies crowned with gooey mini marshmallows and a quick-set chocolate icing. Crowd-pleasing, nostalgic, and irresistibly rich in every bite.

Buttery shortbread crust meets a silky brown sugar pecan topping in these easy pecan pie bars. Just 10 minutes of prep for bakery-level bliss.

A flawlessly smooth pumpkin cheesecake with warm spice, buttery graham crust, and no cracks. Finish with caramel and rum-kissed whipped cream.
Leave a comment & rating below or tag @culinya on social media!
Enjoyed this recipe? Share it with friends and family, and don't forget to leave a review!
This recipe looks amazing! Can't wait to try it.
Comments are stored locally in your browser. Server comments are displayed alongside your local comments.

Join to receive our email series which contains a round-up of some of our quick and easy family favorite recipes.
