
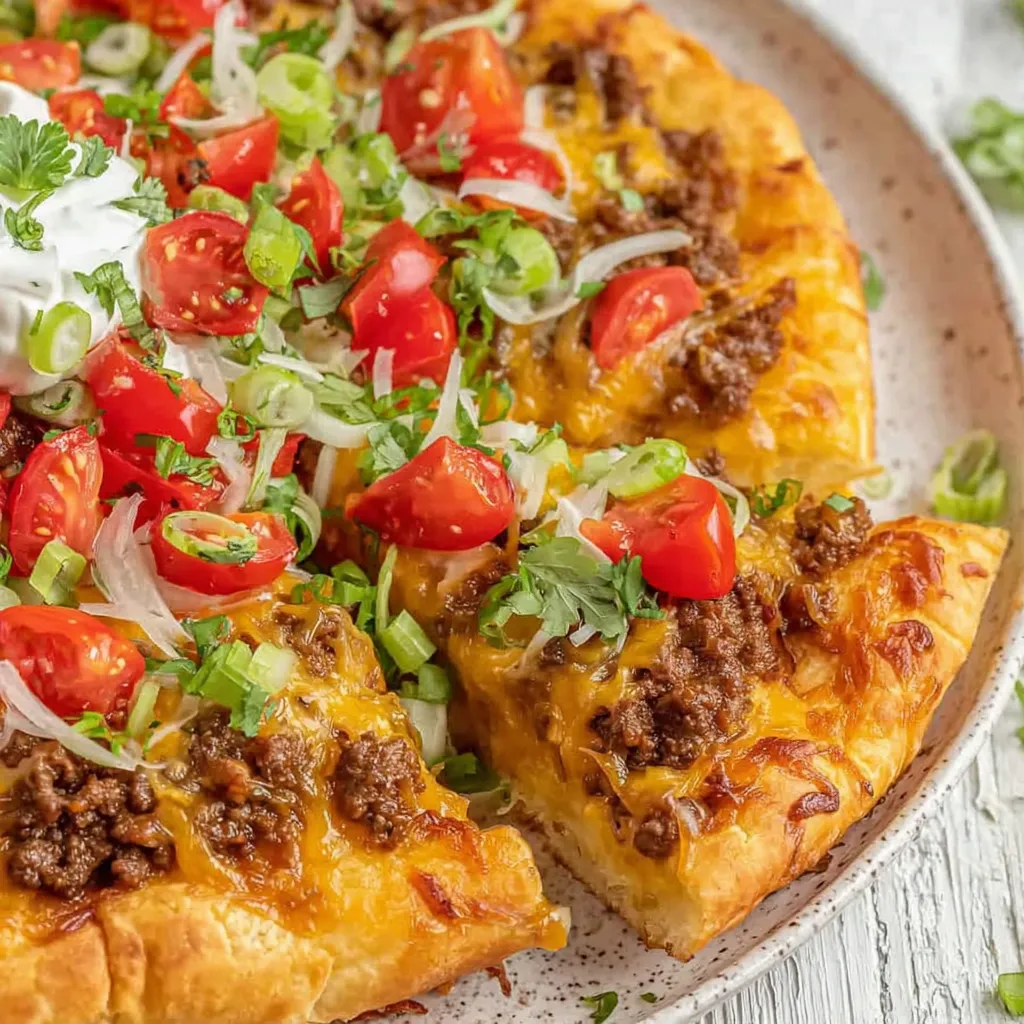
Taco Pizza

A fun, family-friendly taco-inspired sheet pizza built on crescent roll dough, topped with seasoned beef, melty Colby–Monterey Jack blend, fresh tomatoes and green onions—finished with sour cream and hot sauce.
Why You'll Love This Recipe
- Ready in about 30 minutes from start to finish—perfect for busy weeknights or last-minute gatherings.
- Uses pantry staples and easily found items: crescent dough, lean ground beef, taco seasoning, and shredded cheese—no special trip to the store required.
- Sheet-pan format feeds a crowd and slices easily for parties, game nights, or family dinners.
- Flexible toppings let you cater to picky eaters—leave off cilantro or hot sauce for kids, or add pickled jalapeños for grown-ups.
- Make-ahead friendly: cook and refrigerate the taco meat up to 3 days in advance to cut active time to under 10 minutes.
- Customizable to dietary needs: swap in turkey or plant-based mince and dairy-free cheese for alternative diets.
In my experience, this is the recipe I turn to when I need something fast but satisfying. My kids love helping sprinkle the cheese and picking the tomato quarters, and at neighborhood potlucks it disappears faster than homemade cookies. Small swaps—like using a sharper Monterey Jack or adding a few green chiles—have led to delightful variations over time.
Ingredients
- Crescent dough sheets (16 ounces): I typically use a trusted brand like Pillsbury® crescent sheets. The pre-rolled dough stretches thinly and bakes to a crisp, slightly flaky base—look for even, unbroken sheets and room temperature dough for easier stretching.
- Lean ground beef (1½ pounds): Choose 90% lean or leaner to reduce excess grease. Browning the meat well and draining any excess fat keeps the crust from becoming soggy.
- Taco seasoning (2 ounces): A mild blend (Old El Paso® or your preferred brand) provides the classic flavor; adjust to taste or use homemade seasoning for control over salt and heat.
- Water (¾ cup): Adds just enough moisture to activate the seasoning and create a saucy coating—don’t overdo it or the crust will soften.
- Colby and Monterey Jack cheese, freshly shredded (3½ cups): Freshly shredding yields better melt and texture than pre-shredded. A 50/50 blend gives a creamy, tangy profile and excellent melting behavior.
- Grape tomatoes (1 cup), quartered: Choose firm, sweet tomatoes to add freshness and pop; halved cherry tomatoes work in a pinch.
- Green onions (⅓ cup), thinly sliced: Adds a sharp, fresh bite—slice just before serving for brightness.
- Cilantro (1 tablespoon), optional: A little herbaceous lift if you enjoy cilantro’s bright flavor; omit for cilantro-averse diners.
- Sour cream & hot sauce, optional garnishes: Drizzle to taste for cool creaminess and a tangy or spicy finish.
Instructions
Preheat and prepare the pan: Heat the oven to 375°F and use a standard 13 x 18-inch baking sheet. No need to grease the pan because the crescent dough contains enough fat, but keep an eye on the edges—a rimmed baking sheet helps contain any bubbling cheese or meat juices. Stretch and seal the dough: Unroll the first sheet of crescent dough and gently stretch it to cover one-half of the baking sheet. Unroll the second sheet to cover the remaining half. Overlap the seams and press them together firmly with your fingertips to seal; then pierce the surface with a fork every 1 to 2 inches to allow steam to escape. This prevents excessive puffing and keeps the base flat and sturdy. Aim for an even thickness across the sheet so the crust bakes uniformly. Par-bake the crust: Bake the sealed dough for 10 minutes or until the surface turns a light golden brown. You want the crust set and just starting to color—not fully browned—so it can finish crisping under the toppings without overbaking the meat and cheese layer. Brown the meat: While the crust bakes, warm a 2- to 4-quart saucepan over medium-high heat and add the ground beef. Stir frequently to break up clumps; cook until the meat is no longer pink, about 5–6 minutes. Spoon off and discard excess fat if necessary to avoid a greasy finish. Season and simmer: Lower the heat to medium and stir in both packages (2 ounces total) of taco seasoning and ¾ cup water. Simmer lightly for about 5 minutes until the mixture thickens and coats the meat evenly. Taste and adjust salt or heat now—remember the cheese will add saltiness later. Assemble: Remove the par-baked crust from the oven and spread the seasoned meat in an even layer across the dough, leaving a small border around the edges. Sprinkle the freshly shredded Colby–Monterey Jack mix evenly over the meat so that it melts uniformly. Finish baking: Return the sheet to the oven and bake for an additional 4–5 minutes, or until the cheese is completely melted and just beginning to bubble and brown at the edges. Visual cues: fully melted cheese that’s slightly golden in spots and a crisp crust edge signify readiness. Top and serve: Scatter quartered grape tomatoes, thinly sliced green onions, and chopped cilantro over the hot cheese. Drizzle with sour cream and hot sauce if desired. Slice into squares and serve immediately so the crust retains crispness and the toppings stay fresh.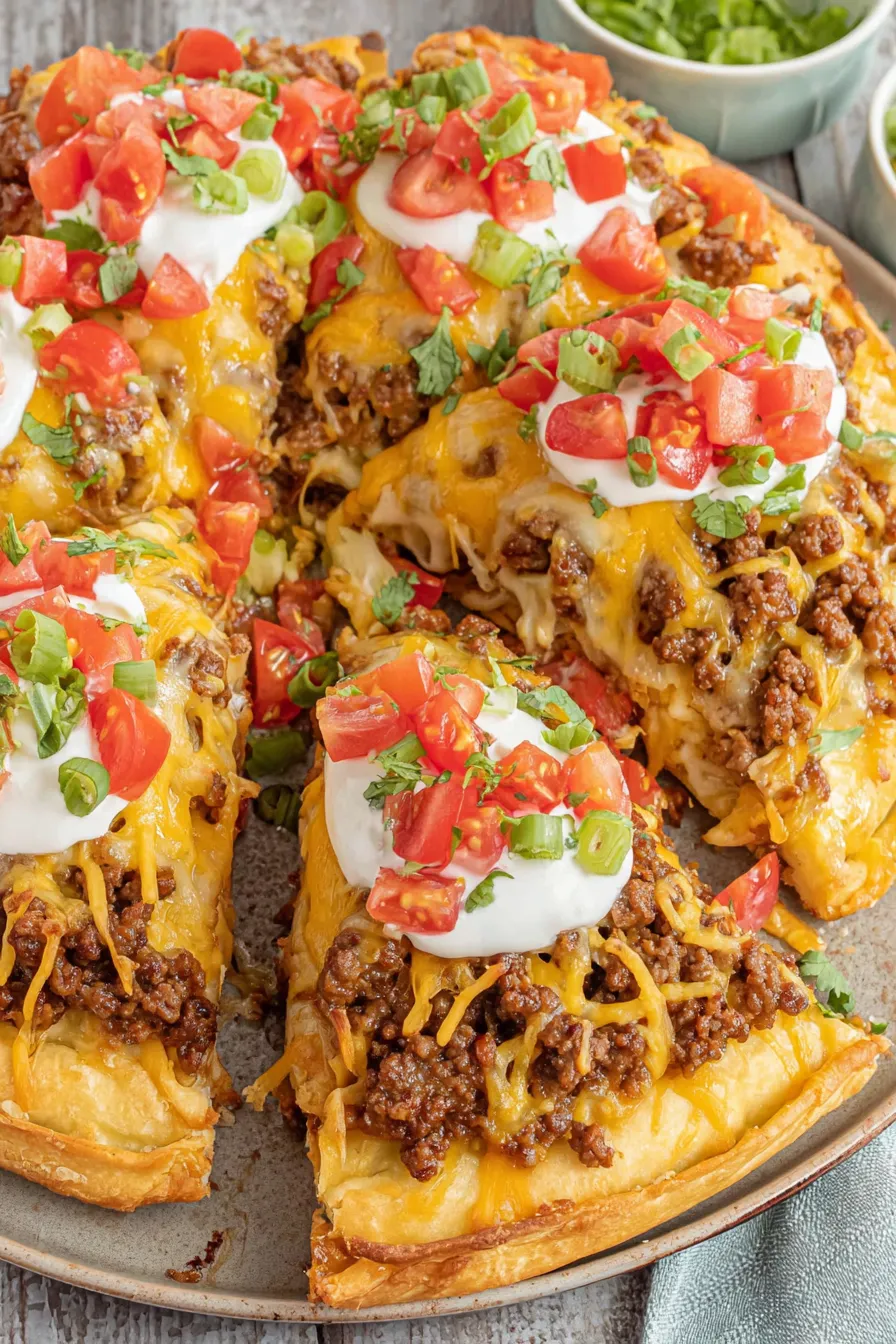
You Must Know
- This keeps well in the refrigerator for up to 3 days in an airtight container; re-crisp on a baking sheet at 375°F for 6–8 minutes.
- Freezes best without fresh tomatoes or sour cream—wrap cooled slices in foil and freeze up to 2 months; reheat directly from frozen at 375°F for 12–15 minutes.
- High in protein thanks to the beef and cheese; drain excess grease during cooking to control fat content.
- Swap ground turkey and dairy-free cheese to lower saturated fat and accommodate dietary needs.
- Crust can become soggy if too much liquid is used—measure the ¾ cup water carefully and simmer until the meat mixture is thick.
What I love most is the way this dish brings people together—friends and family invariably gather to customize their slice with toppings. Over the years I’ve learned small adjustments (like par-baking the crust and draining the beef) make the difference between a soggy tray and a crisp, shareable centerpiece. Watching everyone debate hot sauce vs. sour cream never gets old.
Storage Tips
To keep leftovers tasting fresh, cool the tray to room temperature for no more than two hours, then transfer slices to an airtight container lined with a paper towel to absorb moisture. Refrigerate up to 3 days. Reheat in a preheated oven at 375°F on a rimmed baking sheet for 6–8 minutes to restore crispness. For longer storage, freeze cooled slices individually wrapped in foil and placed in a freezer bag for up to 2 months. Avoid freezing toppings like tomatoes or sour cream—add them fresh after reheating.
Ingredient Substitutions
If you want to lighten the dish, use 99% lean ground turkey or chicken and a reduced-fat cheese blend; keep an eye on moisture because leaner meats can dry out—add a tablespoon of olive oil while cooking if needed. For a gluten-free option, replace the crescent dough with a pre-baked gluten-free flatbread or gluten-free pizza crust. To make it vegetarian, use a plant-based crumbled meat alternative and a vegan taco seasoning, then top with dairy-free shreds. Small swaps like smoked paprika or a pinch of cumin can replace or enhance the taco seasoning for a more complex flavor.
Serving Suggestions
Serve this on a large platter with lime wedges, extra chopped cilantro, and bowls of pickled jalapeños, black olives, and guacamole for a festive buffet. Pair with a crisp green salad dressed in lime vinaigrette to cut through the richness, or offer Mexican rice and refried beans for a fuller spread. Garnish slices with additional sour cream swirls and a few dashes of your favorite hot sauce for guests who enjoy heat.
Cultural Background
This mash-up reflects the American love of cross-cultural comfort food, combining traditional North American baking (crescent dough) with Mexican-inspired taco flavors. Variations of taco-topped flatbreads have circulated in home kitchens for decades—what matters most is the joyful improvisation. While not an authentic regional dish, it’s a testament to how immigrant cuisines and convenience baking can create something entirely new and beloved in family weeknight rotation.
Seasonal Adaptations
In summer, use ripe cherry tomatoes and add grilled corn kernels for sweetness. Fall calls for adding roasted poblano peppers and swapping in a sharper, aged cheese. For winter comfort, fold in a little refried beans under the cheese for creaminess and sprinkle with roasted pumpkin seeds for texture. Each season offers simple swaps that keep the basic method intact while highlighting seasonal produce.
Meal Prep Tips
Cook the seasoned meat up to three days ahead and store it in the refrigerator. Par-bake the crust the morning of serving and hold it at room temperature wrapped loosely with foil for a few hours—then top and finish baking just before serving. Pre-shred your cheese and quarter the tomatoes in advance for super-quick assembly. Use disposable foil baking sheets for easy cleanup at large gatherings.
This taco pizza is all about easy pleasures: quick assembly, family-friendly flavors, and plenty of options to customize. Try it once as written, then experiment with your favorite toppings—each version tells a little story about the people you share it with. Happy cooking and even happier eating!
Pro Tips
Par-bake the crescent dough to prevent sogginess and ensure a crisp base.
Drain excess fat after browning the beef to avoid a greasy topping.
Shred cheese fresh for better melt and creaminess compared with pre-shredded varieties.
Simmer the seasoned meat until thick so it doesn't release excess liquid onto the crust.
This nourishing taco pizza recipe is sure to be a staple in your kitchen. Enjoy every moist, high protein slice — it is perfect for breakfast or as a wholesome snack any time.
Tags
Taco Pizza
This Taco Pizza recipe makes perfectly juicy, tender, and flavorful steak every time! Serve with potatoes and a side salad for an unforgettable dinner in under 30 minutes.
Ingredients
Dough
Protein & Seasoning
Cheese & Veggies
Garnish
Instructions
Preheat and prepare pan
Preheat oven to 375°F and select a 13 x 18-inch rimmed baking sheet. Keep the sheet ungreased; the crescent dough contains sufficient fat.
Stretch and seal dough
Unroll first crescent dough sheet and gently stretch to cover one half of the pan. Unroll second sheet to cover the other half, overlap seams slightly and press to seal. Pierce dough all over with a fork to allow steam to escape.
Par-bake crust
Bake the sealed dough for 10 minutes until it is a light golden brown and set but not fully browned. This prevents a soggy bottom when toppings are added.
Brown the beef
While crust bakes, brown the ground beef in a 2–4 quart saucepan over medium-high heat, stirring and breaking up clumps until no pink remains (about 5–6 minutes). Drain excess fat.
Season the meat
Reduce heat to medium and add both taco seasoning packets and ¾ cup water. Simmer for 5 minutes until the mixture thickens and coats the meat evenly, then remove from heat.
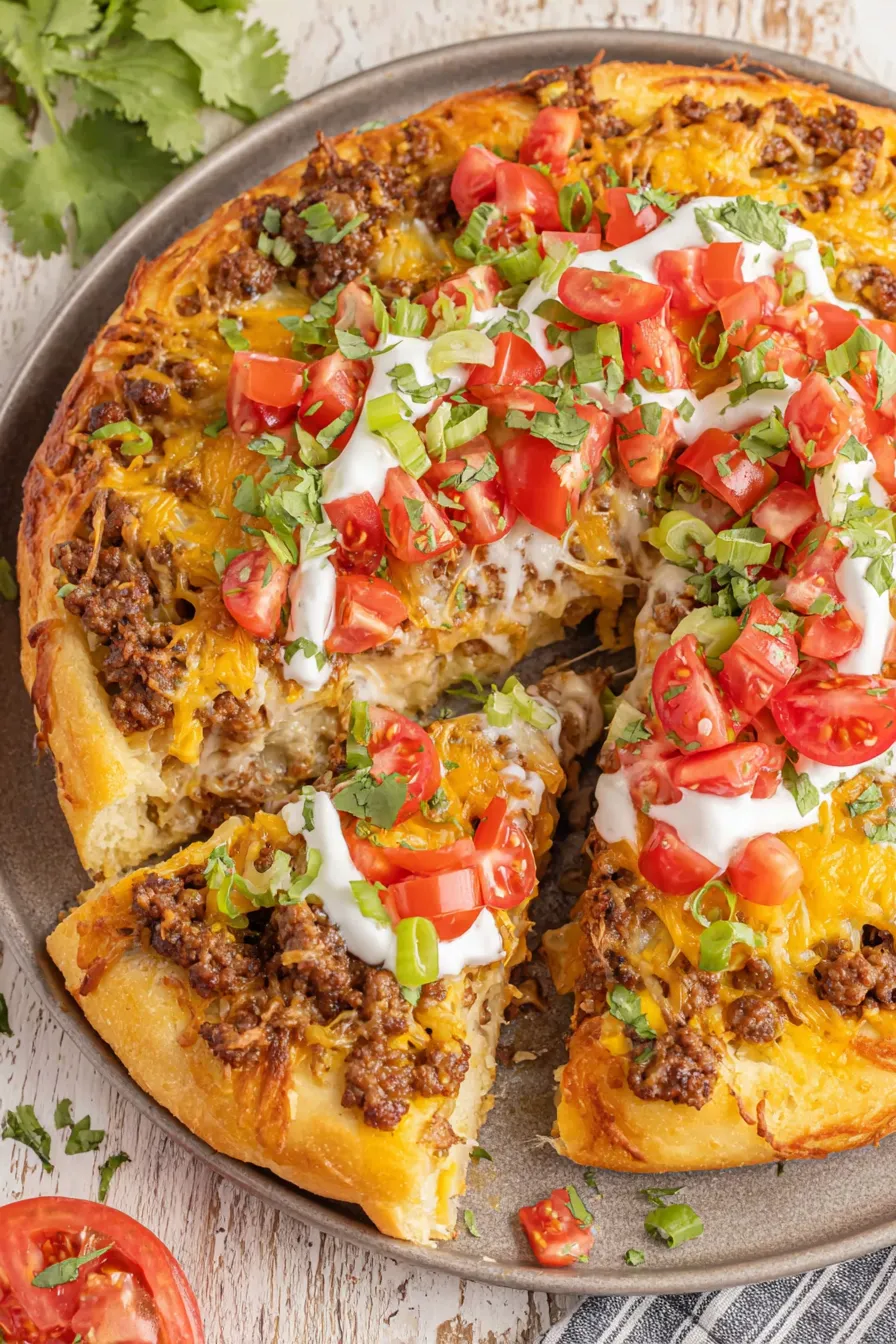
Assemble and finish baking
Spread the seasoned meat evenly over the par-baked crust. Sprinkle the shredded cheese over the top and return to the oven for 4–5 minutes until the cheese is fully melted and slightly bubbly.
Top and serve
Scatter quartered grape tomatoes, sliced green onions, and chopped cilantro over the hot pizza. Drizzle with sour cream and hot sauce if desired, slice into squares, and serve immediately.
Last Step: Please leave a rating and comment letting us know how you liked this recipe! This helps our business to thrive and continue providing free, high-quality recipes for you.
Nutrition
Did You Make This?
Leave a comment & rating below or tag
@culinya on social media!
Categories:
You might also like...

Fudgy Marshmallow Mud Brownies
Ultra-fudgy brownies crowned with gooey mini marshmallows and a quick-set chocolate icing. Crowd-pleasing, nostalgic, and irresistibly rich in every bite.

Buttery Pecan Pie Bars
Buttery shortbread crust meets a silky brown sugar pecan topping in these easy pecan pie bars. Just 10 minutes of prep for bakery-level bliss.

Silky No-Crack Pumpkin Cheesecake
A flawlessly smooth pumpkin cheesecake with warm spice, buttery graham crust, and no cracks. Finish with caramel and rum-kissed whipped cream.
Did You Make This?
Leave a comment & rating below or tag @culinya on social media!
Rate This Recipe
Share This Recipe
Enjoyed this recipe? Share it with friends and family, and don't forget to leave a review!
Comments (1)
This recipe looks amazing! Can't wait to try it.
Comments are stored locally in your browser. Server comments are displayed alongside your local comments.

Hi, I'm Sophia!
What's Popular

30-Minute Meals!
Join to receive our email series which contains a round-up of some of our quick and easy family favorite recipes.