
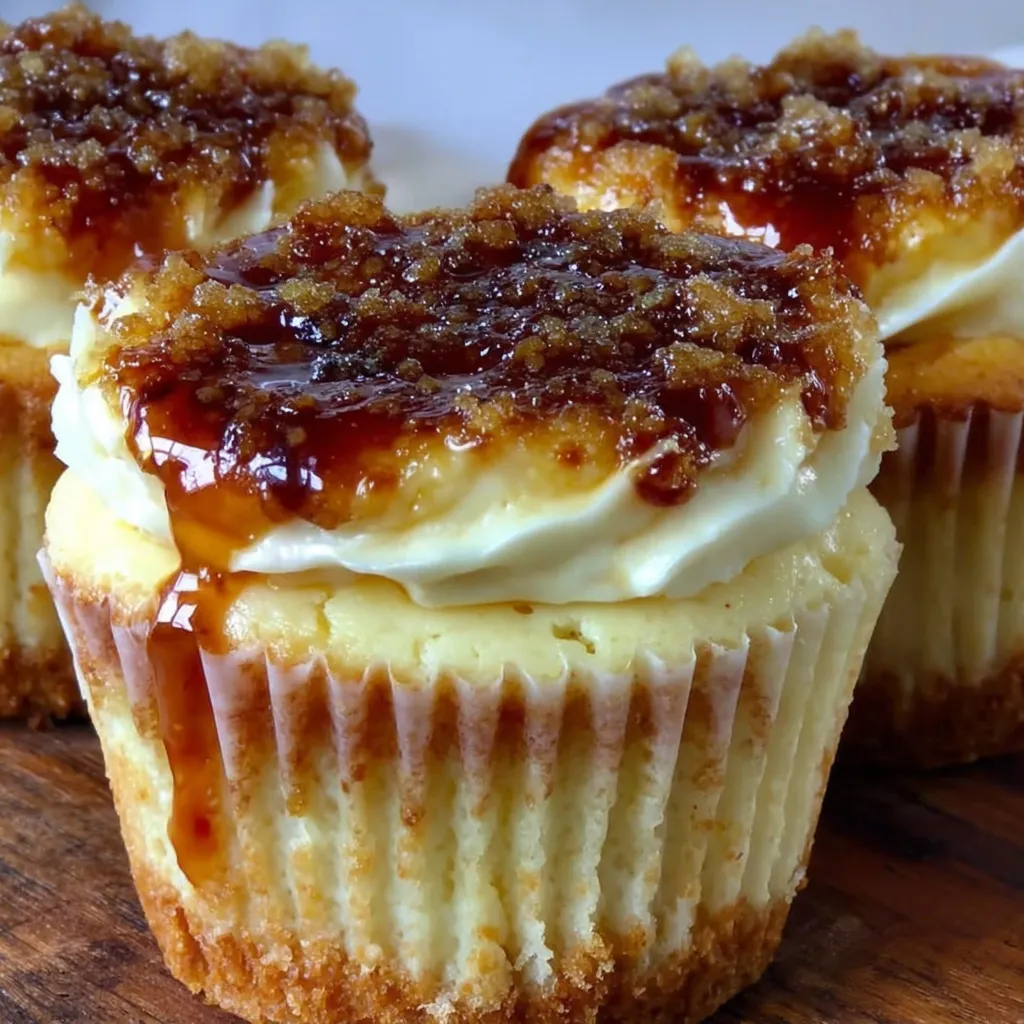
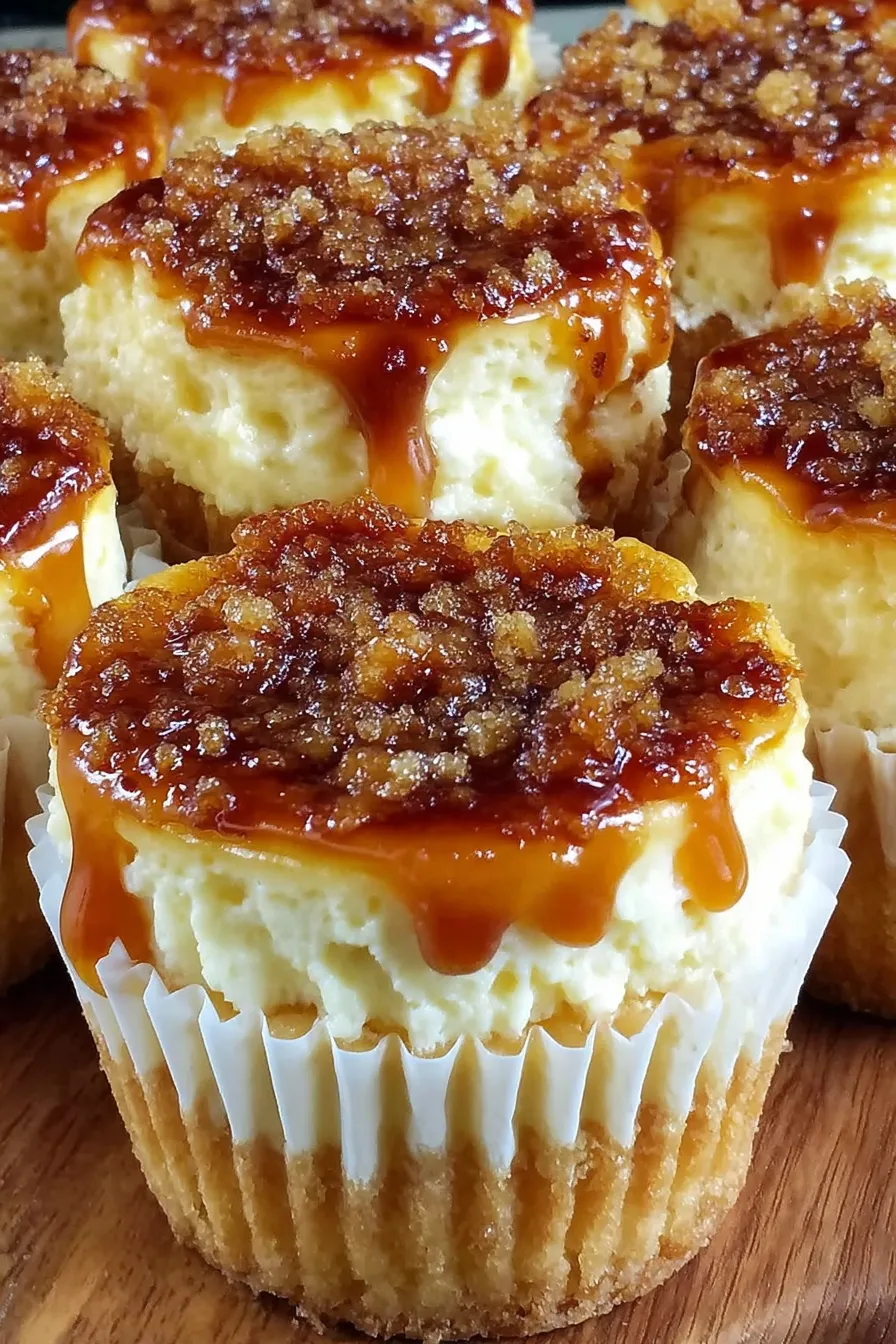
Vanilla Bean Crème Brûlée Cheesecake Cupcakes

Buttery vanilla cupcakes filled with silky vanilla-bean cheesecake and finished with a brûléed sugar crust — a dessert that delivers custardy richness and satisfying crunch in every bite.
This recipe began as an experiment the winter I wanted something both elegant and approachable for a small holiday gathering. I love classic crème brûlée and a good baked cheesecake, and the idea of nesting a custardy cheesecake center inside a tender vanilla cupcake felt like the perfect marriage of two favorites. The vanilla bean paste gives a real flecked vanilla aroma while the brûléed top provides that momentary crack and caramel warmth that makes this dessert feel celebratory. It’s the kind of treat that makes people pause mid-conversation to savor the texture and then ask for the recipe.
What makes these cupcakes special is the contrast of textures: a light, buttery cake that gives way to a creamy cheesecake heart, capped with a glassy, caramelized sugar shell. I discovered this combination when I wanted single-serve portions of a show-stopping dessert without the fuss of ramekins. They’re portable, portion-controlled, and fun to make with friends or family — my niece still remembers the first time she got to torch a cupcake and declared it the best part of her birthday party.
Why You'll Love This Recipe
- The cupcakes combine two classic desserts in one: fluffy vanilla cake and a silky vanilla-bean cheesecake center, offering creamy and tender contrasts that please most palates.
- They’re made with pantry staples and one specialty item — vanilla bean paste — which adds intense vanilla flavor and pretty flecks without scraping pods.
- Hands-on time is reasonable: you can have batter and filling ready in about 20 minutes, then bake for roughly 25 minutes; perfect for last-minute guests or a weeknight treat.
- Make-ahead friendly: you can bake and chill them a day ahead, then brûlée just before serving for restaurant-style drama and a crisp topping.
- Portion control helps at parties — each guest gets a personal dessert — and they travel well for potlucks when the sugar crust is added on site.
- Adaptable: swap sour cream for Greek yogurt for tang, or use citrus zest to brighten the cake for spring.
My family has a soft spot for tiny, handcrafted desserts, and when I first made these I plated them with a sprig of mint and watched guests break the sugar top like little edible glass. My partner declared them “fancy but doable,” which is high praise in our house. Over time I’ve learned to time the torching so the sugar melts evenly and to chill thoroughly so the cheesecake center sets without cracking.
Ingredients
- All-purpose flour: 1 cup — use a spoon-and-level method for accuracy; King Arthur or another reliable brand gives consistent texture and avoids dense cakes.
- Granulated sugar: 1/2 cup for the cake plus extra for caramelizing — fine granulated sugar melts and caramelizes smoothly; keep an extra 1–2 tablespoons per cupcake on hand.
- Baking powder & salt: 1/2 teaspoon baking powder and 1/4 teaspoon salt to balance flavor and ensure a light crumb.
- Unsalted butter: 1/2 cup (1 stick), softened — room temperature butter gives a tender, even crumb; European-style butter will lend extra richness.
- Eggs: 2 large for the cake, plus 1 large for the filling — use eggs at room temperature for better emulsification.
- Vanilla extract & vanilla bean paste: 1 teaspoon extract in the batter and 1 teaspoon vanilla bean paste in the cheesecake for intense, flecked vanilla flavor.
- Sour cream: 1/2 cup — adds moisture and a gentle tang that prevents the cake from becoming dry; full-fat sour cream yields the best texture.
- Cream cheese: 8 ounces, softened — Philadelphia or other full-fat brands blend smoother and give the richest filling.
- Powdered sugar: 1/2 cup in the filling to sweeten without graininess.
Instructions
Preheat the oven: Set the oven to 350°F (175°C) and arrange a rack in the center. Line a standard 12-cup muffin tin with liners. Preheating ensures even rise and a reliable bake time when you place cold batter in the oven. Prepare the cupcake batter: Whisk together 1 cup flour, 1/2 cup granulated sugar, 1/2 teaspoon baking powder, and 1/4 teaspoon salt in a medium bowl. In a separate bowl, cream 1/2 cup softened unsalted butter with the dry ingredients briefly to combine, then add 2 large eggs one at a time, beating until incorporated. Stir in 1 teaspoon vanilla extract and 1/2 cup sour cream until smooth. The batter should be thick but scoopable; overmixing will develop gluten and toughen the crumb. Make the cheesecake filling: In a clean mixing bowl, beat 8 ounces softened cream cheese until smooth and lump-free. Add 1/2 cup powdered sugar and 1 teaspoon vanilla bean paste, beating until creamy. Scrape down the bowl and add 1 large egg, mixing just until combined — do not overbeat or incorporate too much air, which can cause the filling to puff and crack. Assemble the cupcakes: Fill each liner about halfway with the cupcake batter (roughly a tablespoon to two tablespoons). Spoon a heaping teaspoon of the cheesecake filling into the center of each, then cover with a little more batter so the filling is enclosed but not sealed; aim for a 2:1 ratio of cake to filling. This keeps the cheesecake molten at the center while the cake finishes baking. Bake: Bake at 350°F for 20–25 minutes. Start checking at 20 minutes — the cake should be set and a toothpick into the cake (not the filling) should come out clean or with a few moist crumbs. Avoid overbaking; the cheesecake center should still be noticeably soft when warm. Cool and caramelize: Cool the cupcakes completely on a wire rack, at least 1 hour, then chill for 1–2 hours to set the filling. Before serving, sprinkle about 1 teaspoon of granulated sugar on each cupcake top and caramelize with a kitchen torch until the sugar melts and browns to a deep amber. If you don’t have a torch, place under a hot broiler for 1–2 minutes, watching closely to prevent burning.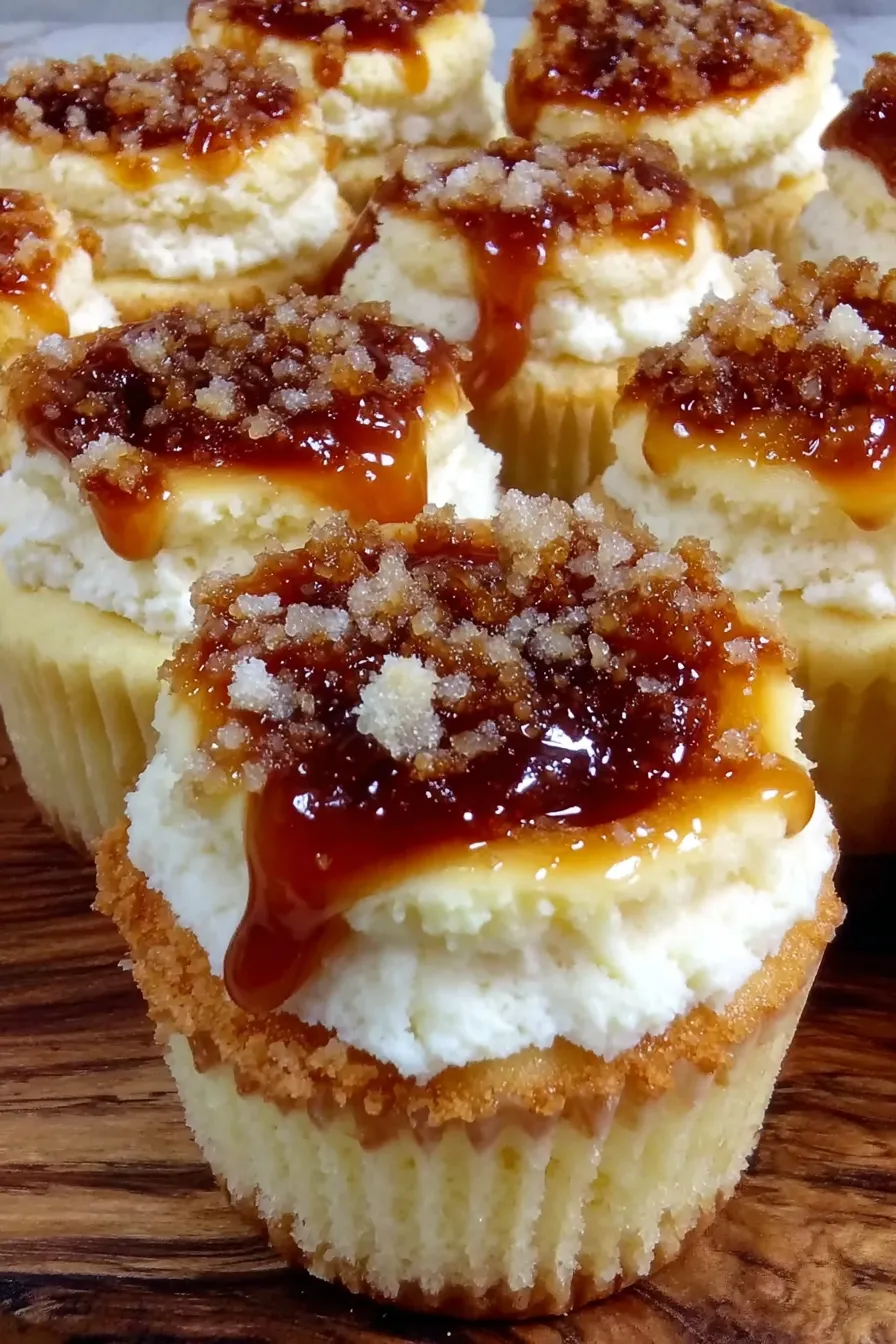
You Must Know
- These hold well in the refrigerator for up to 3 days; the sugar top should be added just before serving to keep the crackly texture.
- The dessert contains dairy, eggs, and gluten — not suitable for those with allergies to these ingredients.
- Freeze unbrûléed cupcakes for up to 3 months; thaw overnight in the refrigerator and brûlée before serving.
- Chilling between baking and torching is essential; a warm cheesecake center will weep if not fully set, making the sugar topping soggy.
My favorite moment is the torching: it turns a simple cupcake into an interactive dessert that feels special. At a holiday brunch, I set up a small station and let guests take turns caramelizing their own tops. The smell of caramel and the sound of that first crack bring a little wow-factor to any table. Over the years I’ve learned that using superfine sugar for the top helps melt evenly while ordinary granulated sugar gives a classic crunch.
Storage Tips
Once cooled and chilled, store cupcakes in a single layer in an airtight container in the refrigerator for up to 3 days. If you’ve already brûléed the tops, place parchment between layers to avoid scraping the caramel. For longer storage, freeze cupcakes without the caramelized sugar in a sealed freezer-safe container for up to 3 months; thaw in the refrigerator overnight and finish with granulated sugar and a quick torch before serving. Avoid storing at room temperature because the cheesecake filling is perishable.
Ingredient Substitutions
If you don’t have vanilla bean paste, use two teaspoons of high-quality vanilla extract; for a more subtle aroma use one teaspoon plus 1/4 teaspoon vanilla powder. Swap sour cream for full-fat Greek yogurt in equal measure for a lighter tang. For a gluten-free version, replace the flour with a 1:1 gluten-free blend and add 1/4 teaspoon xanthan gum if your blend lacks it; texture will be slightly different but still satisfying. Low-fat cream cheese can be used, but expect a softer filling that needs longer chilling.
Serving Suggestions
Serve these cupcakes chilled with the sugar brûléed just before presenting. Garnish with a tiny mint sprig, a few fresh berries, or a dusting of finely grated lemon zest for brightness. They pair nicely with dark-roast coffee, lightly sweetened tea, or a dessert wine like Sauternes. For a brunch setting, plate one cupcake with a small spoonful of raspberry coulis for a tart contrast.
Cultural Background
The concept blends French and American dessert traditions: crème brûlée is a classic French custard with a caramelized sugar crust, while cheesecake in single-portion forms has roots in American baking and European cheesecakes. Combining techniques — baking a custard-based filling inside a cake — is a modern, playful adaptation that celebrates both textures. These cupcakes nod to the theatricality of French desserts and the comfort of American home baking.
Seasonal Adaptations
For fall, add 1/2 teaspoon ground cinnamon and a pinch of nutmeg to the batter and top with a candied pecan. In spring, fold 1 tablespoon lemon zest into the batter and add a raspberry center under the cheesecake for a bright pop. Holiday versions can include a splash of bourbon in the cheesecake or a pinch of cardamom in the cake for aromatic warmth.
Meal Prep Tips
Make the cake batter and cheesecake filling separately and refrigerate for up to a day. Assemble and bake on the day you plan to serve for the best texture. If preparing for a large event, bake the cupcakes and freeze them unbrûléed; transport frozen in a cooler and torch just before serving. Use a reusable torch or coordinate with the venue if you’ll be using a broiler to finish the tops.
These vanilla-bean crème brûlée cheesecake cupcakes are a delightful hybrid that deliver both comfort and elegance. Whether for a small dinner party or a celebratory brunch, they’re forgiving to make and impressive to present — give them a try, and don’t be surprised if they become a requested specialty at your gatherings.
Pro Tips
Use room-temperature eggs and cream cheese to prevent lumps and ensure a smooth filling.
Chill the cupcakes well before torching; a cold filling prevents weeping and preserves the crackly top.
For even caramelization, sprinkle an even, thin layer of sugar and rotate the cupcake while torching.
This nourishing vanilla bean crème brûlée cheesecake cupcakes recipe is sure to be a staple in your kitchen. Enjoy every moist, high protein slice — it is perfect for breakfast or as a wholesome snack any time.
FAQs about Recipes
Can I use a broiler instead of a kitchen torch?
If you don't have a torch, place cupcakes under a very hot broiler for 1–2 minutes, watching closely until the sugar browns. Keep the oven rack near the top.
Do I need to chill the cupcakes before caramelizing the sugar?
Yes — chill them thoroughly for at least 1–2 hours before torched or serving to ensure the cheesecake center is set.
Tags
Vanilla Bean Crème Brûlée Cheesecake Cupcakes
This Vanilla Bean Crème Brûlée Cheesecake Cupcakes recipe makes perfectly juicy, tender, and flavorful steak every time! Serve with potatoes and a side salad for an unforgettable dinner in under 30 minutes.
Ingredients
Cupcake Batter
Cheesecake Filling
Topping
Instructions
Preheat the oven
Preheat oven to 350°F (175°C). Line a 12-cup muffin tin with liners and place the rack in the center position.
Prepare the cupcake batter
In a bowl, whisk flour, granulated sugar, baking powder, and salt. In another bowl, beat softened butter, add eggs one at a time, then add vanilla extract and sour cream. Fold dry ingredients into wet until combined but do not overmix.
Make the cheesecake filling
Beat cream cheese until smooth, add powdered sugar and vanilla bean paste, then beat in one egg until just combined. Avoid overbeating to minimize air in the filling.
Assemble the cupcakes
Fill liners halfway with batter, add a teaspoon or so of cheesecake filling to the center of each, then top with more batter so the filling is enclosed. Aim for slightly more cake than filling.
Bake
Bake at 350°F for 20–25 minutes until the cake portion is set and a toothpick in the cake comes out clean. Start checking at 20 minutes to avoid overbaking.
Cool and caramelize
Cool on a wire rack, chill at least 1–2 hours to set the filling, then sprinkle granulated sugar on top and caramelize with a torch or under a hot broiler just before serving.
Last Step: Please leave a rating and comment letting us know how you liked this recipe! This helps our business to thrive and continue providing free, high-quality recipes for you.
Nutrition
Did You Make This?
Leave a comment & rating below or tag
@culinya on social media!
Categories:
You might also like...

Fudgy Marshmallow Mud Brownies
Ultra-fudgy brownies crowned with gooey mini marshmallows and a quick-set chocolate icing. Crowd-pleasing, nostalgic, and irresistibly rich in every bite.

Buttery Pecan Pie Bars
Buttery shortbread crust meets a silky brown sugar pecan topping in these easy pecan pie bars. Just 10 minutes of prep for bakery-level bliss.

Silky No-Crack Pumpkin Cheesecake
A flawlessly smooth pumpkin cheesecake with warm spice, buttery graham crust, and no cracks. Finish with caramel and rum-kissed whipped cream.
Did You Make This?
Leave a comment & rating below or tag @culinya on social media!
Rate This Recipe
Share This Recipe
Enjoyed this recipe? Share it with friends and family, and don't forget to leave a review!
Comments (1)
This recipe looks amazing! Can't wait to try it.
Comments are stored locally in your browser. Server comments are displayed alongside your local comments.

Hi, I'm Sophia!
What's Popular

30-Minute Meals!
Join to receive our email series which contains a round-up of some of our quick and easy family favorite recipes.